About the author
 Věra Šulcová
Due to improperly chosen fields of study and three children, I became a housewife. About ten years ago I discovered the magic of polymer clay and five years ago, when the last “bird” left the family nest, I became addicted. Since then I have been playing with polymer clay and I having a great time almost constantly.
Materials and tools:
- White and black polymer clay (Cernit)
- LC Stencil (I used a pattern from the Set 7)
- LC Microstencils (I used Set 7)
- Acrylic paint
- Translucent liquid polymer
- Pasta machine
- Tile
- Tile with a grid (for example, laminated working grid by LUCY CLAY)
- Blade, scalpel
- Acrylic roller
- Czextruder (not necessarily needed)
- Cookie cutters – 3 cm/1.18″ diameter circle and 6 x 6 cm/2.36″ x 2.36″ rectangle
- Cylindrical metal mold with a diameter of 6 – 7 cm (can be a beverage can)
- Instant glue
- Polystyrene molding (from a DIY store)
- Sponge, toothpick, sandpaper.
Step 1
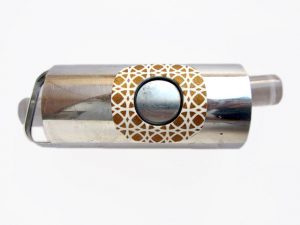
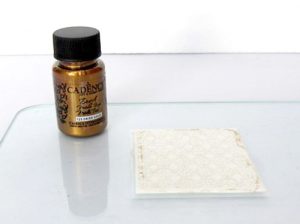 Run conditioned white clay at the medium setting (Imperia No. 3) and place it on a tile. Place an LC Stencil on the clay and gently roll over with an acrylic roller. Apply acrylic paint (using a sponge), remove the Stencil and immediately wash with water.
Step 2
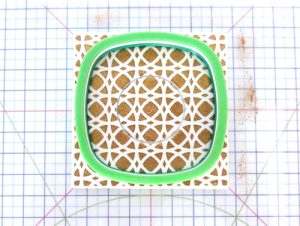
After the paint has dried, remove the sheet from the glass, then place it on the grid and cut, using a rectangular cutter and a circle cutter in the middle.
Step 3
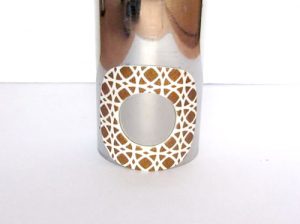 Clean the edges with a scalpel, carefully place on a cylindrical mold and bake for 15 minutes at 130°C/266°F.
Step 4
 After cooling down, coat the entire color area and edges of the center cut with liquid polymer to fix the color and wrap the center with a black stripe (here, a 1 mm / 0.03′′ diameter extrusion). Bake again at 130° / 266°F. C for 15 minutes. I skipped this step when I made the option with a black backside.
Step 5
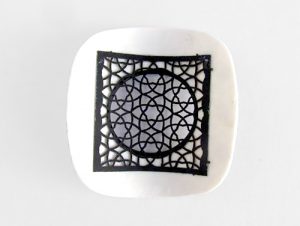 Glue LC Microstencil on the back using instant glue. Glue gradually from one corner to the other. (Use a toothpick to apply the glue. Do not touch with your fingers!)
Step 6
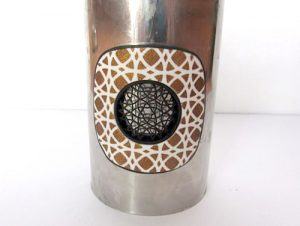
 Run conditioned black clay at the medium setting (Imperia No. 4) and cut out a circle using the same cutter as before and place the sheet on the same cylindrical metal mold. Apply liquid clay on the back of baked white part (only around the LC Microstencil) and press against the black sheet, so that the central parts coincide. Use a scalpel to cut off black clay excess. Cut directly on the mold, perpendicular to its surface. Bake for 15 minutes at 130°C/266°F.
Step 7
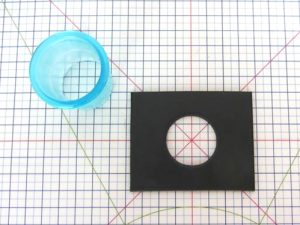
Run conditioned black clay at the widest setting, the size 5,5cm x 7,25cm / 2.16′′ x 2.85′′ (the diameter of the polystyrene molding I have). Cut out a circle with a cutter and clean the edges with a scalpel.
Step 8
 Place the sheet on the arch of the polystyrene molding and wrap the sheet around it, join the edges at the backside, drip with liquid polymer and smooth with a roller.
Step 9
 Carefully smooth the polymer clay with a roller so that there is no air between clay and polystyrene.
Step 10
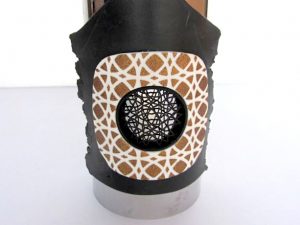
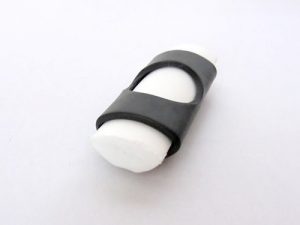
 Hem the finished part with a strip of black clay approx. 4 mm / 0.16′′ wide (on the mold).
Step 11
 Place the hemmed piece on the polystyrene molding, the central parts must coincide. Bake for 30 minutes at 130°C / 266°F, this way the polystyrene molding will bake and fall. Let cool down, separate two parts, grind the edges and then glue parts together with instant glue. You may cover the piece with clear varnish.
Step 12
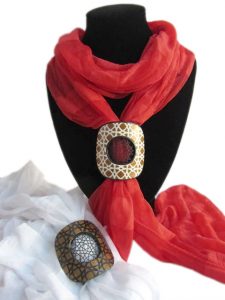 Thread the end of the thin scarf through the finished buckle (to my own surprise, the buckle holds and does not slide).
Download PDF tutorial for free: scarf-buckle-vera-sulcova
Leave A Reply