Assembly instructions – quick installation
Do not forget to set the blade! This step is essential!
ACTUAL PRODUCT MAY DIFFER SLIGHTLY FROM THE ONE SHOWN IN IMAGES / VIDEOS
DOWNLOAD PDF:
Assembly Instructions for LC Mini Slicer - White
This small compact LC Mini Slicer – redesign 2023 (as well as the previous models of the LC Mini Slicer) has no ambition to replace its “sister” LC Slicer – a professional slicer tool.
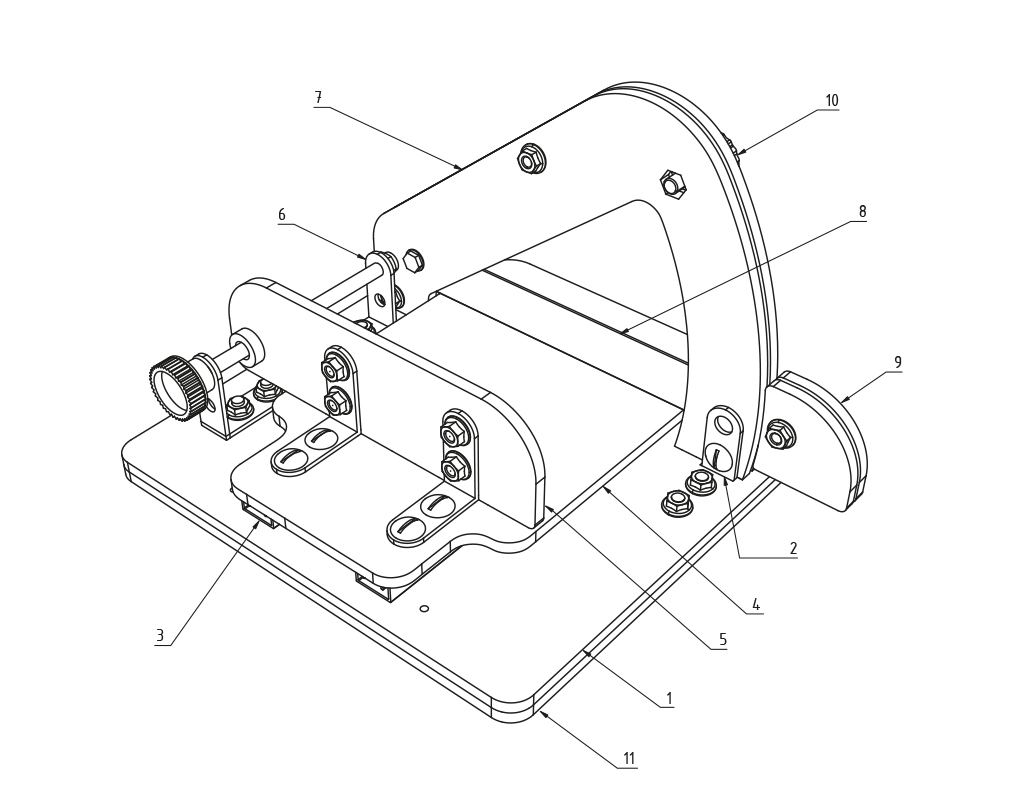
Basic parts of LC Mini Slicer:
- Baseplate
- 2x L Brackets
- 2x Rail Glides
- Slicing Platform
- Backstop Support
- EASE Module (2x L brackets and threaded rod)
- Double Frame Blade Arch
- Slicer Blade
- Slicer Blade Handle
- SAFETY Knob
- Baseplate Frame
A full turn of the knob moves the platform 1mm forward.
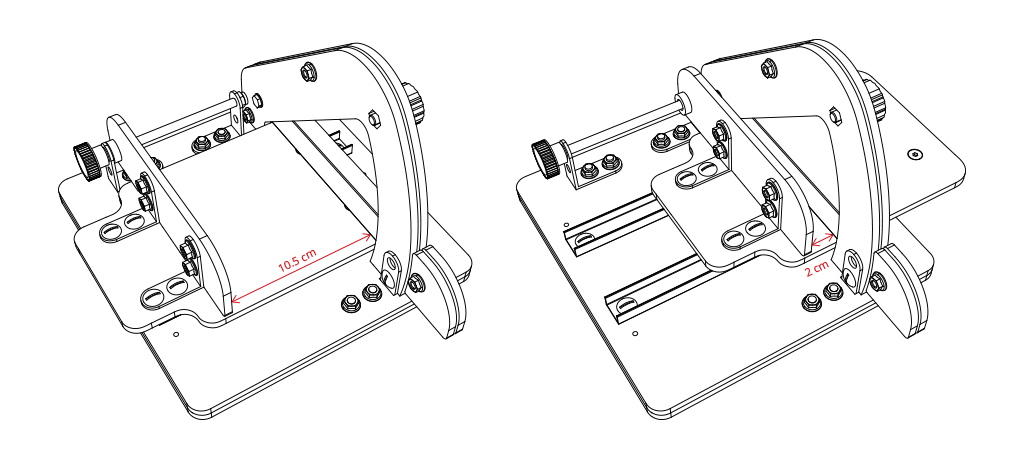
The backstop support is not designed to be used as a backrest for polymer canes. The smallest gap between the backstop support and the blade is about 20 mm.
SAFETY:
- THE LC Mini Slicer should only be used for slicing polymer clay.
- Before using the LC Mini Slicer, make sure to place it on a firm horizontal surface/anti-slip mat.
- When you are finished working with the LC Mini Slicer, make sure to raise the slicer blade up into the Double Frame Arch, covering and securing the blade with the Red SAFTEY Knob tightened to secure.
- The LC Mini Slicer is not intended for children and must not be used by children unattended by a responsible adult.
- Slicer Blade is very sharp and can easily cause cut or injury. Use the blade handle only to lift and lower the blade.
- Keep the blade clean from residue of polymer clay. When cleaning the blade, pay special attention to never clean with bare hands or your finger. Use a cloth/wipe in a downward motion. Using a tong-type tool to hold a cloth/wipe is recommended.
- Always follow safety instructions for the protection of yourself and others.
- LC Tools s.r.o. Is not responsible for any injuries or damage resulting from inappropriate handling of LC Mini Slicer.
QUICK INSTALLATION
1. Loosen the screws holding the L Brackets in the Baseplate, so the L Brackets can move slightly.
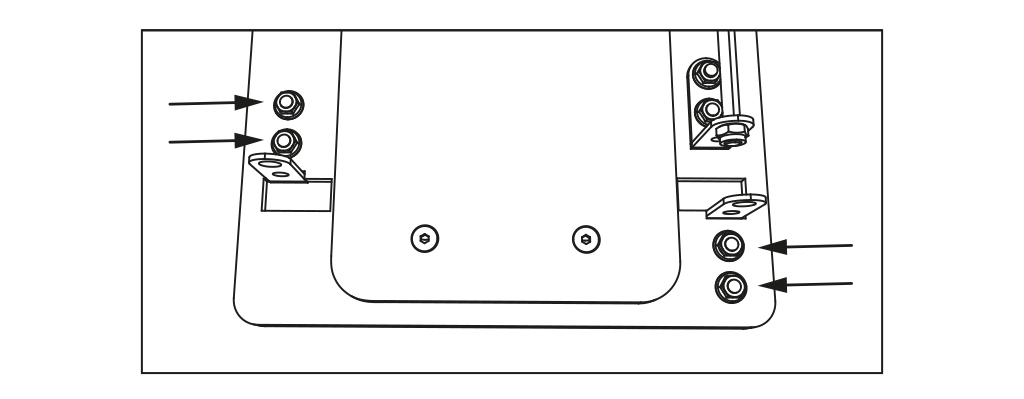
2. Attach the secured Double Frame Blade Arch to the protruding L Brackets at both ends and secure with 2x M5 screws and 2x flanged M5 nuts. Align the frame and tighten the screws holding the L Brackets in the Baseplate.
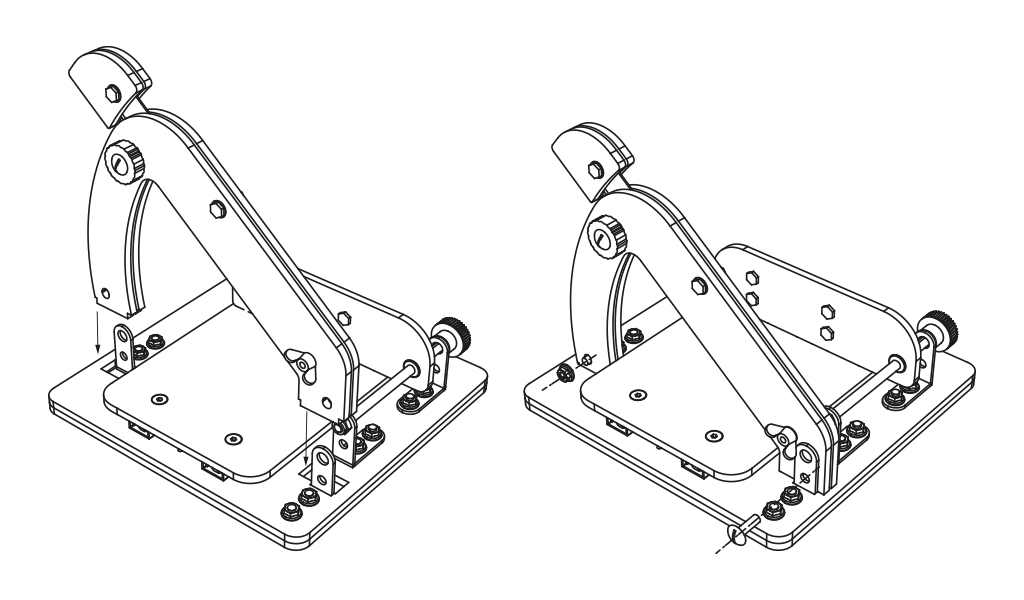
2. Do not forget to set the blade! This step is essential!
The blade must be aligned so that it is parallel to the surface plane of the Slicing Platform. It must neither hang below the level nor above the Slicing Platform. Simply adjust the position of the hinge bolt with the wing nut to move the blade upward or downward in the oval hole and tighten when the Slicing Blade placement is correct.
Watch the video: How to set the blade (for version LC SLICER V4 MDF).
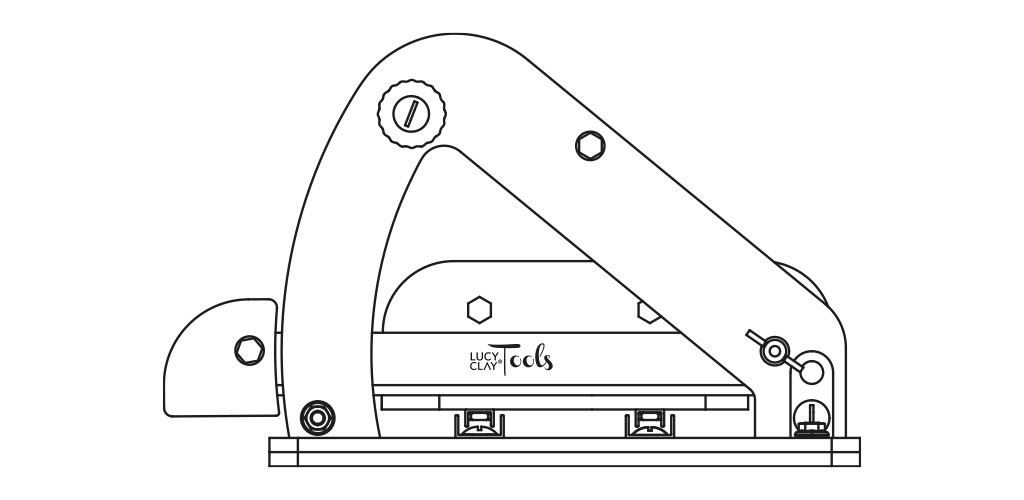
Troubleshooting
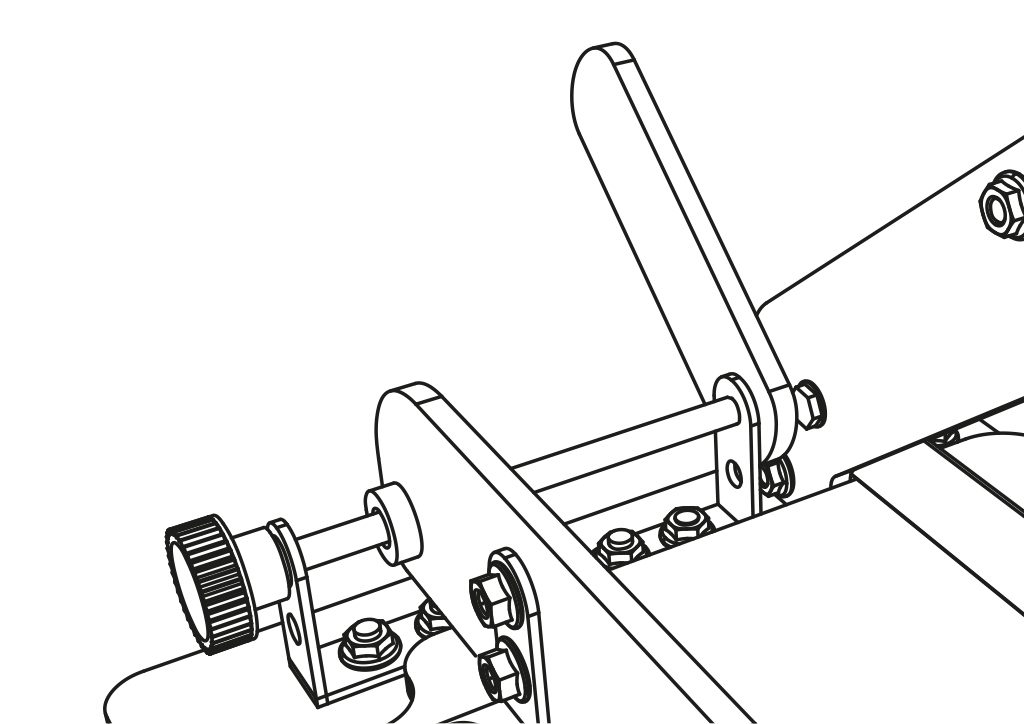 The threaded rod should be practically free of any play, but it has to spin easily. Use the supplied key.
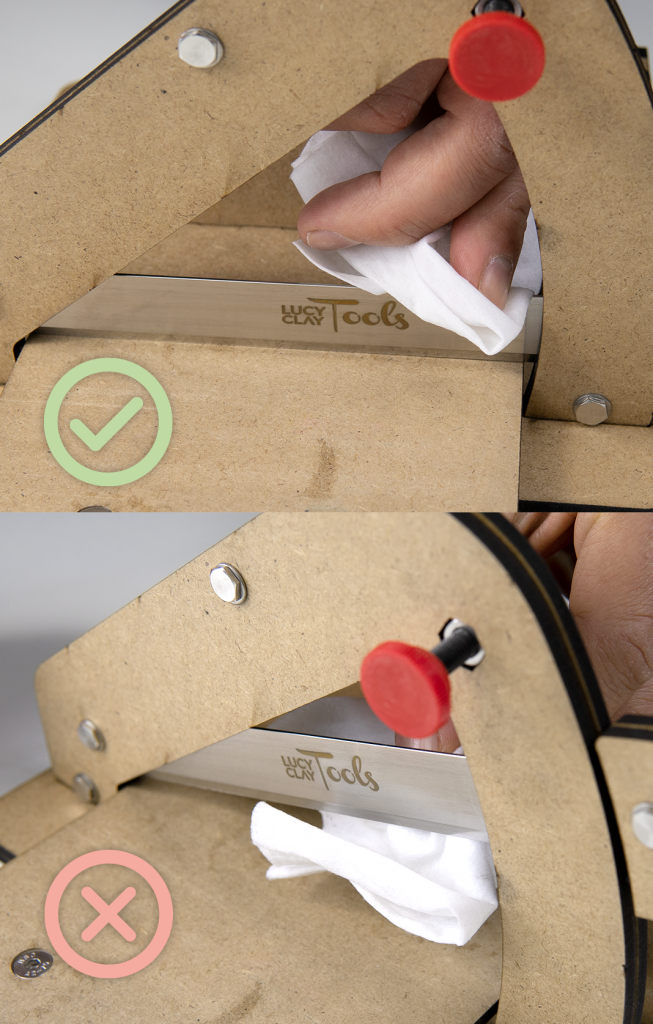 Never put your hand under the edge of the blade. Clean the blade in the lower position. Never clean the blade in any other way.
DOWNLOAD PDF:
Assembly Instructions for LC Mini Slicer
