About the author
 Věra Šulcová
Due to improperly chosen fields of study and three children, I became a housewife. About ten years ago I discovered the magic of polymer clay and five years ago, when the last “bird” left the family nest, I became addicted. Since then I have been playing with polymer clay and I having a great time almost constantly.
Materials and tools:
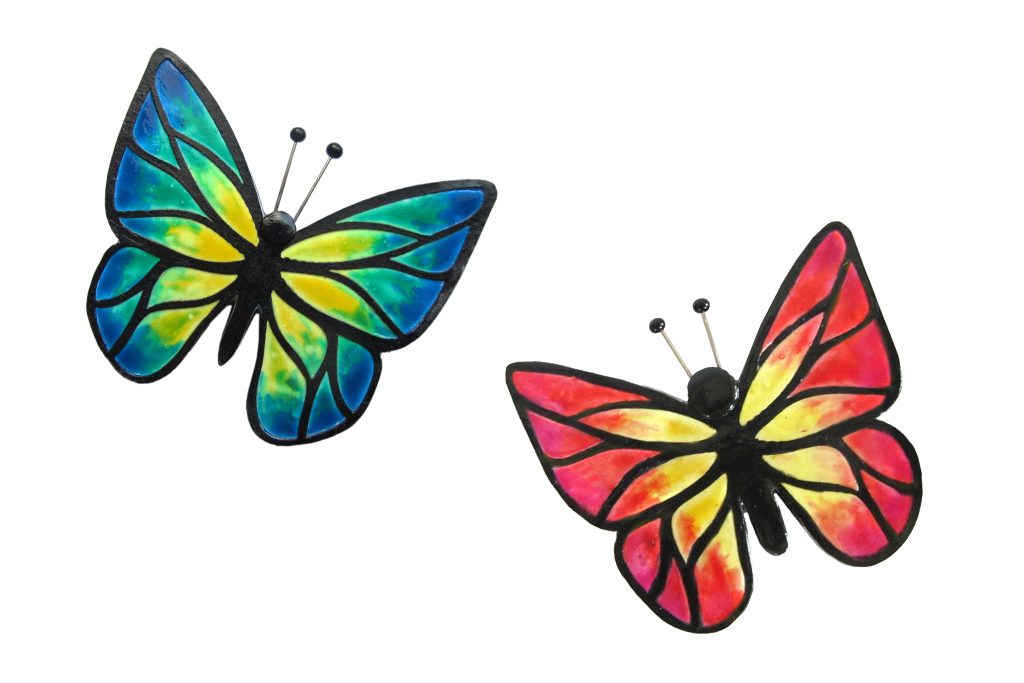
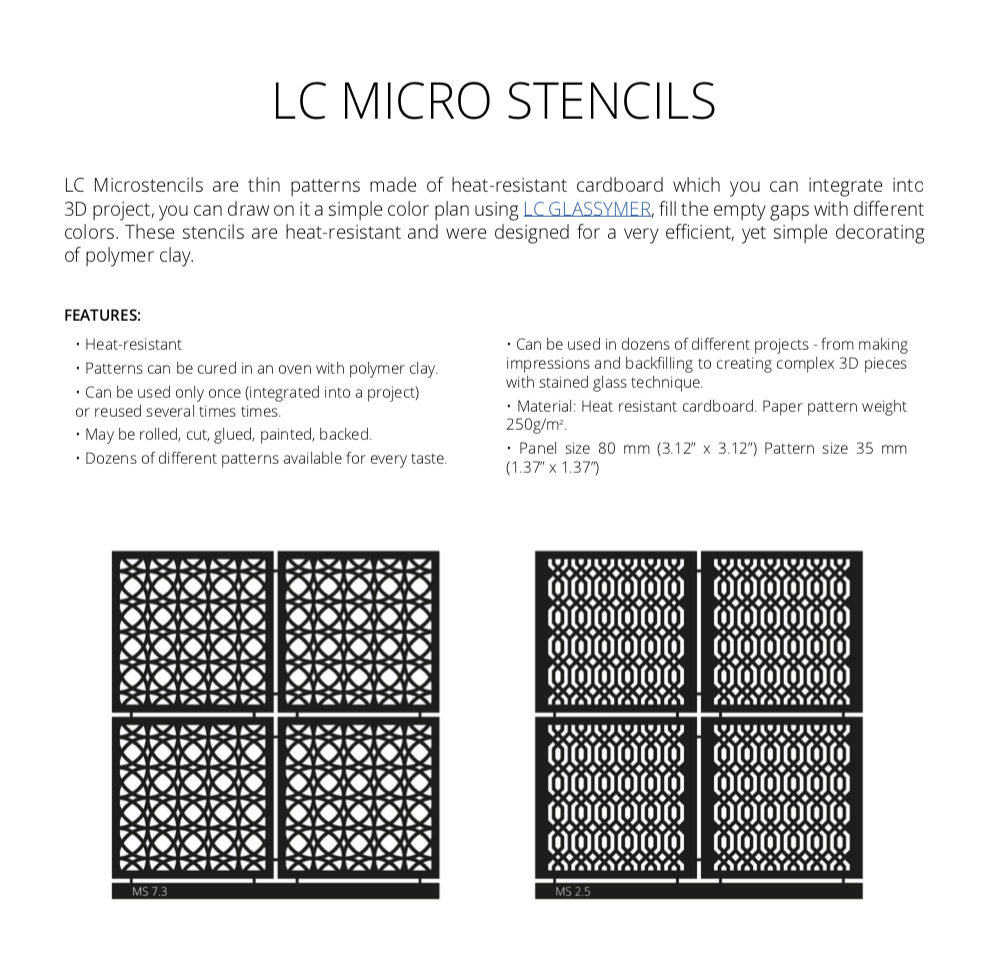
• LC Microstencils Butterfly (Set 12)
• LC Glassymers Color Set
• Transparent liquid polymer clay (Glassymer Transparent)
• Brooch back pin
• Two pins with glass head
• Pasta Machine, acrylic roller
• Ceramic tile
• Blade, scalpel
• Baking paper, wet wipes
• Brush, sponge, small round cutter
• Abrasive sponge, nail file
• Transparent varnish
Step 1
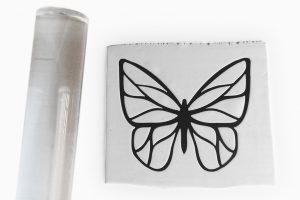
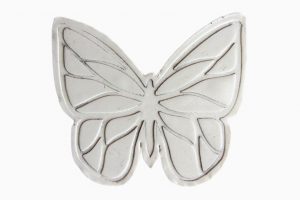
Run conditioned clay through a pasta machine at a thin adjustment (I use Imperia No.2) and place it on a tile. Place an LC Microstencil on the sheet and roll it into the clay with an acrylic roller.
Step 2
Cut the clay at a distance of about 2 mm from the edge of the Microstencil, then carefully lift the tip of the Microstencils with a scalpel and carefully peel off the clay. Bake for 15 minutes at 130°C/266°F.
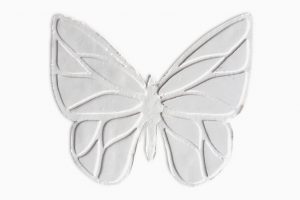
Step 3
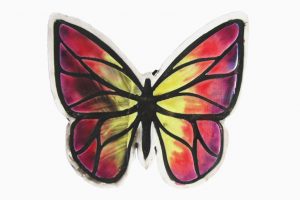
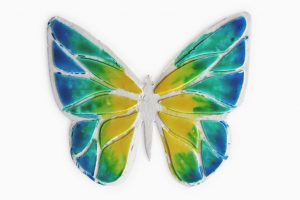
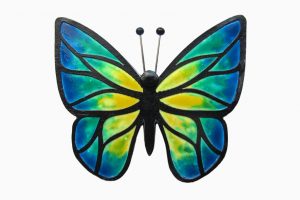
After cooling, apply Glassymer colours on the convex parts with a brush so that the colours blend together. The colour in the grooves does not matter if there is only a thin layer. Bake for 30 minutes at 140°C/284°F.
Step 4
Backfilling: Fill the grooves with black clay mixed with liquid polymer (in your palms), squeeze (preferably at first using your fingers and then over baking paper) and gently wipe off any excess with a damp cloth. Bake again for 15 minutes at 130°C/266°F.
Step 5
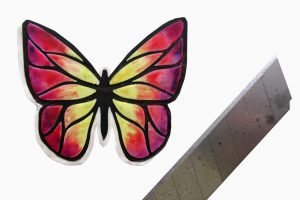
Cut off the white edges with a knife or scalpel (a combination of both is preferred). Cut in small pieces perpendicular to the tile.
Step 6
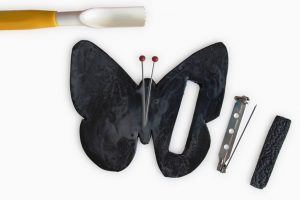
Run conditioned black clay through the pasta machine (Imperia thickness Nr.4). Place the “butterfly” on the backside (not textured), and cut along the edges, cutting a slightly larger half-circle around the head. Remove the “butterfly”. Cut out a rectangle for the brooch pin and press two pins-antennae in the clay. Cover the clay with liquid polymer, and clean the edges. Bake for 15 minutes at 130°C/266°F.
Step 7
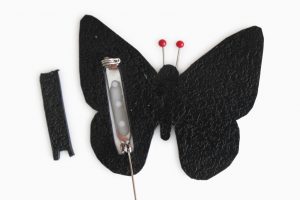
Insert the brooch pin into the rectangular cut and cover it with black clay. Use some liquid and a sponge to join the baked and non-baked clay.
Step 8

From a small piece of black clay, make a head of the butterfly and place it to the front site. Using a small round cutter, cut a circle from a thin sheet of black clay and place on the butterfly‘s head. Again, apply liquid polymer before joining. Place the butterfly on a texturing pad and bake for 130 minutes at 130°C/266°F.
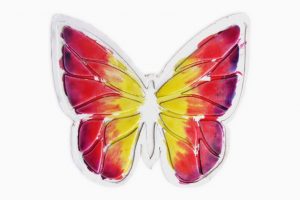
Step 9
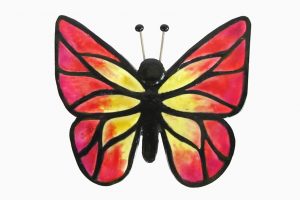
After cooling, you can get rid of the imperfections on the edges with an abrasive sponge and a nail file. Glassymer will look better if you cover it with clear varnish.
Easier option: After rolling the Microstencil into the clay, cut the clay along the edges of the Microstencil and remove it, and after baking, applying Glassymer and second baking, coat the Microstencil with liquid clay, insert back into the grooves and squeeze well.
Download PDF tutorial for free: butterfly-brooch-vera-sulcova
Leave A Reply