One of the best things about LC Microstencils is that they can be used as stamps for polymer clay. This way you can make a pretty realistic embossed leather impression. In this tutorial, I will show you how to make a keychain. Of course, you can use the same method to make bangles, pendants, earrings,…
About the author

Petra Vilímková
Petra lives near Pilsen, Czech Republic. Ever since childhood, she has loved learning new craft techniques. By age fifteen, she began studying art at various art schools in Pilsen before receiving a Bachelor of Arts degree in Industrial Design at the Ladislav Sutnar Faculty of Design and Art, University of West Bohemia. She has been working for LUCY CLAY since 2014.
Materials and tools:
Brown polymer clay
Scalpel
LC Microstencil of your choice – I use Set 12 with butterflies
Liquid clay
Letter stamps
Sandpaper
Divider (compasses) or stitching chisels
Micro drill
Carving tools
Black acrylic paint
Extra fine steel wool
2 needles and black thread
Hollow rivet (and super glue)
Keyring
Step 1
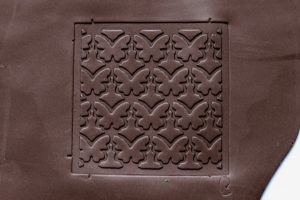
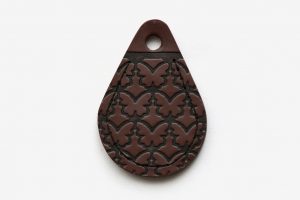
Run LC Microstencil with a sheet of conditioned brown clay through the machine to make a very clear impression.
Step 2
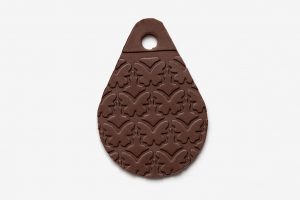 Cut the shape using LC Shape Plate and a scalpel. I choose the second biggest shape. Make a hole for the rivet and bake according to the manufacturer’s instructions.
Step 3
 Now, let’s make the other side. You can repeat the first step, but I decided to make a key-tag with the name. Again cut the same shape and make a hole for the rivet. Apply liquid clay and glue it to the baked piece. Stamp your letters. Clean the edges and bake according to the manufacturer’s instructions.
Step 4
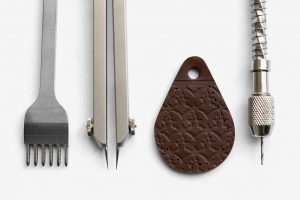
Sand the edges. Create stitch holes – first make marks using stitching chisels. You can use compasses to make these marks in the perfect distance apart. Then drill the holes using a micro drill.
Step 5
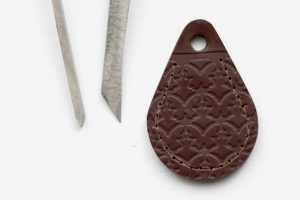
Groove stitching lines using carving tools.
Step 6
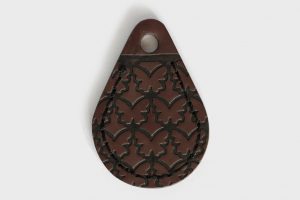
Paint it with black acrylic color. Let dry. Rub with fine steel wool, so the paint stays only in stays in embossed areas.
Step 7
Begin stitching. Use two needles (one on either end of the thread). Sew through the first hole and make sure the lengths of thread are even on each side. Sew through the same hole with both needles from opposite sides. Lock the stitch, when you finish your stitching.
Step 8
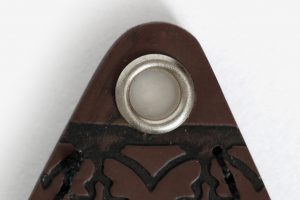
Finally, glue the rivet in place.
Step 9
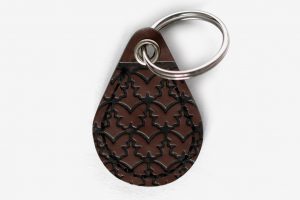
Attach the keyring and it is done.
Download PDF tutorial for free: leather-effect-keychain-PDF-tutorial
Leave A Reply