My testing will go beyond this tutorial. I hope you share your results and insights. I Hope you enjoy this tutorial.
About the author
 Jan Edward Montarsi has been working and experimenting with polymer well over 10 years. Jan has been published in multiple magazines. Former IPCA Americas President. Recently Jan traveled to teach in the Czech Republic. An active member of the Dayton Ohio Polymer Clay Guild. Jan has a very active presence on Facebook and has recently released a line of several polymer clay template tools and supporting YouTube videos. Being semi-retired he is available for teaching at workshops and retreats.
Jan and his husband Bill live in Cincinnati along with their 6 AKC Champion boxer dogs. www.facebook.com/JemboxDesigns
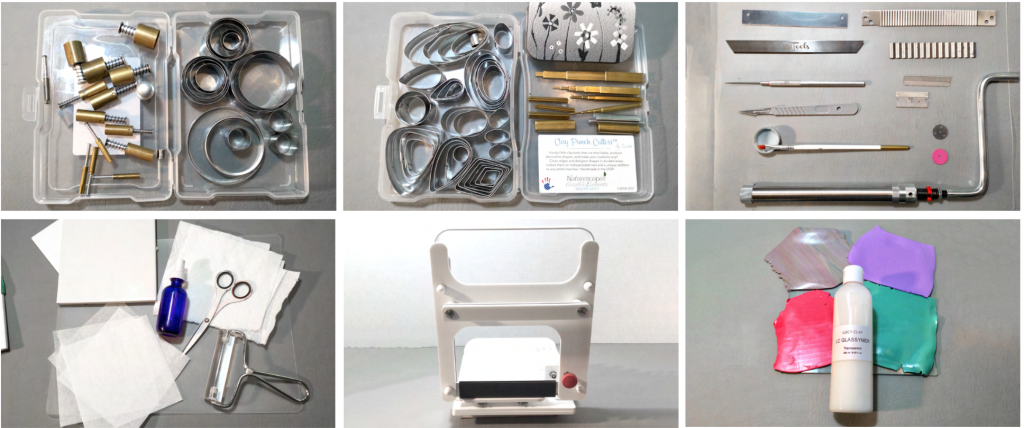
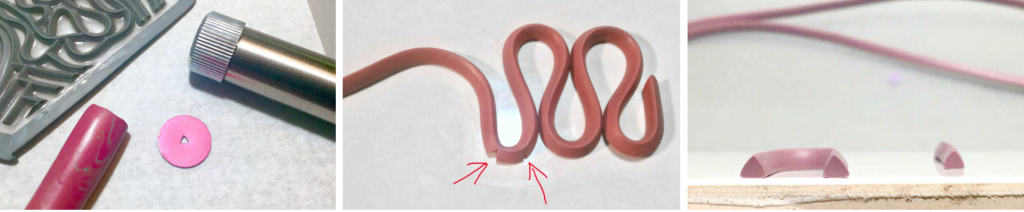
Materials and tools:
• Wavy blades
• Small utility blades
• Scalpel
• Needle tool
• A brush and small container for LC Glassymer. 2 Liter Soda lids and other plastic food lids usually don’t react with liquid clay. The red lid that I am using this tutorial is from a peanut butter jar. Little plastic soufflé cups that you get from restaurants will dissolve from all liquid clay brands.
• Small triangle disc from LC Disk #11
• Round 4-hole disc
• Both discs make the best size strings for stamp making
• Tiles – 6 x 6 inch preferably
• Patty paper, paper towels
• Scissors, acrylic roller, water mist bottle.
• A non-stick work surface for cutting and moving your clay pieces without distortion or stretching. Cardstock works well.
• Small cutters, circle cutters, mini cutters.
• I am also using “Clay Punch Cutters” which are very sharp graduated hand made micro cutters, made by Naturescapes Studios. http://www.etsy.com/shop/nscreativeelements
• An LC Slicer for making consistently sliced strings of clay the same width.
• Scrap Clay – Firm for using Cutters and slicing, Softer for extruding to prevent cracks when making tightly curved designs.
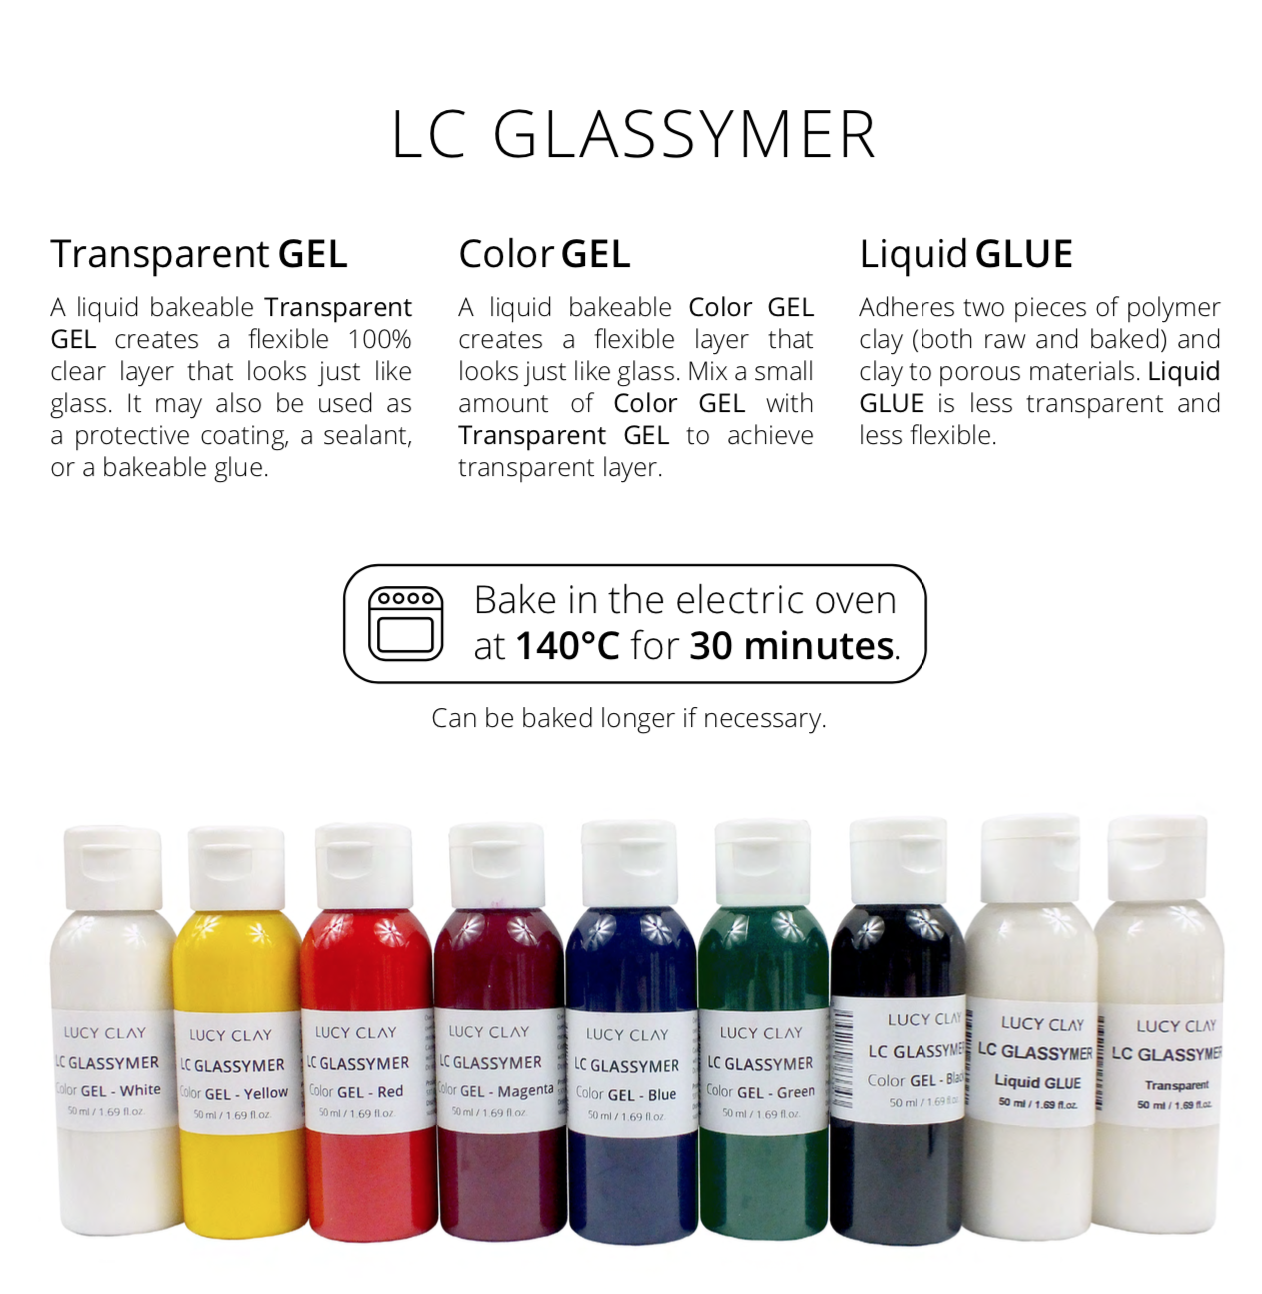
• LC Glassymer Liquid. I have tried this with other brands without the same success. LC Glassymer at the thin layers we will use is stronger, more flexible, and will stretch with certain designs creating a nice pillow effect in your stamped clay. It also sticks to clean tiles or acrylic blocks like clear commercial cling stamps. Stamps can be washed with warm soapy water to refresh the clinginess.
• Water mist provided the best results as a release with regular polymer clay. Ultralight clay worked better with cornstarch as a stamp release.
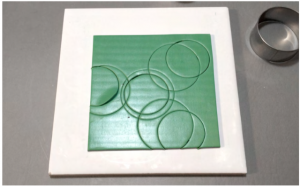
CIRCLES STAMP
The first stamp design we will create will be cutting and removing shapes of clay from a solid sheet. What is left behind on tile will be the stamp.
Step 1.
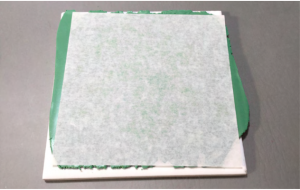 Condition a sheet of scrap clay on the second thickest setting of your pasta machine. Burnish to the tile eliminating all air bubbles. Starting at one edge and burnishing as you lay the sheet down is the best way to eliminate air bubbles. A patty paper on top of your clay helps prevent bubbles and allows you to burnish clay sheet for good adhesion as you incrementally allow the sheet to lay onto the tile.
Step 2.
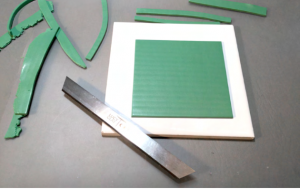 Remove patty paper and trim rough edges from clay sheet.
Step 3.
 Starting with larger (2.5 “) circle cutter, cut a circle near center. Twist cutter slightly to ensure cuts are all the way through clay. If your clay is pulling up with cutter it is not burnished well enough to tile. Misting clay sheet or cutter with water can help prevent lifting of clay.
Step 4.
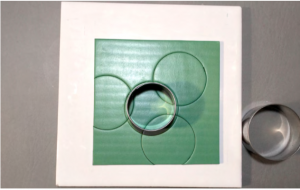 Add 3 more overlapping circle cuts.
Step 5.
 Using the next smaller cutter overlap some more cuts. If you have lifting as I did, leave it alone till later in process. You may be removing it anyway.
Step 6.
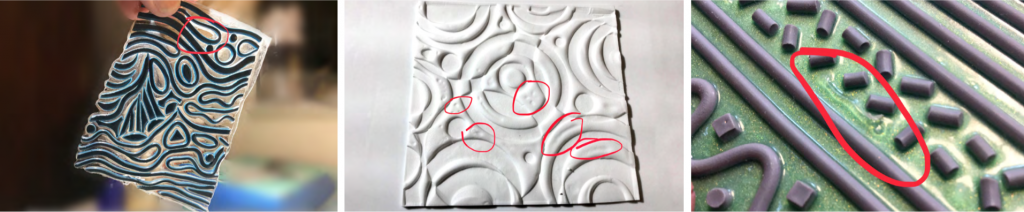
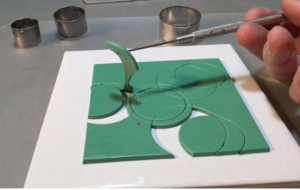 With needle tool start to remove pieces. I attempt to have an ‘Every Other Piece Removed Pattern”. Don’t remove all possible pieces, just a few to start.
Step 7.
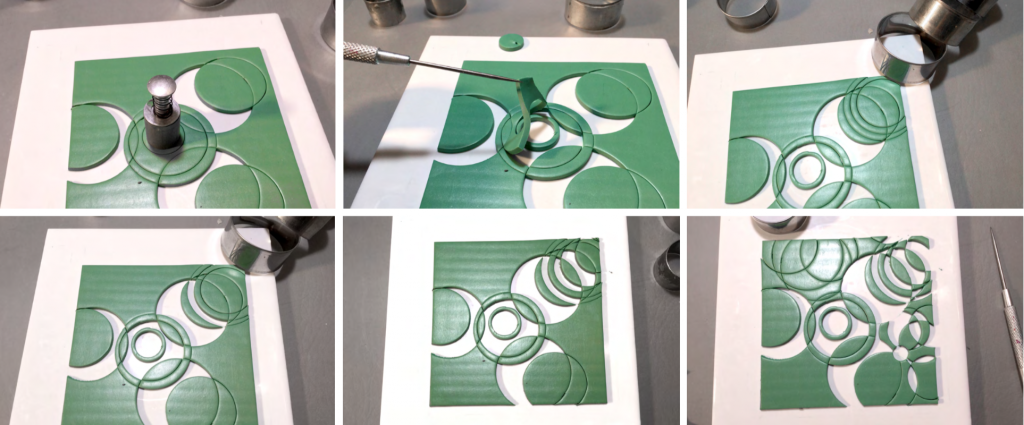
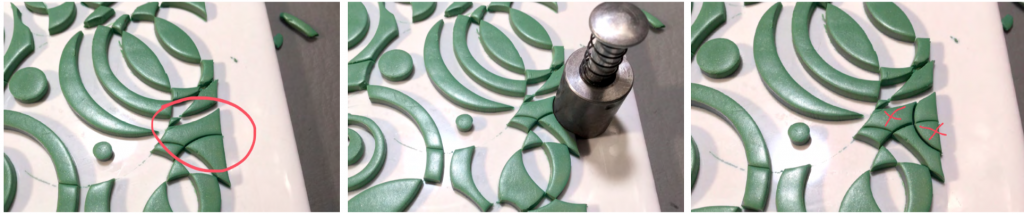
We will continue to cut and remove letting our pattern grow. If you are not sure if you should remove a piece or not, wait until your pattern develops more.

You will come to places where “Every Other “doesn’t work. Just add another cut or two. You now have more pieces to choose to remove.
Here is another example.
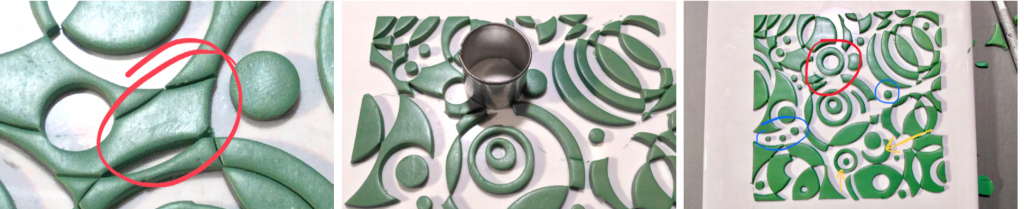
And yet another. You can see I cut a circle within a circle (Red) so that I did not leave a large open area.
On this final picture You can see where I add mini circles in patterns and randomly (Blue). I also added a separately cut moon and circle pieces. (Yellow)
Step 8.
Bake on tile for 45 min. to 1 hour at manufactures recommended temperature. Let fully cool and remain on tile. Finishing stamp process is after other designs.
SLICED STRIPS AND CUTTER SHAPES
Step 1.
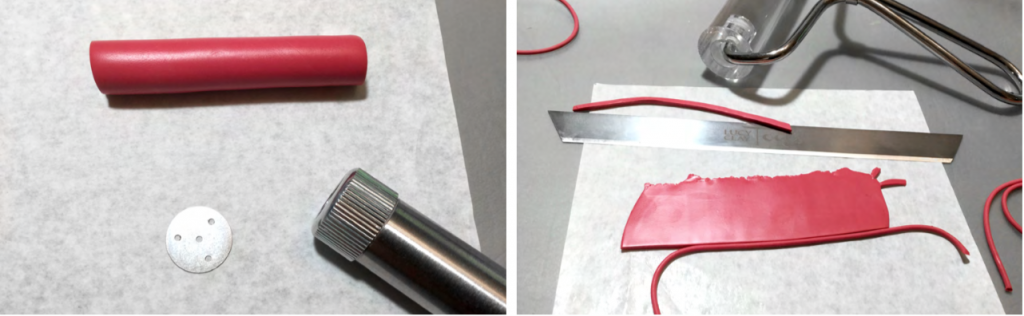
Use a well-conditioned sheet of firm scrap clay on the first or second thickest setting. Place clay sheet on LC Slicer platform. My strips were cut using 1 – 1/2 turns of the knob. I kept making continuous cuts and lifted them later. The same sheet thickness was used for other components.
(After thought, this would be a good place to use a sheet of clay that was two different color layers, to help keep the top side of sliced strips in correct orientation.)
Cut circles from within circles using graduated Kemper cutters to create rings.
Start by laying out wiggly strips and reshaping rings into ovals, building your design as you go.
Step 2.
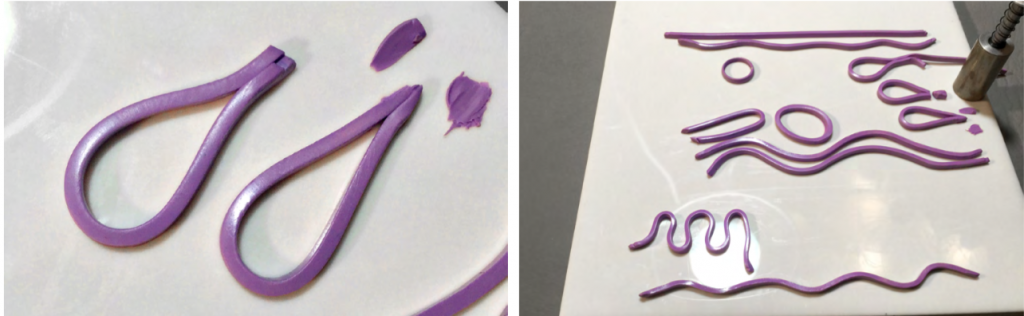 Fold some strips into teardrop shapes. Trim to a point or straight edge. I usually place these at the edge coming into the pattern.
Step 3.

Use a medium circle cutter to cut some arcs in a row from a sheet of clay and a wavy blade to make one- or two-sided wavy cuts.
The 3-sided flower shapes in lower right corner were small circles with even smaller circles cut away from edges. Add micro cutter dots.
Arrange all the elements. Bake on tile for 45 min. to 1 hour at manufactures recommended temperature. Let fully cool and remain on tile. Finishing stamp process is after other designs.
(Hindsight – I wish I had made a tighter pattern with this design, placing my elements closer together.)
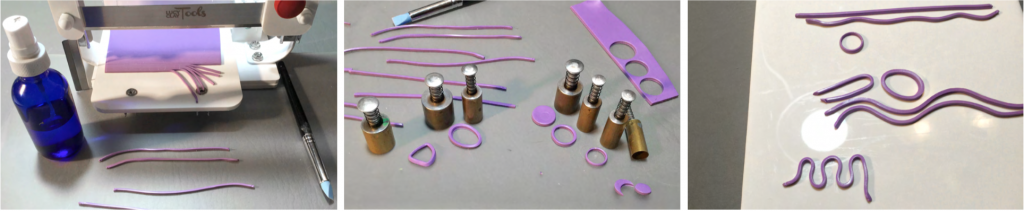
EXTRUDED STRINGS STAMP
Step 1.
This stamp will be built on a thin base layer of clay rolled on the 5th or 6th thinnest setting.
Burnish backing sheet to tile very well without air bubbles as described in the CIRCLES Stamp Section.
Step 2.
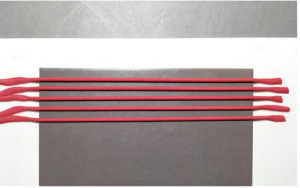
Start by placing a string across base sheet and pulling straight but not stretched. Press down edges to tile to hold in place. Do as many rows as desired with space between each.
Step 3.

Next cut some little cylinder shapes from your strings using a very thin or utility blade. Arrange them with a needle tool in a random but evenly spaced pattern. Try not to show needle marks. Add as many rows as desired. Add more straight strings across base sheet.
Step 4.

Pre curve a sting of clay by guiding it around the end of the needle tool.
Step 5.
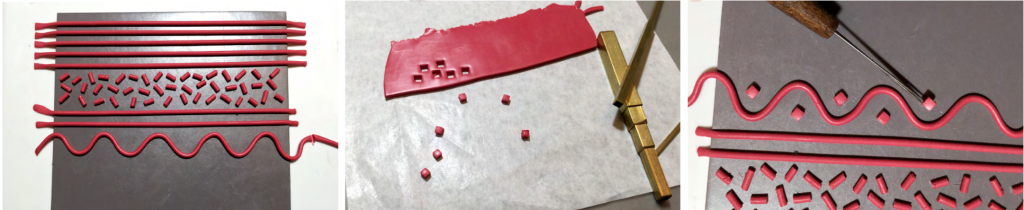 Arrange wavy string on base clay. Cut out some micro square shapes and add in the spaces of the wavy line. Add more straight strings.
Step 6.
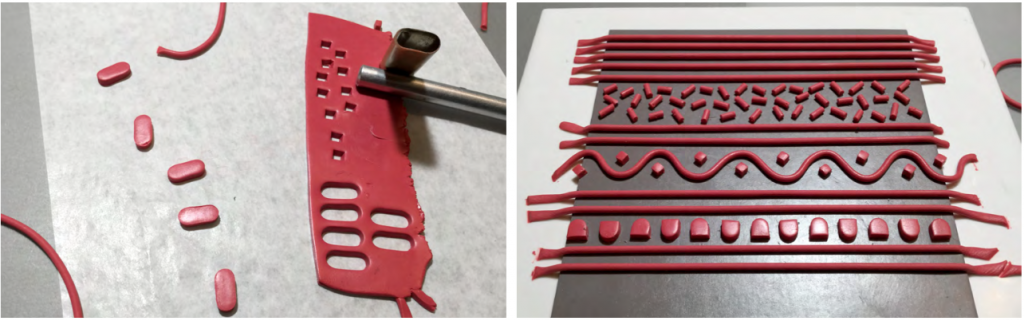
Next, I added micro ovals cut outs, that I also cut in half. I placed them in a row in alternating directions followed buy more straight strings.
Step 7.
Then next row of triple arches is made by spiraling a sting of clay into a coil. Cut coil in half and place on base sheet. Use needle to remove every other string section. Trim excess strings from edges.
Bake on tile for 45 min. to 1 hour at manufactures recommended temperature. Let fully cool and remain on tile. Finishing stamp other designs.
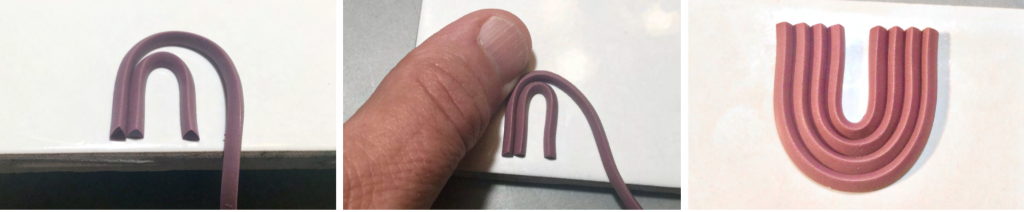
TRIANGLE EXTRUSION STAMP
Step 1.
The Triangle Extrusion Stamp is probably my favorite to make. I will be showing just some patterns and tips. The final stamp is one I previously made. Extrude clay using the small triangle extruder disc from LC Disc #11. Be sure to use clay that is not too dry or cracks when you bend the strings. Glassymer will fill in joints and minor cracks but why go to all the trouble of repairs when softer clay will prevent extra work.
Make sure in the different ways you make your patterns to keep the bottom side of your triangle string flat against the tile.
Step 2.
When placing strings next to each other and touching I have found that it is best to run your fingers along the outside side of the triangle seating it flat against the tile and the string next to it.
Step 3.
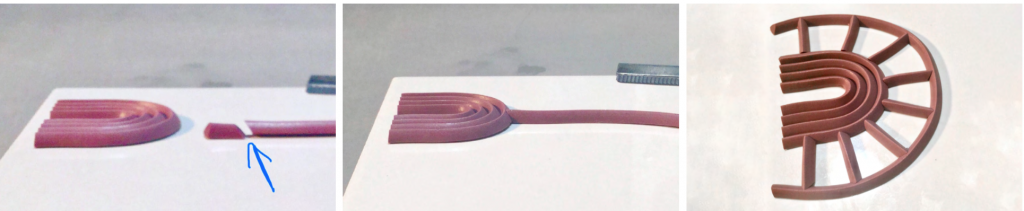
 When placing strings next to each other and touching I have found that it is best to run your fingers along the outside side of the triangle seating it flat against the tile and the string next to it.
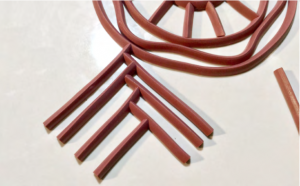
Step 4.
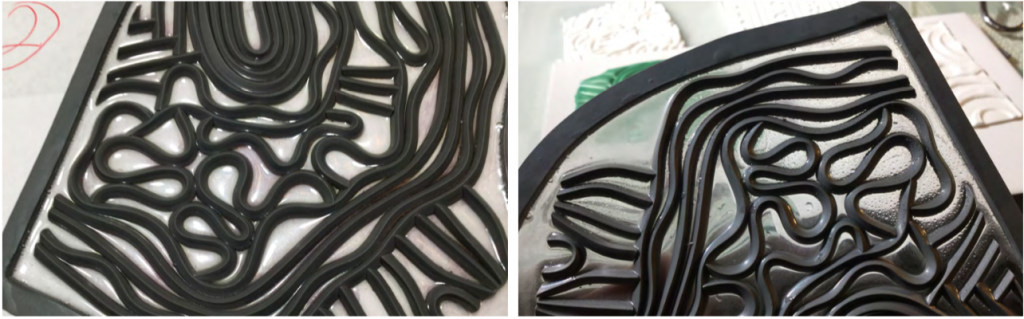 Finished Triangle Extrusion Stamp.
Bake on tile for 45 min. to 1 hour at manufactures recommended temperature. Let fully cool and remain on tile. Finishing stamp process is after other designs.
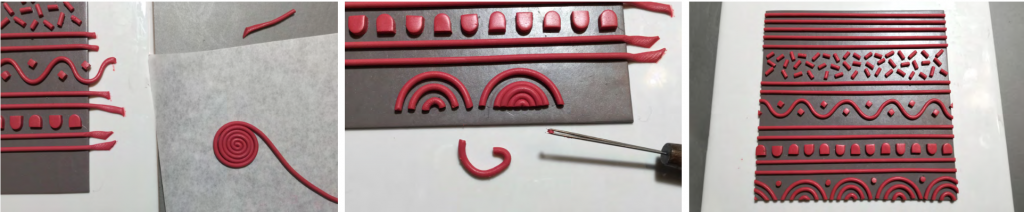
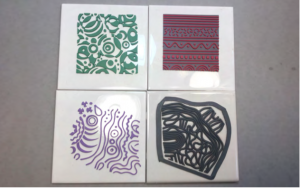 Here are the three baked stamps and the finished Triangle Extrusion Stamp. Be careful that you don’t bump or dislodge any of the pieces off the tiles. As you are working with the raw clay on the tiles if you have clay stings or pieces that don’t seem to want to stick, you can smear a thin coat of Glassymer on tile and then wipe off excess. The tile should look dry as if there was nothing added but the minute film of Glassymer left behind is enough to help raw clay pieces stay in place.
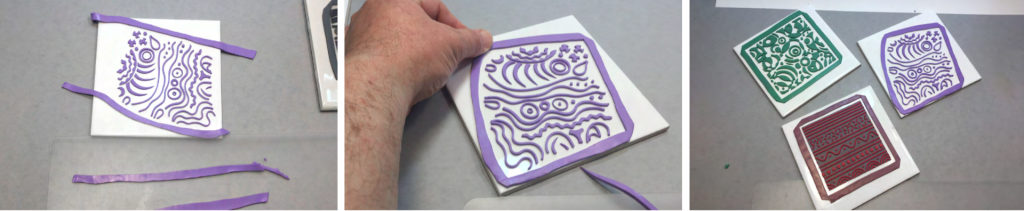
Using conditioned scrap clay make strips long enough to frame your stamps. These frames can be cut away later, I choose to leave some of my frames on. More than likely I will only use sections of my stamps in my designs.
The purpose of the strips is to contain the Glassymer from running off tile in oven. Glassymer is much thinner than other liquid clays. The strips should be the same thickness of your stamp designs.
Frame you stamp designs with the strips. Press them firmly to tile. Make sure corner joins are well connected. The frame must not leak or the Glassymer will run out.
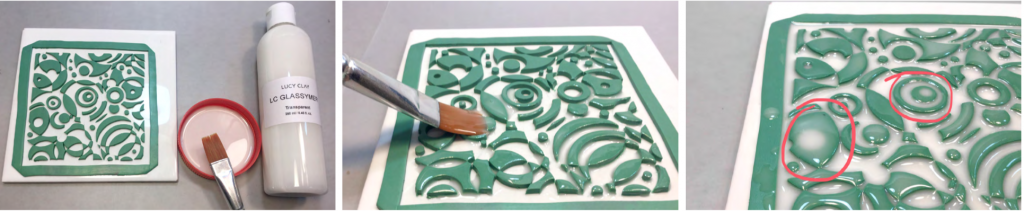
Apply the Glassymer with a brush, first to all the pieces to give a good coat that will fill in any joins or small cracks. It will also help to prevent air bubbles trapped along edges of baked clay pieces. Continue adding liquid until the pattern is half full or less. If you over fill your pattern, your stamp will be shallow as in my purple stamp which I overfilled. The Glassymer will self-level it will also be slightly thinner layer when baked. Check areas such as inside circles that may be fuller than the rest of the stamp.
When finished, allow to rest awhile to allow Liquid to level.
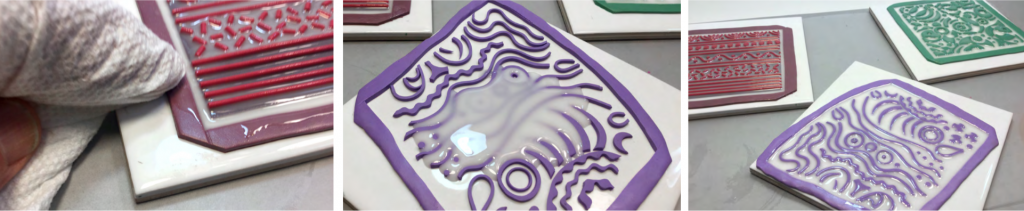
Wipe any excess liquid off frame, it will run off either side and onto the tile or making a thick area on stamp. Do not pour directly from bottle. You will over fill as I did on the purple stamp. Getting the correct amount of Glassymer on stamp may take practice. I suggest experimenting with thickness of Glassymer.
Bake stamps for 45 min to 1 hour at 285 F. Allow to cool on tile before removing.
After several different experiments I found that backing stamps with thin clay sheet or even more Glassymer resulted in bubbles being trapped and making bumps and unwanted ridges or dots in the stamps. Too thin of a layer of Glassymer may result in hole in the background.
The next few pictures are the resulting stamps and my thoughts about them.
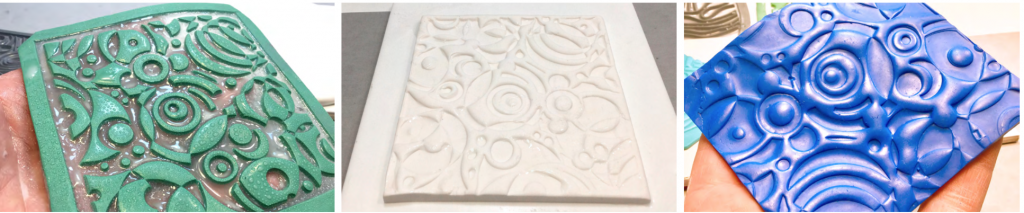
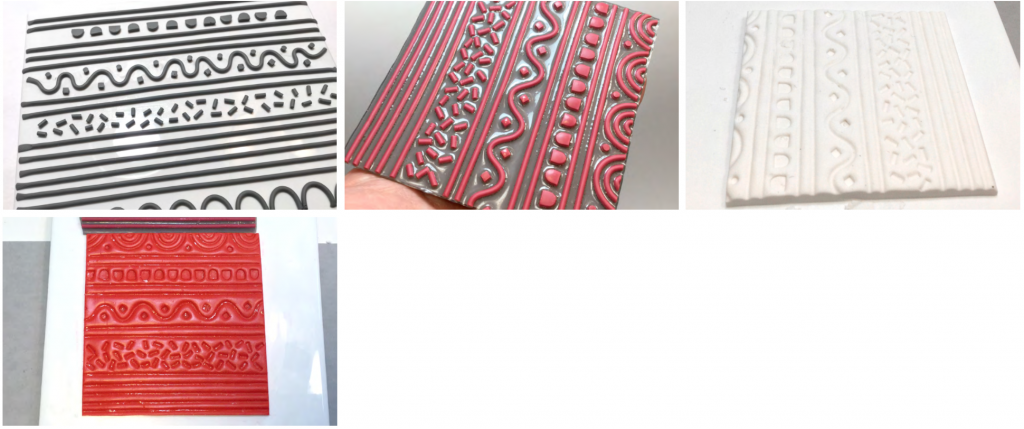
CIRCLES STAMP
This is my favorite and most challenging to make, I love the resulting impressions. White is Ultralight, Blue is Premo.
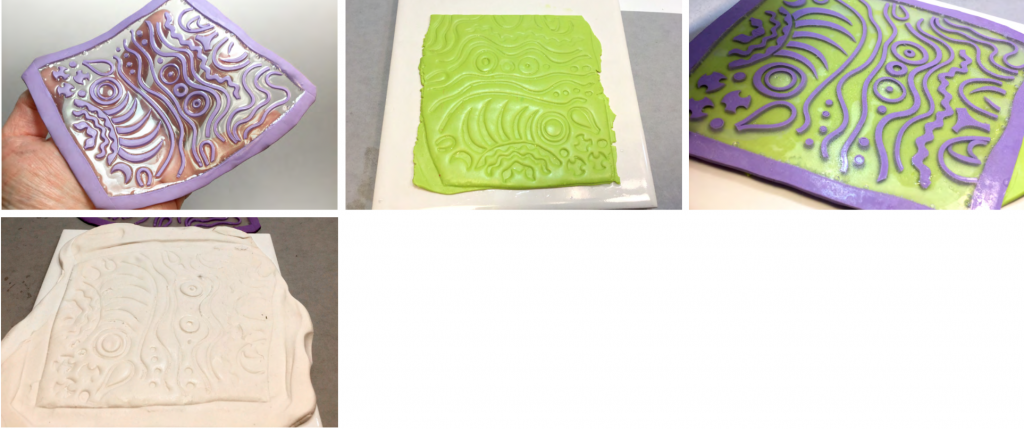
SLICED STRIPS AND CUTTER SHAPES
Making this type of stamp gives you lots of design options. I like the elements in this stamp. Two things I would do differently is to not over fill with Glassymer and make the design with less space between the pieces. The picture shows how shallow the stamped impression is.
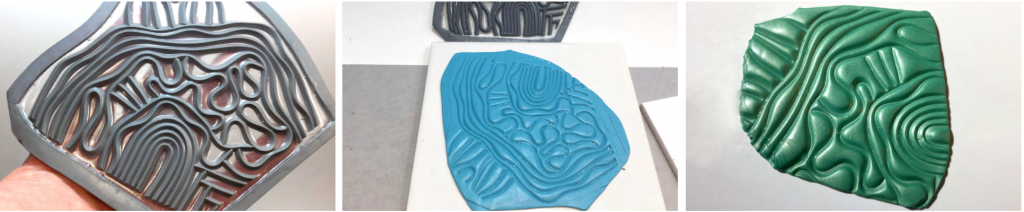
EXTRUDED STRINGS STAMP
This stamp was built on a thin sheet of clay. I removed the frame while still hot on the tile by cutting along the side with a sharp utility blade. You can also wait until cool and cut with scissors. I have also built this similar type without backing sheet (Gray on white tile).
TRIANGLE EXTRUSION STAMP
Using the triangle extrusions, I found it quick and easy to design and build the stamp. I like the results. The Glassymer backing of the stamp stretches a little, rounding the stamped impression.
FINAL THOUGHTS
When stamps are baked, decide if you will cut off frames. You can always trim later with scissors. Mist stamps and clay with water as a release.
Stamps without clay backing can be stuck to a clean tile or acrylic stamping block for support. Cleaner stamps stick better to tile, glass or acrylic.
 Make a tile, stamp and clay sandwich, press straight down while standing for more pressure.
Use stamps as you would other flexible stamps.
Make mirror image stamps by stamping and baking a thick sheet of scrap clay that has been well conditioned. You may need a double thickness of clay.
I would love to see your stamps and resulting impressions or items made with stamps.
Please Tag me on Facebook, Jan Edward Montarsi
Copyright © Jan Edward Montarsi
DOWNLOAD FREE TUTORIAL IN PDF HERE: polymer-clay-stamps-jan-edward-montarsi
Leave A Reply