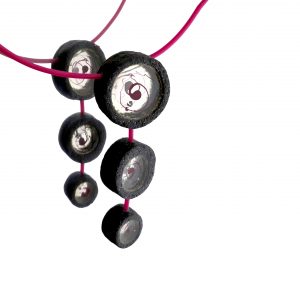
Necklace-spiral eye
Try to make a simple necklace with the help of a few tools and the indispensable LC Glassymer. The choice of the shape and the color are up to you. So go ahead, find a moment and have fun.
About the author

Tereza Čermáková lives in Libčice nad Vltavou. She graduated from the Secondary School of Applied Arts and VOŠ in Jablonec nad Nisou. She started working with polymer clay in 2012 more or less by accident. She draws her inspiration from surroundings, and the polymer has become just the right medium for her, which, even at home, with a few skills can be turned into almost anything.
Web page: www.terice-bizu.cz
Materials and tools
- Polymer Clay scrap (dark colors) + embossing powder (not necessary)
- LC Glassymer Transparent GEL + LC Glassymer Colour GEL
- Round cutters of different sizes
- Pasta machine or roller
- Blade, scalpel
- Texture sponge
- Stylus or toothpick
- Baking tile
- Polymer liquid
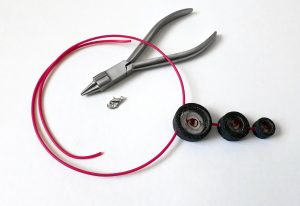
Assembly tools
- Memory wire
- Hollow tube
- Round pliers
- Hand drill
- Superglue
- Jewelery clasps (carabiner)
Step 1.
Condition the clay (optionally add a little bit of embossing powder). Run through the pasta machine on to the thinnest setting (approx. 1.2mm). Texture with a sponge. And prepare a round cookie cutter.
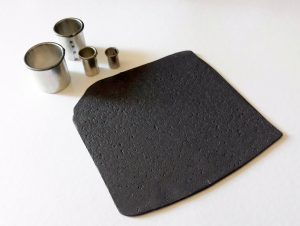
Step 2.
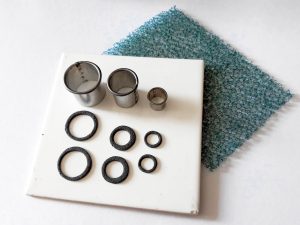
From a sheet of polymer material, cut 6 round pieces with a cut-out center, each of 2 pieces of the same size, which we later will join together – i.e. 3 pairs.
Smooth firmly to the baking tile, and gently adjust the sharp edges with a textured sponge.
Step 3.
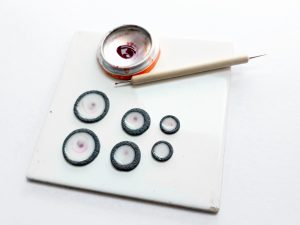
Fill the rings with LC Glassymer Transparent GEL and swirl the stylus or toothpick from the center with a drop of Glassymer Colour (you can also drop the colour directly into the center of the circle).
Bake in the oven according to the manufacturer’s instructions (approx. 135°C, 20 minutes).
Let cool down on the tile.
Step 4.
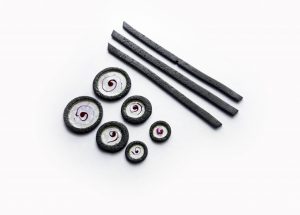
After cooling, remove the pieces carefully from the tile. Cut from the rest of the textured sheet – 3 long strips of about 6 mm wide.
Step 5.
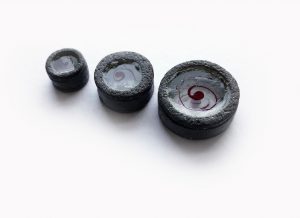
Spread the liquid on back the surface of the baked circle piece (not the transparent part) and glue the strip carefully, cut the rest with a scalpel and clean the edges, then spread some liquid on the second ring and cover it as a lid.
Repeat for all pieces.
Put on the tile and bake again in the oven according to the manufacturer’s instructions.
Step 6.
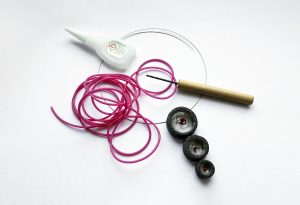
The necklace is assembled simply by drilling the necessary holes. Drill one hole in the smallest wheel, the larger two wheels will have holes on both sides.
Prepare a hollow tube, cut about 1.5 cm using a scalpel or scissors. 2 pieces in total.
Step 7.
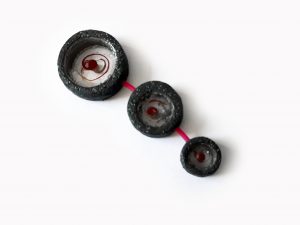
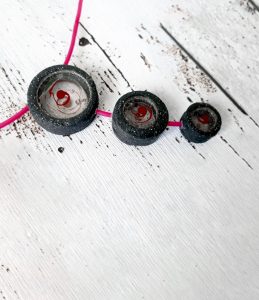
Glue the tube into the drilled hole and connect all three rings together.
Using a hand drill, make holes into the top (largest) ring. Holes are drilled in the upper third of the ring. To accommodate neck wire and tubing.
Step 8.
Now we prepare a memory (approx. 50 cm) – you can check the length by putting it around your neck.
Thread through the prepared holes and align to the same length of both sides. String a hollow tube on the wire, shorten it as needed and make loops on both sides with round pliers. Attach the jewelery clasps.
And we’re done.
Step 9.
An easier version of the assembly: The rings can be drilled and connected with an eye screw at top and hung on a jewelery hoop or chain.
I hope this interesting necklace will make you happy.
DOWNLOAD FREE TUTORIAL IN PDF HERE: spiral-eye-necklace-tereza-cermakova_190517 (1)

Leave A Reply