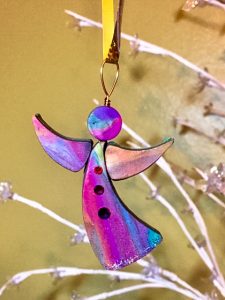
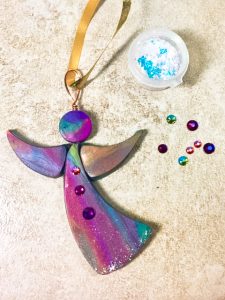
Angels in Our Mist original polymer clay tutorial by Marilynn Ordoñez.
In this tutorial by Marilynn Ordoñez, you will make a beautiful angel ornament using LC Shape Plates and LC Glassymer as adhesive.
About the author:
MARILYNN ORDONEZ
Born and raised in Puerto Rico , Marilynn always loves sea life and the amazing colors of the rainforest. She has carried these images into her polymer clay jewelry. Follow Marilynn on Instagram.
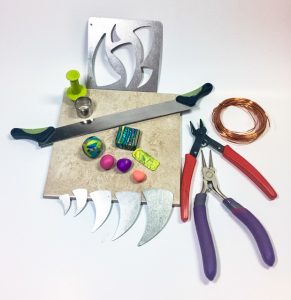
TOOLS AND MATERIALS
- Scrap clay (one set with pretty colors and another set in any color)
- LC Glassymer
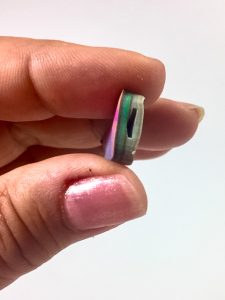
- LC Shape plates #16
- Small round cookie cutter
- LC Blade
- Pasta Machine
- Small brush
- Exacto knife
- 18 ha wire
- Wire cutter
- Needlepoint plier
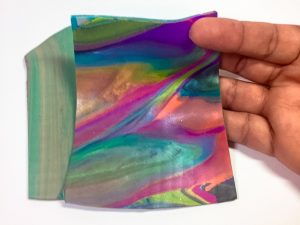
Step 1. Gather the set of scrap clay for the front of your angel and twist the pieces together to mix them.
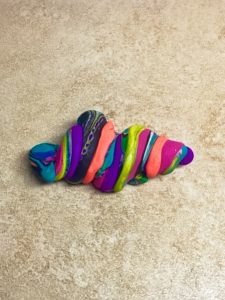
Step 2. Run the mixed clay through your pasta machine on the thickest setting.
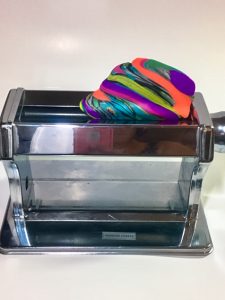
Step 3. Continue to fold and run the clay through the pasta machine until you are satisfied with the combination of colors, set aside.
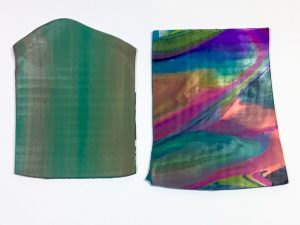
Step 4. Repeat steps 1-3 with the set of scrap clay for the back of your angel.
Step 5. Place the clay for the front on top of the clay for the back.
Step 6. Roll the poly roller over the two sheets to adhere them together.Make sure to do this gently, without adding pressure.
Step 7. Cut the edges of the slab to make it a rectangle.
Step 8. Place the LC Shape Plate over the clay slab.
Step 9. Use the Exacto knife to cut out 3 pieces.
a. 1 large piece for the body
b. 2 smaller ones for the wings.
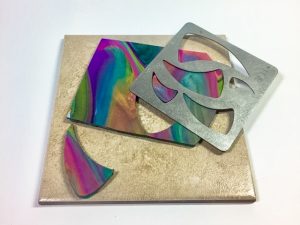
Step 10. Cut out a circle with the round cookie cutter for the head.
Step 11. There are two ways to place the wings:
a. Concave edge facing up
b. Concave edge facing down
Step 12. Choose whichever you like best.
Step 13. Smooth the edges of the cut pieces with your fingers, set aside.
Step 14. Cut 2 pieces of 18 ga wire
a. One 3 in
b. The other 1.5 in.
Step 15. Using the needlepoint plier, make a big wrap loop on one side of the longer (3 in) wire.
Step 16. Put the straight side of the wire through the round, “head” piece.
Step 17. Make a small loop on the end of the wire you pushed through the head.

Step 18. With the small brush apply a little bit of the LC Glassymer between the head and the body
Step 19. Using the needlepoint plier, make two small loops at each end of the shorter (1.5 in) wire.
Step 20. Push the wire through the upper part of the body where the arms will be.
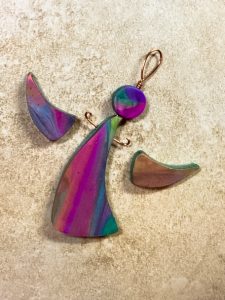
Step 21. Using the Exacto knife, cut an indentation into each arm where the wire will be placed.
Step 22. Brush on some LC Glassymer in the indentations on the arms and in the area on the body the arms will be attached to.
Step 23. Place the arms onto the body of the angel, making sure you insert the wire into the indentations you made on the arms.
Step 24. Cure the angel in the oven according to your clay’s instructions,
Step 25. After the angel is cured and cooled, you can decorate it (using pearl pigments, rhinestones, etc.)
Enjoy making your angels.
Leave A Reply