Safety instructions
• Use LC Slicer only for cutting polymer clay.
• Before using LC Slicer place underneath the anti-slip mat.
• When you use LC Slicer, beware of the very sharp blade.
• Never put your hand under the edge of the blade. To lift the blade, use only the handle. Never pick up the blade in any other way.
• Do not move the clay by hand, use a moving mat for it.
• Do not carry LC Slicer holding the handle of the blade, hold it with a metal frame.
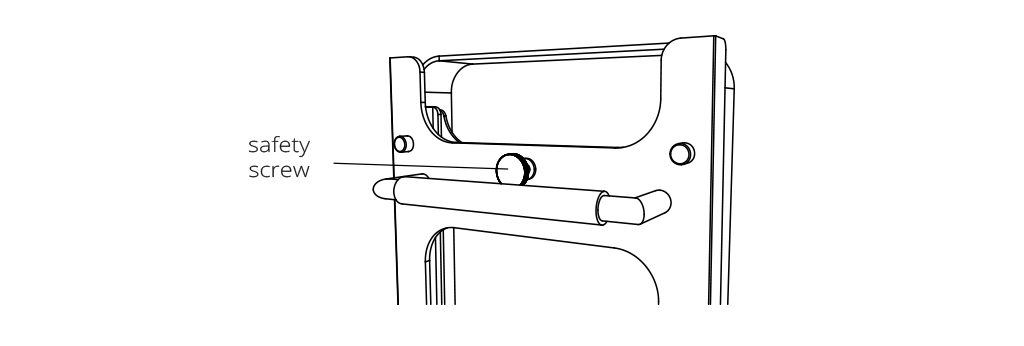
• After each use of LC Slicer park the moving section in the lower position and secure with the safety screw.
• The tool is not designed for children and should not be used by children without the proper supervision of a responsible person.
• Always follow the safety instructions for your and others’ safety.
• LC Tools s.r.o. is not liable for injuries or damages incurred by improper handling with LC Slicer.
Quick assembly
1. Take out all parts of LC Slicer from the package.
2. Remove the protective sheets from all parts. For easy removal of the sheet, it is recommended to lay the parts on a flat soft surface.
3. For complete removal of the protective sheets, it is necessary to loosen the nuts by the included wrench. Loosen the nuts one by one and gradually remove the protective sheet, then tighten the nut always back before loosening next one. Avoid the disassembly of LC Slicer. Finally, make sure that the nuts are tightened.
4. Before you will continue to the next point, turn to the other side where you can find the assembly procedure of LC Slicer.
5. Carefully remove the protective plastic sleeve of the blade.
6. To compensate the blade, loosen the nuts on the sides, align the blade with the plate and tighten the nuts.
7. Place all protective plastic covers on the nuts.
8. Your LC Slicer is ready to use.
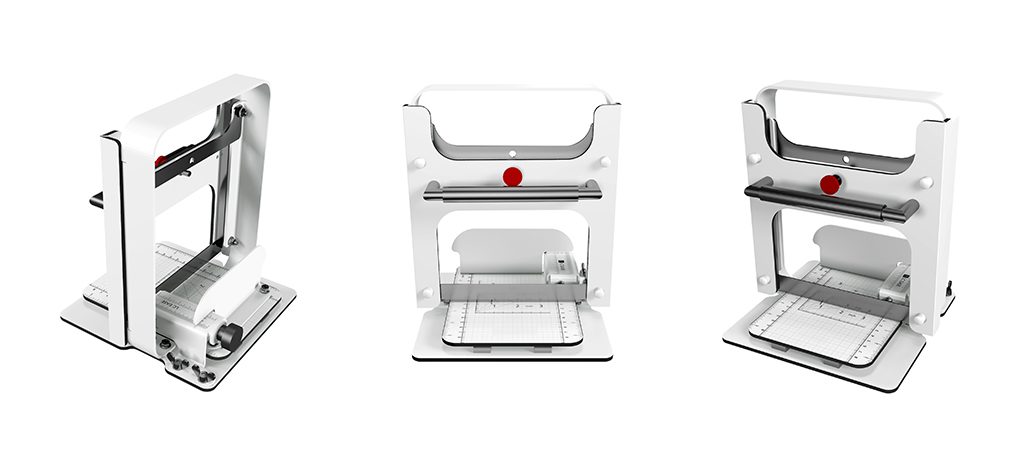
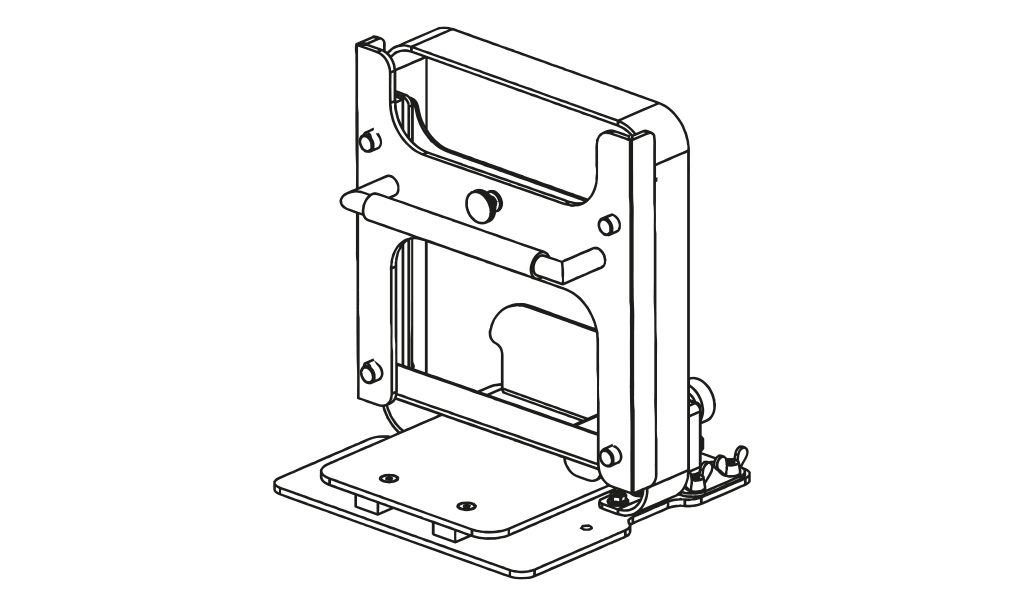
Technical details
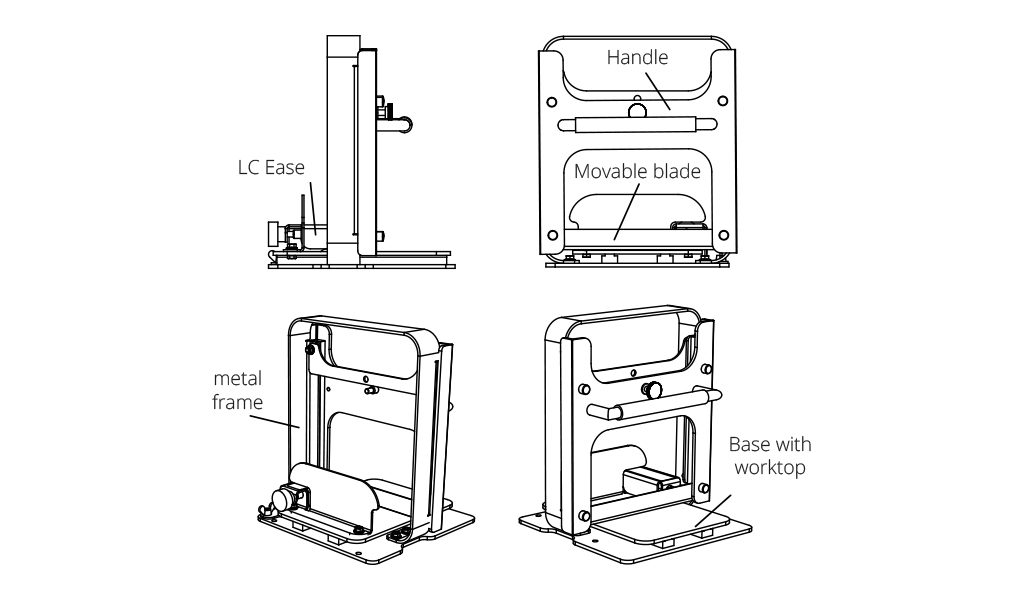
LC Slicer consists of 5 main parts:
• Metal frame
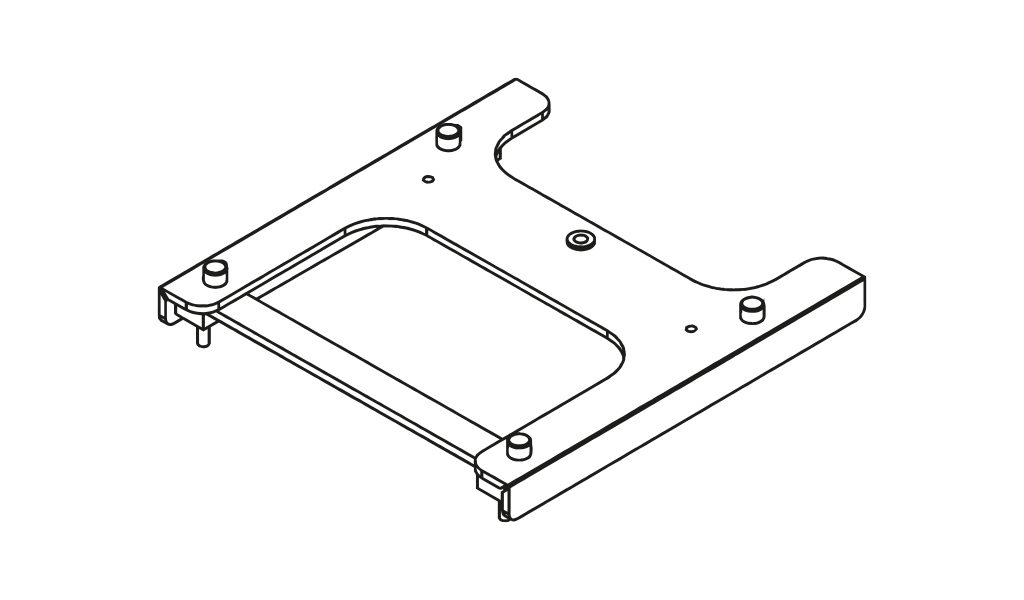
• Base with worktop
• Movable blade
• Handle
• LC Ease
• Size: 22 x 20 x 25 cm closed, 22 x 20 x 35 cm opened
• Weight: 1,9 kg
• Cutting window size: 14 cm x 10 cm
• Blade length: 16 cm
LC Slicer: Assembly procedure
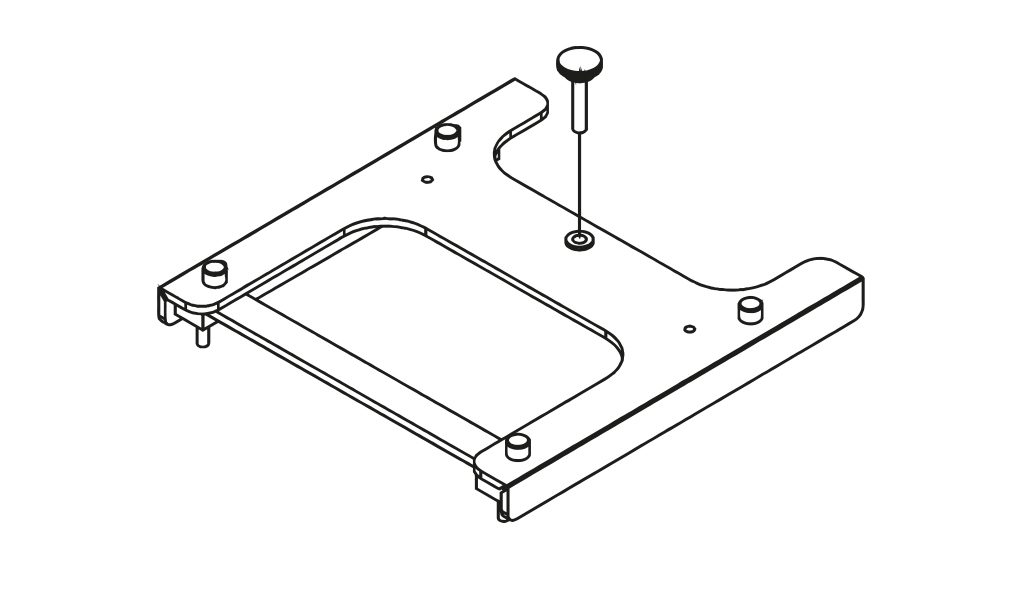
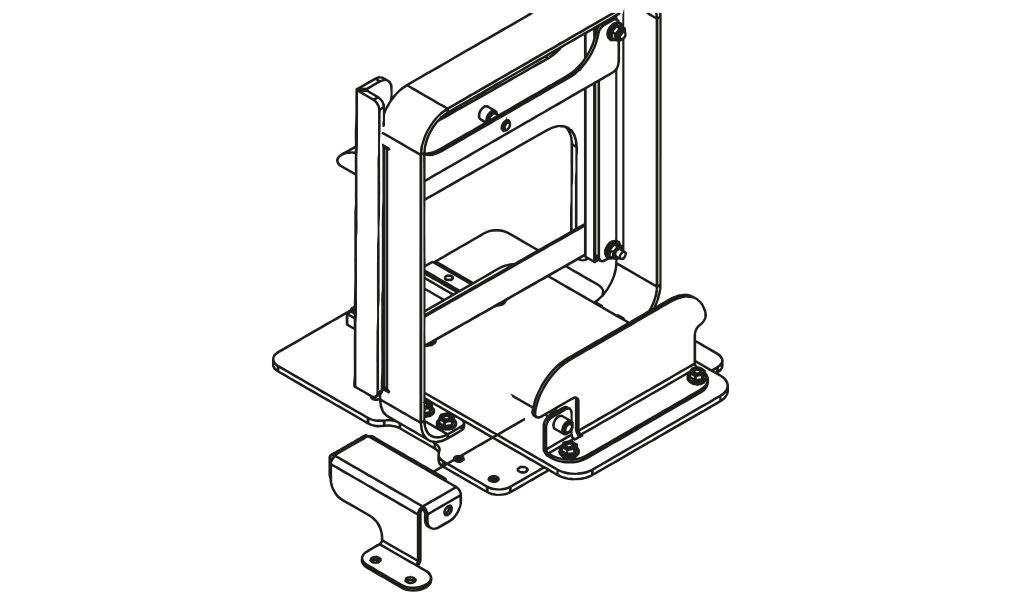
1. Let’s prepare your LC Slicer. Take a preassembled part with the blade.
2. Install the red secure screw to the nut at this part. Follow the right orientation according to the picture.
3. Attach a handle using two screws (M4x12). Follow the right orientation according to the picture.
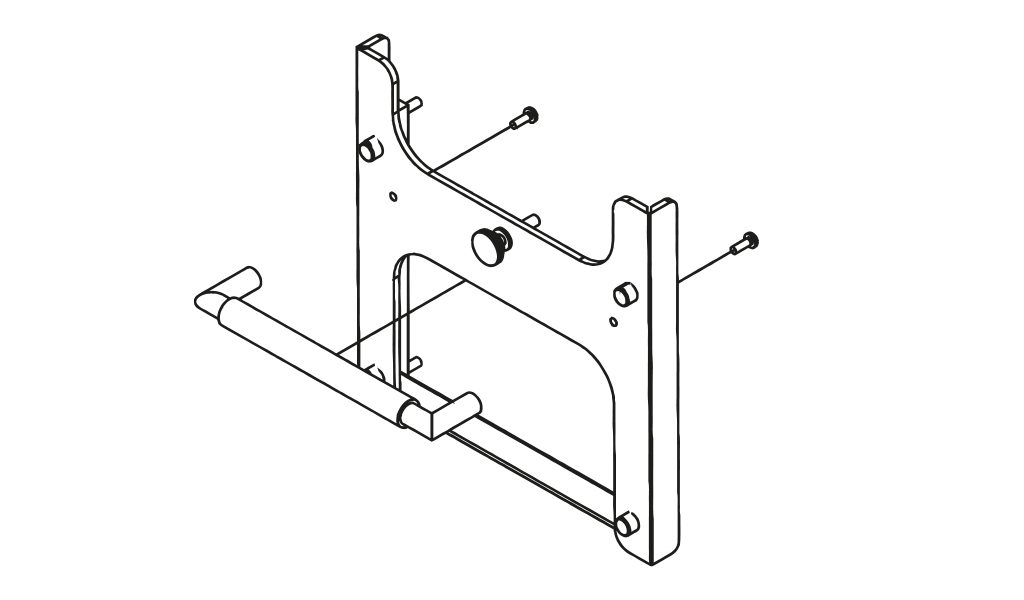
4. Attach prepared part from step 3 to the face of the slicer frame.
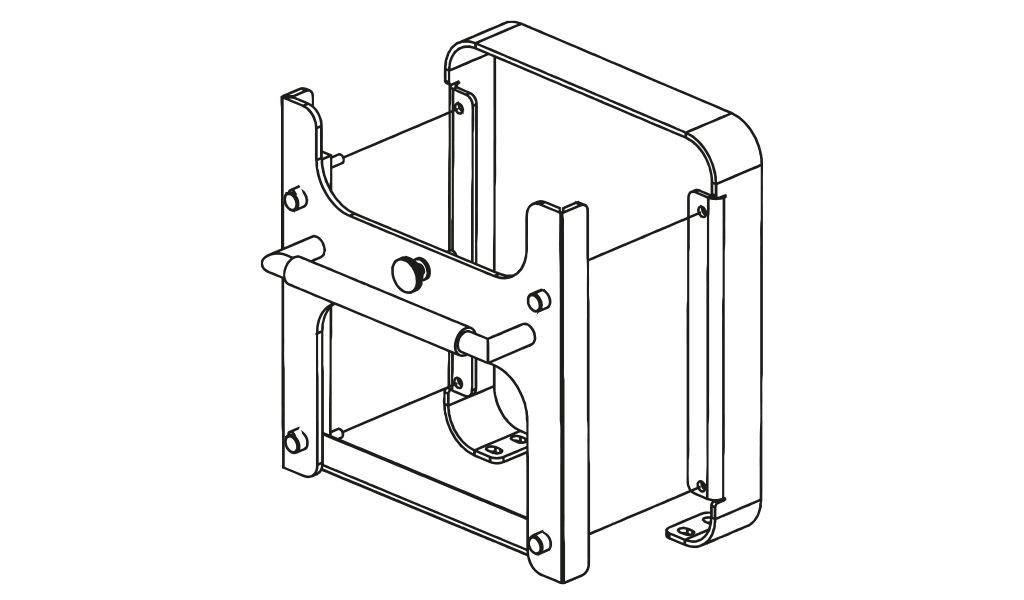
5. Install a secure stainless plate to the upper two screws, the middle holes must fit to the red secure screw.
6. Put on washers and M5 nuts with flange to marked screws and slightly tight by hand.
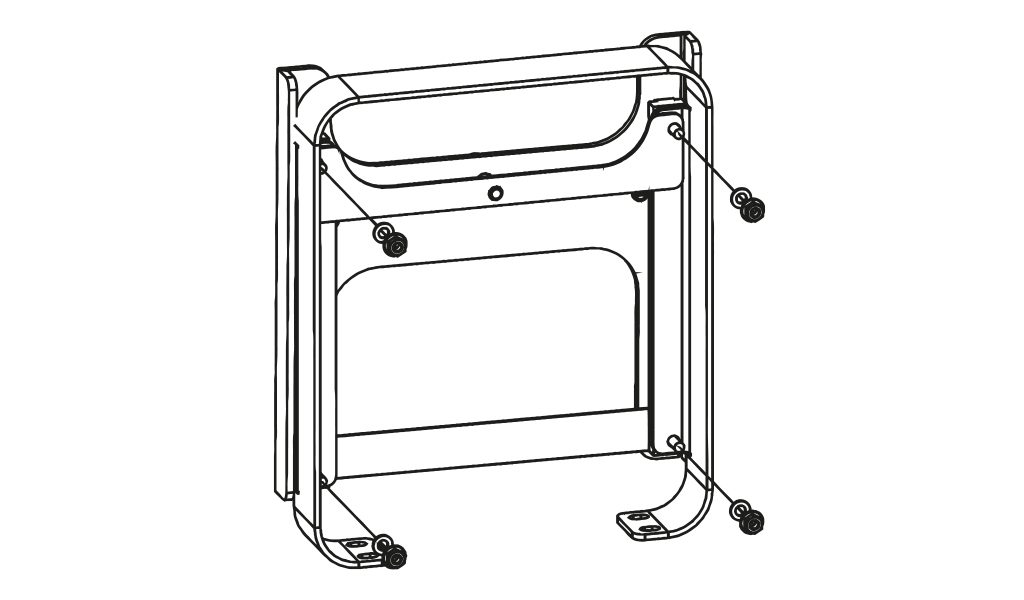
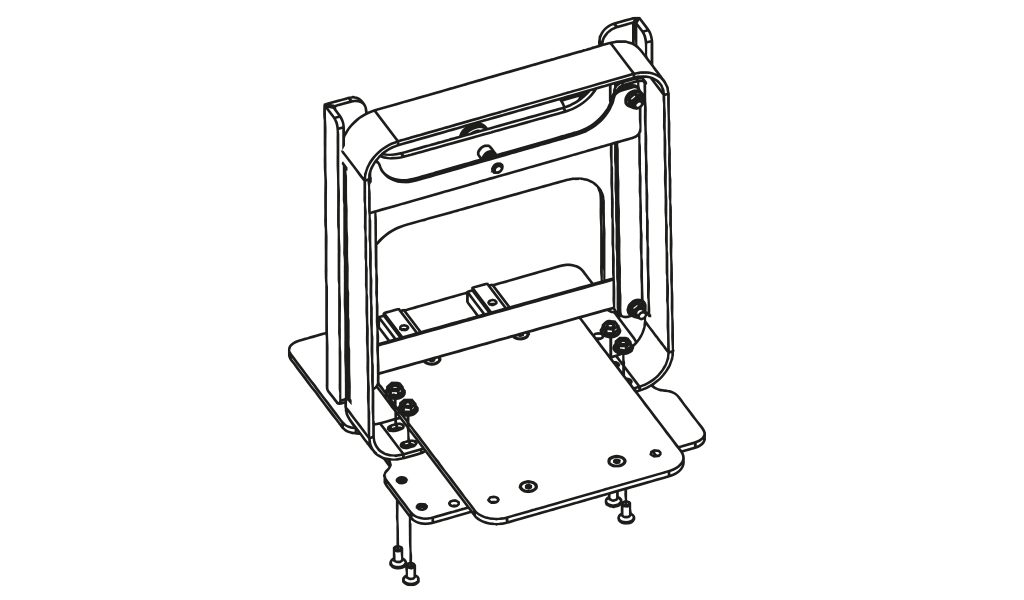
7. Insert a whole set of frame from the front to the base plate, align holes at the frame with holes at the plate. Please, follow the orientation of the plate according to the picture.
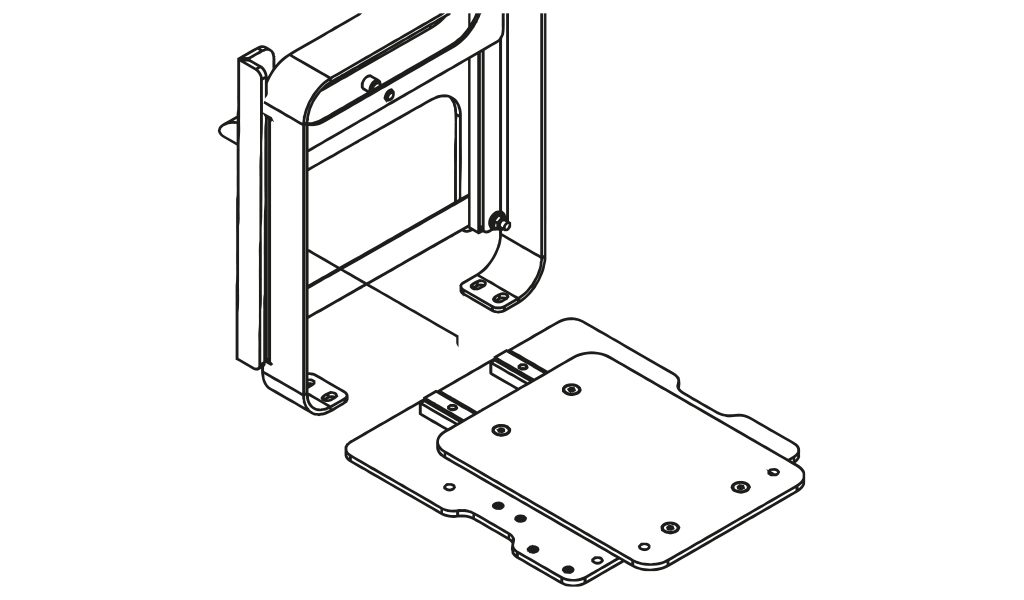
8. Put M5 screws with countersunk head and M5 nuts with flange into marked holes and tight it by the included wrench. Tight M5 nuts from step 6 by the included wrench.
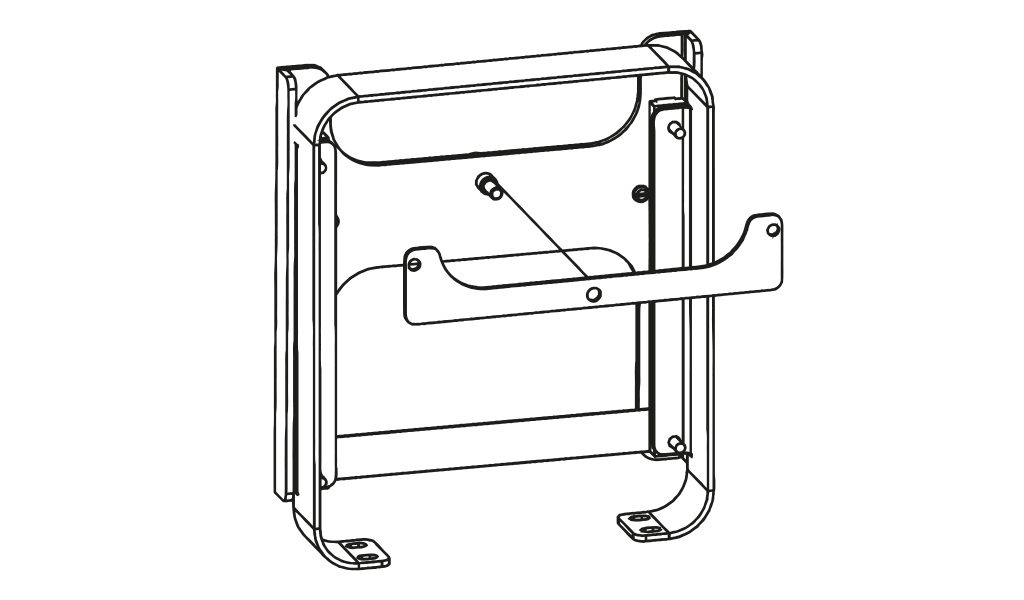
9. Attach a back pad according to the picture.
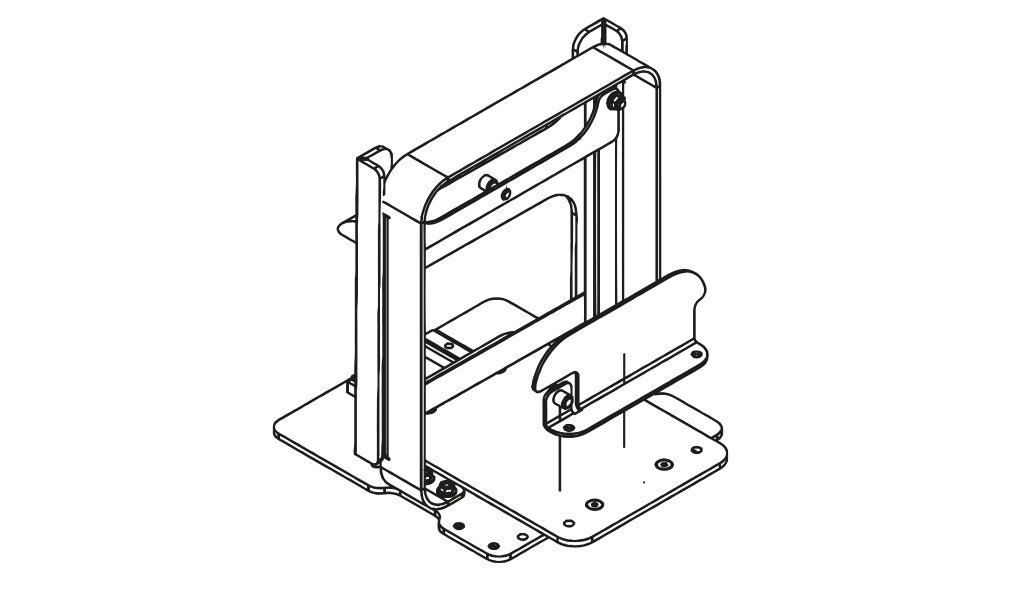
10. Put M5 screws with a hexagonal head and two washers with M5 nuts with flange into marked holes. Tight it slightly by hand.

11. Insert LC EASE from the side. Note: its recommended to place a sticker with the ruler included in the package to LC EASE before this step.
12. Align holes at the ease module with holes at the base plate and insert M5 screws with countersunk head and washers with wingnuts into marked holes. Tight it slightly by hand.

13. Screw in threaded rod. Note: for better lifetime apply LC Lubricant before this step. We recommend that you occasionally reapply.

14. Screw in the threaded rod all the way and secure it with a nut.
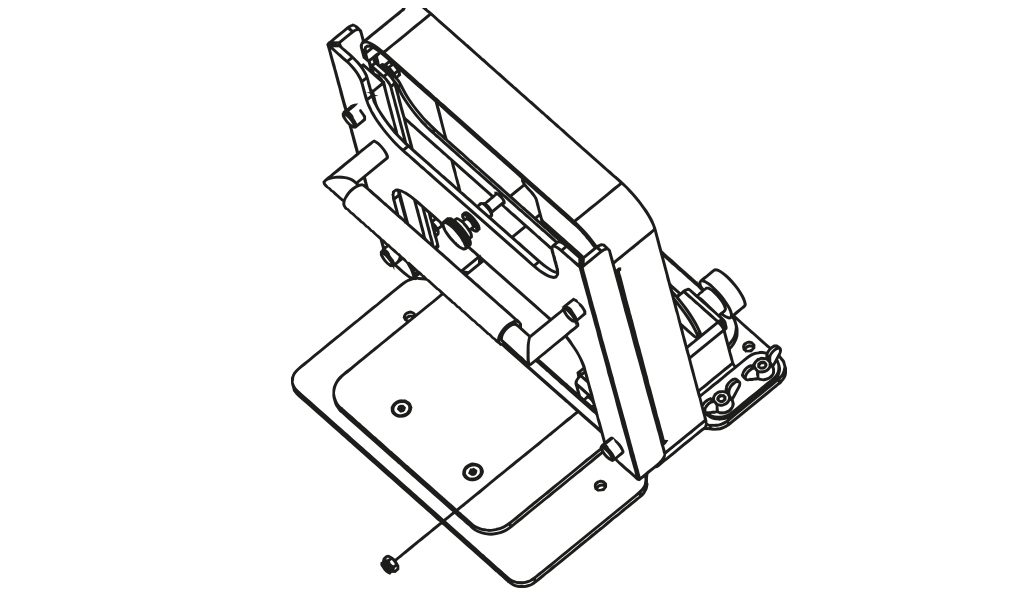
15. After balancing the rod we can tighten it all up. Note: if the LC EASE isn’t spinning freely, loosen necessary parts, settle them and tighten them up again.
DOWNLOAD PDF
Order LC Slicer now:
Lucy Clay Store | Amazon – Lucy Clay
Leave A Reply