Let’s make a funny spider-shaped brooch and get rid of arachnophobia. This form of therapy is non-violent and can be very entertaining and creative. Color combinations are endless and this beautiful brooch will surely make you happy ☺.
About the author

Tereza Čermáková lives in Libčice nad Vltavou. She graduated from the Secondary School of Applied Arts and VOŠ in Jablonec nad Nisou.
She started working with polymer clay in 2012 more or less by accident. She draws her inspiration from surroundings, and the polymer has become just the right medium for her, which, even at home, with a few skills can be turned into almost anything.
Web page: www.terice-bizu.cz
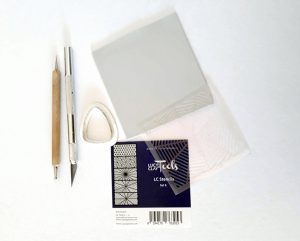
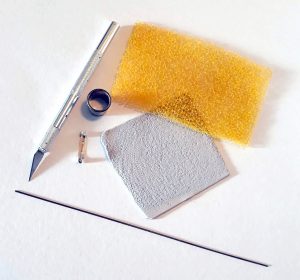
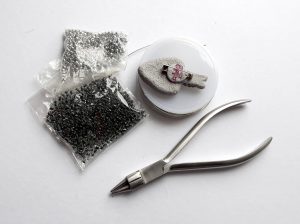
Materials and tools:
Light Gray Metallic Polymer Clay
LC Glassymer + LC Glassymer Color Gel
Small round cutter
LC Stencil with spider web pattern (Set 6)
Stylus and 1 mm needle
Blade, scalpel
Soft brush
Texture sponge
Baking tile
LC Glassymer Glue (or another polymer liquid)
Brooch pin connector
Assembly tools
0.8mm/ 0.03″ jewelery wire
round pliers, wire cutters
small beads
Step 1
 Condition a half of bar of gray polymer clay and run through the pasta machine (thickness about 1.2mm/0.05″)
Prepare an LC Stencil Set 6 with a spider web pattern.
Step 2
 Place the sheet on a tile or other solid base. Put the LC Stencil on the sheet and carefully roll with a roller.
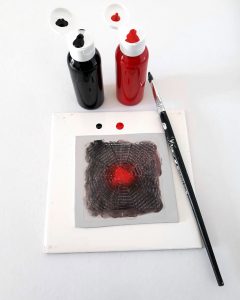
Drop some red and black LC Glassymer Color Gel on the the tile.
From the center of the stencil, apply red with a finger or a brush, and then, from corners to the center, apply black until the colors blend.
Step 3
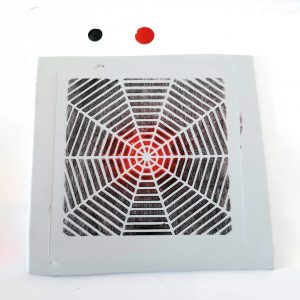 Carefully remove the LC Stencils from the polymer sheet, wash the Stencil with water and soap, then carefully dry.
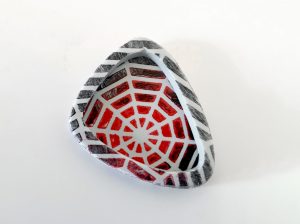
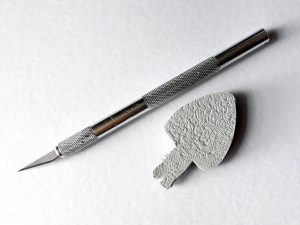
Choose a part of the web that you like most and cut out the abdomen of the future spider with a cutter.
Then cut one more piece (see next picture).
Do not throw away the rest, you will need it for the body.
Step 4
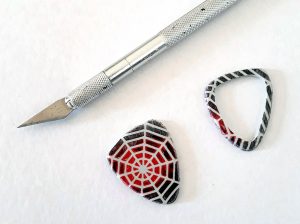 Put the base for abdomen aside. Now, using a scalpel, cut out a contour 2-3 mm/0.08-0.11″ wide.
Step 5
 Put the contour on the base and gently squeeze, everything must fit exactly (we can use a paper tissue so that the top drawing does not blur). We have a finished abdomen and now we are going to model the body.
Step 6
 From the rest of the sheet, cut out a rectangle about 2cm x 2.5cm/0.78-1″. Make a cylinder, flatten it, so that the abdomen and the body are of same width.
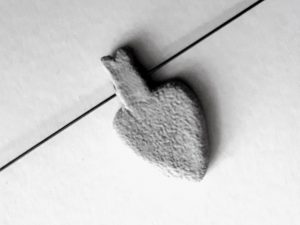
Step 7
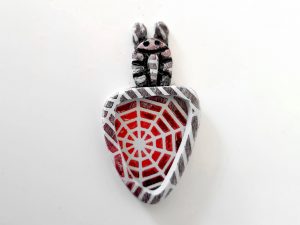 Using stylus, model the spider’s body, indicate the future head and body structure (see picture). Press out eyes with a stylus and dip the top of the stylus into a drop of black Glassymer, so that the eyes are highlighted as well as the contours of the body.
Glue two more pieces of material like the mandibles, gently press against the base of the body.
Step 8
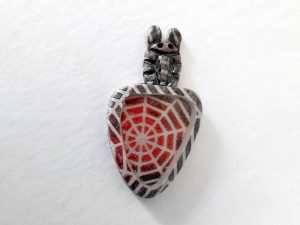
 Place the prepared body base on the baking tile and pour LC Glassymer in the spider’s abdomen up to the edge of and bake according to the manufacturer’s instructions (approx. 130°C).
Step 9
 Let the baked body cool down properly and carefully remove it from the baking tile.
Do not touch the transparent part until it has cooled down completely, otherwise fingerprints would destroy the transparency effect.
Step 10
 Now let’s work on the brooch.
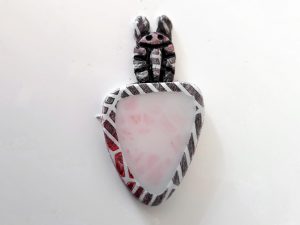
Condition the rest of bar of gray polymer clay and run through the pasta machine (medium thickness), then texture the sheet with a sponge.
Step 11
 Put some liquid on the bottom part of the spider and cover it with a textured sheet, cut off the excess with a scalpel and smooth the edges with a sponge.
Step 12
 Now make four holes in the body part with a needle for the future legs of our spider.
Step 13
 Make the holes close to each other only in the body part, smooth them carefully so that there are not any sharp points (see picture).
Step 14
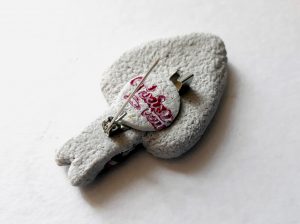 Glue the brooch pin connector to the body of the spider, cover it with a little bit of polymer clay and press with a stylus or a logo stamp.
Fasten the brooch to make sure there is no excess polymer clay.
Bake again in the oven, best placed on a piece of paper or padding. Face up.
Let it cool completely.
Step 15
 Prepare wire cutters, jewelery wire and small beads.
Using wire cutters, cut off four pieces (approx. 18cm/7″ long) of the wire and make a loop at the end of each wire, so that the beads do not fall out of it.
Step 16
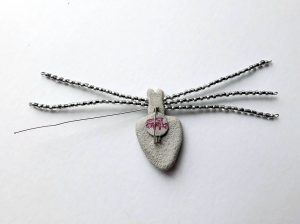 String about 7cm/2.7″ of beads on the wire, push the wire through the body of the spider, do the same on other side, and, again, make a loop.
Continue until we have all eight spider legs.
Step 17
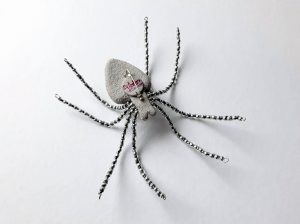 Shape the spider’s legs so that the front two pairs are facing forward while the back two pairs are facing backwards.
Step 18
 Turn the brooch and adjust the legs as you prefer.
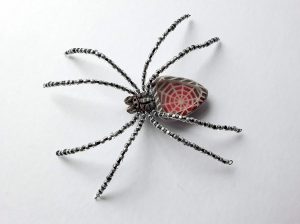
Step 19
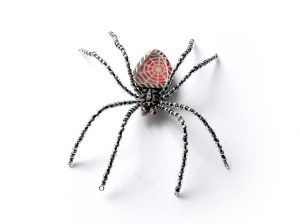
And here is the final version of our spider.
DOWNLOAD FREE TUTORIAL IN PDF HERE: spider-brooch-tereza-cermakova_190603
Leave A Reply