“Shaped candy bonbons”
I got caught up with testing LC Glassymer (a new liquid clay by LUCY CLAY) and I wanted to try what it would be to mix it with similar media. That is how I got the idea to make these beautiful shaped candy bonbons. You can mix and create thousands of colours and effects, the most interesting part is that you will see the final result only when everything is baked.
About the author:

Adela Neff has been living in Germany since 2002. She has been working with polymer clay since 2010. Working with polymer makes her feel relaxed and reduces stress. She enjoys experimenting and hopes that the artistic muse will never abandon her.
www.instagram.com/adelaneff
Materials & Tools:
• Mixing bowls
• Round cutter that has the same diameter as the mould for shaped candy bonbons
• Varnish and jewelry findings
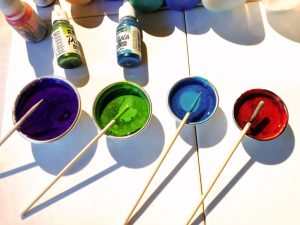
Step 1
Mix LC Glassymer Gel Transparent, transparent alcohol ink in mixing bowls. Mix the basic colors for the shaped candy bonbons.
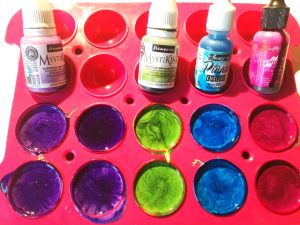
Step 2
Pour into the mould, add gold liquid and Fimo liquid, gently mix. Add a drop of alcohol ink and gently mix again. Bake for 25 – 30 min. at 150°C. Let it cool down well. The look of the bonbons depends on the intensity of mixing. You will see the results only when the bonbons are baked, so it makes each praline unique.
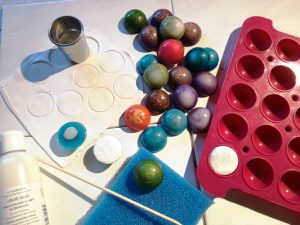
Step 3
After cooling, prepare a white sheet of polymer clay (3rd pasta machine setting) and cut a circle with a round cutter. Put a drop of LC Glassymer Liquid Glue on the bottom of the praline mould, using a skewer clean the edges and texture the bottom with a sponge. Put into mould again and bake for 20 minutes at 130°C.
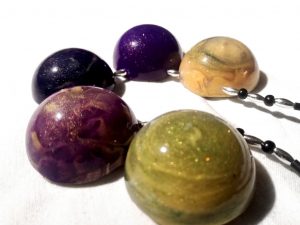
Step 4
Now all you have to do is to drill holes and varnish shaped candy bonbons. You can string and complete the necklace as you wish. I hope you like this tutorial and have fun while experimenting with colors!
DOWNLOAD FREE TUTORIAL IN PDF HERE: Shaped Candy Bonbons PDF Tutorial
Leave A Reply