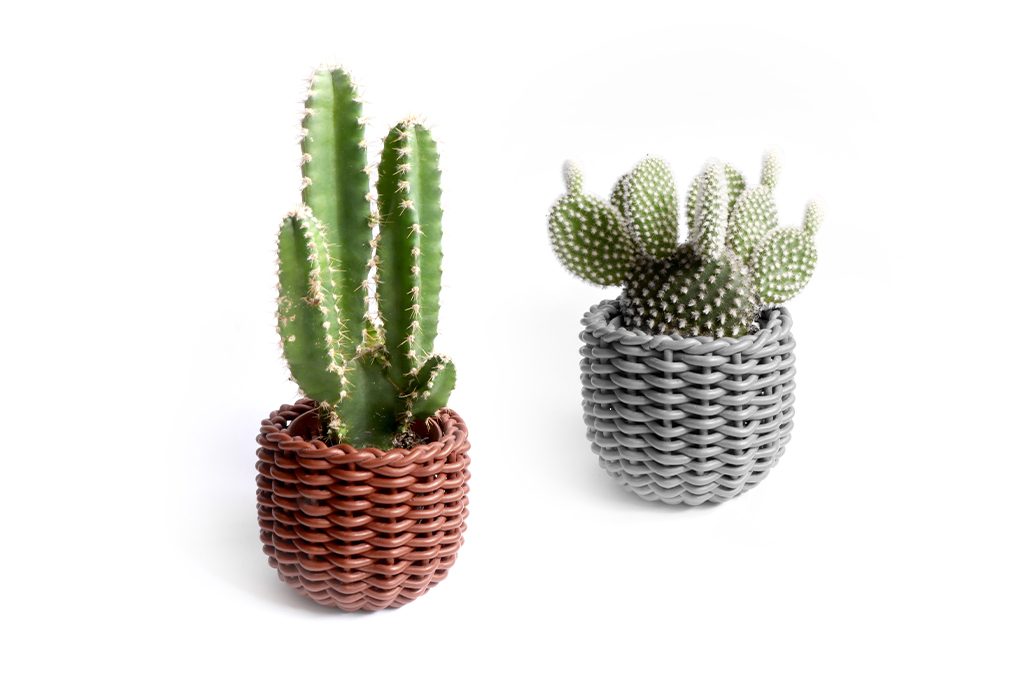
The great thing about Czextruder is that it can be used for various polymer clay techniques. You can even use it to make strands and from them, you can weave a small basket. Learn how in this tutorial.
About the author

Petra Vilímková
Petra lives near Pilsen, Czech Republic. Ever since childhood, she has loved learning new craft techniques. By age fifteen, she began studying art at various art schools in Pilsen before receiving a Bachelor of Arts degree in Industrial Design at the Ladislav Sutnar Faculty of Design and Art, University of West Bohemia. She has been working for LUCY CLAY since 2014.
Materials and tools:
- Polymer clay (color of your choice)
- LC Machine
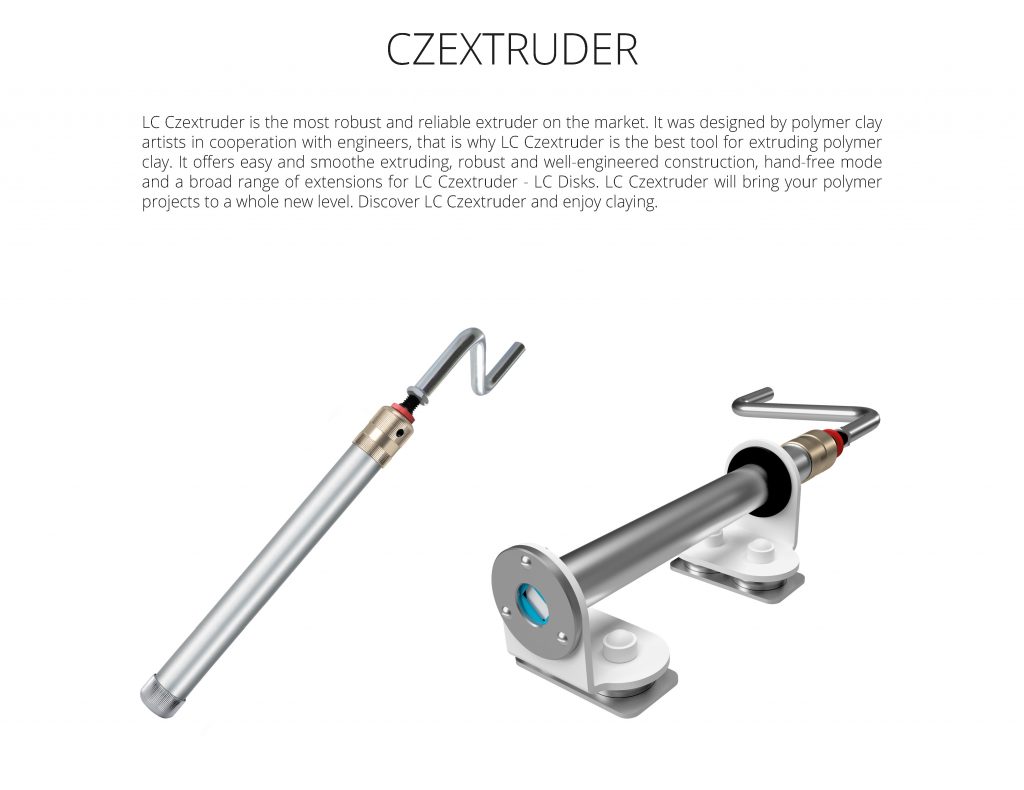
- Czextuder + LC Disk 1 (extension with 3 small holes)
- Scalpel, blade
- Glass with a round bottom (mold)
- Circle cookie cutter
- Cutting pliers
- Baking soda
Step 1

Condition polymer clay, I mixed brown and copper KatoPolyclay. Put the clay into the Czextruder. Use the extension with small holes from LC Disk 1 and extrude the clay.
Step 2

Cut all extrusions into 17 strands of the same length (about 8-9 cm long). You will need an odd number of strands. The diameter of my mold (glass) is 7.5 cm.
Step 3
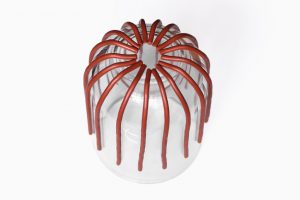
Evenly place all strands on the glass.
Step 4
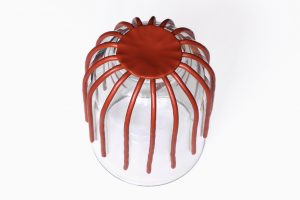
Cut the circle using a circle cookie cutter and use it to fix the strands. Slightly press together and bake according to the manufacturer’s instructions.
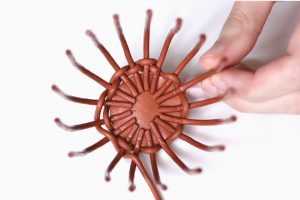
Step 5

Let it cool down. To remove the basket base from the glass, first, you need to gently lift every strand. Then use a needle tool and to unstick the bottom. Stick the needle tool between the two strands and gently lift (as a lever tool). Then stick the needle tool between another two strands and lift again, continue this way, till the basket base pops off. If one strand (or more) will fall off, you can glue it with superglue, or just hold it in its place while you do weaving.
Step 6
Extrude more clay using the same disc. Take one extrusion and start weaving the basket.
Step 7
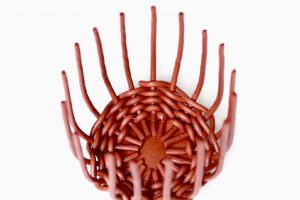
Continue weaving till you reach the end of the extrusion.
Step 8
Take another extrusion and continue waving. To hide the connection, cut strands inside the basket and connect them.
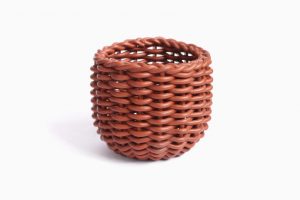
Step 9
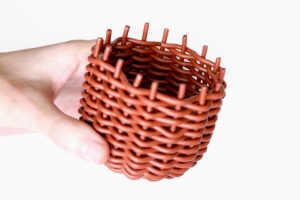
Continue the same way to make a whole basket.
When you reach the desired size stop weaving. Again cut the strand inside the basket to hide the cut.
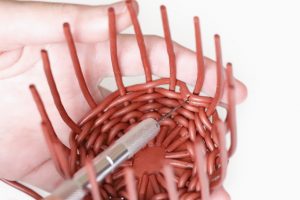
Step 10
Use cutting pliers and cut off the excess of the strands that peek out above.
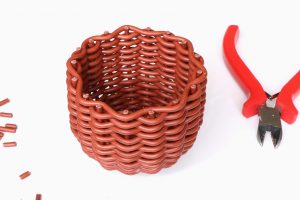
Step 11
Cut the circle using a circle cookie cutter and place it inside to hide the connections inside. Slightly press.
Step 12
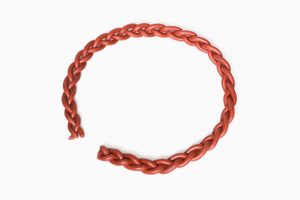
Use another three extrusions to make a classic braid.
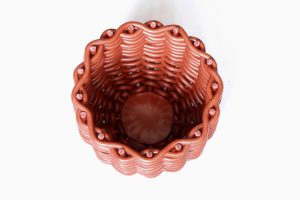
Step 13
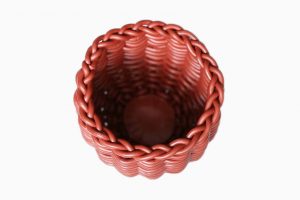
Place the braid on the top. Cut off the excess of the braid and connect it.
Step 14
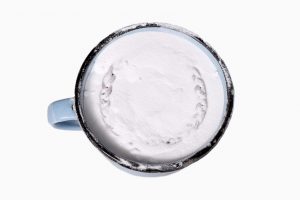
Important! Bake it but cover the whole basket in baking soda. The baking will take more time (about an hour). This is important because the baking soda fixes the basket shape. In the oven, already baked parts will become very soft again. If you won’t use baking soda, the basket will get deformed, and probably will get torn into pieces. You can trust me, I tried it.
Step 15
Let it cool down. It will take a while. Then wash it in the water and your basket is ready.
Download PDF tutorial for free: basket-weaving-PDF-tutorial

Leave A Reply