YTB video of the Assembly process, Blase adjustment & Tips
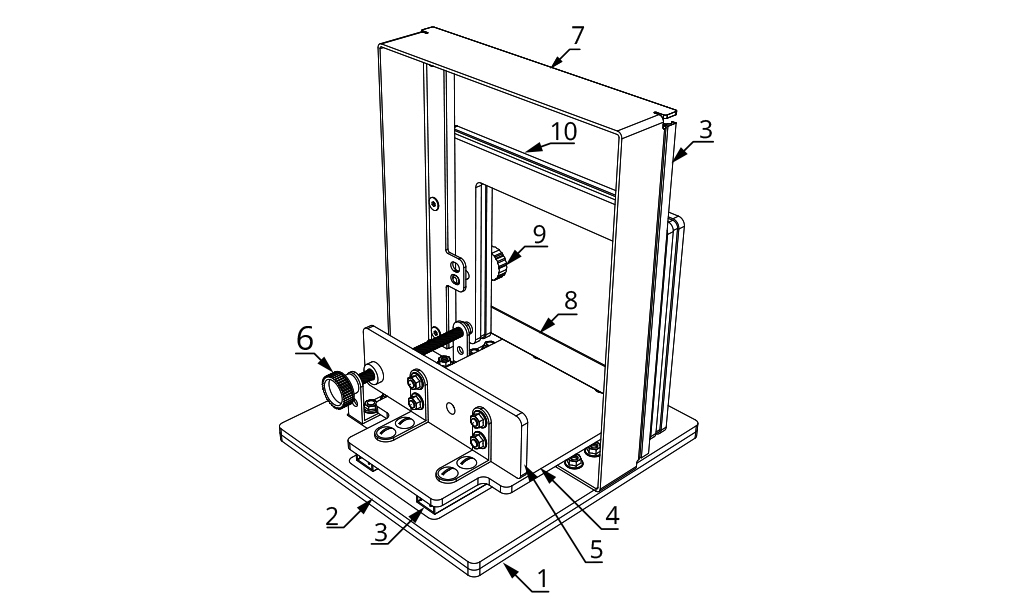
Basic parts of LC Slicer:
- Baseplate Frame
- Baseplate
- 4x Rail Glides
- Slicing Platform
- Backstop Support
- EASE Module V4
- Frame
- Slicer Blade
- SAFETY Knob
- Front frame deckel / Handle
A full turn of the knob moves the platform 1 mm forward.
The New LC Slicer is made from Laser Cut acrylic board.
LC SLICER

LC SLICER + LC ANGLE BASE

SAFETY:
- The LC Slicer should only be used for slicing polymer clay.
- Before using the LC Slicer, make sure to place it on a firm horizontal surface/anti-slip mat.
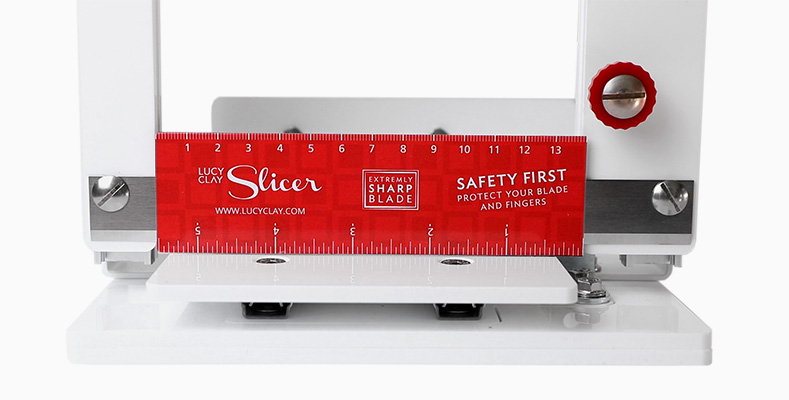
- Once you finish working with the LC Slicer, make sure to put the Slicer Blade down and secure Blade with the red SAFETY Knob. This should prevent accidental contact of the Slicer Blade and the hand. Cover the blade by the red magnetic sheet with a simple scale to prevent any interaction with the blade’s edge which is very sharp.
- The LC Slicer is not intended for children and must not be used by children unattended by a responsible adult.
- The Slicer Blade is very sharp and can easily cause a cut or injury. To lift the blade, use the handle only.
- Keep the blade clean with no residues of polymer clay. When cleaning the Blade, pay special attention and never clean with bare hands or your fingers, use a cloth/wipe instead in a downward motion. Using a tong-type tool to hold cloth/wipe is recommended.
- Always follow the safety instructions for the protection of yourself and of others.
- LC Tools s.r.o. is not responsible for any injuries or damages resulting from inappropriate handling of LC Slicer.
QUICK INSTALLATION
Every part may be covered on at least one side by the protective green or white/transparent plastic sheet which supposes to be removed prior next assembly.
1. Installation of the frame on the baseboard
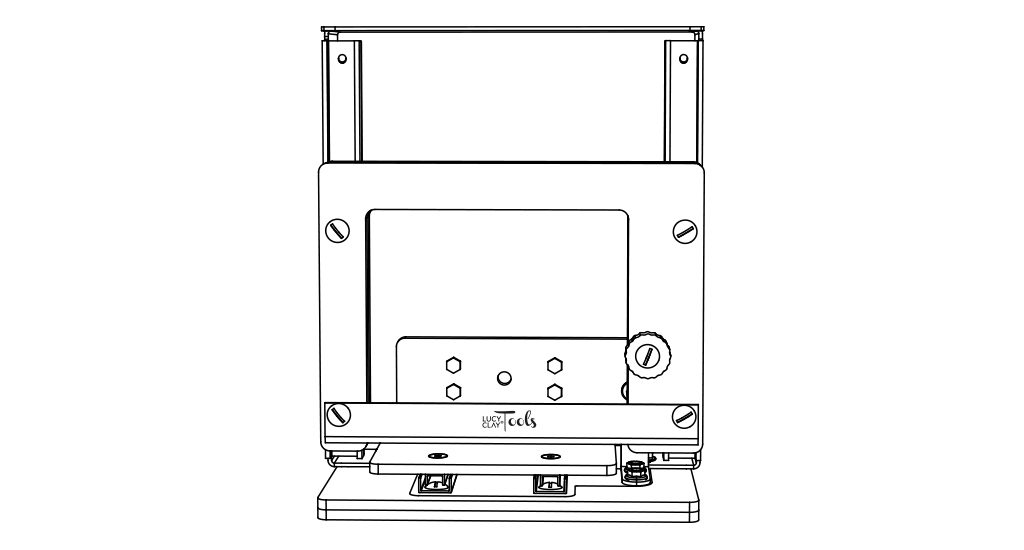
Put the Blade Frame on the mainboard and secure it with 4 screws/nuts.
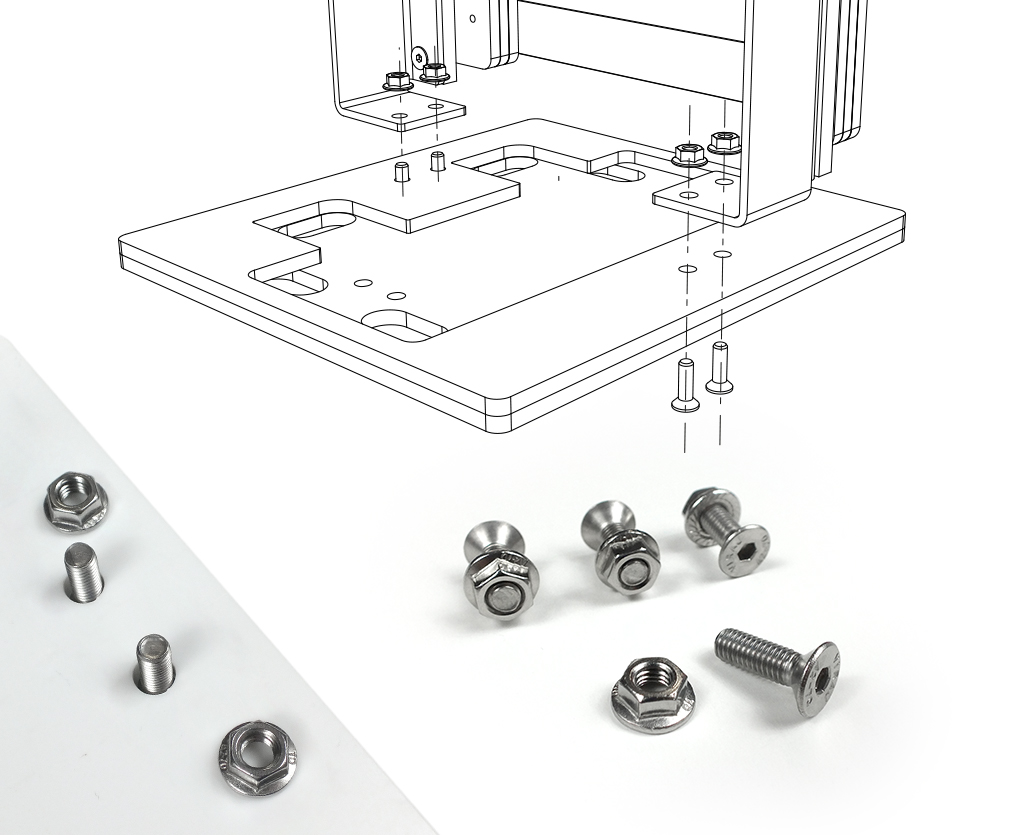
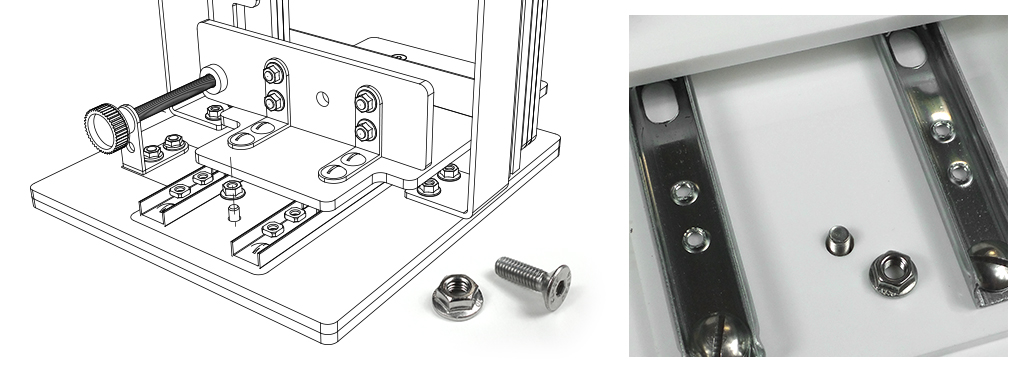
2. Putting the base platform into the baseboard
Insert the platform into the baseboard and secure them together with the last screw, which keeps your slicing platform secured in position.
3. Safety knob support installation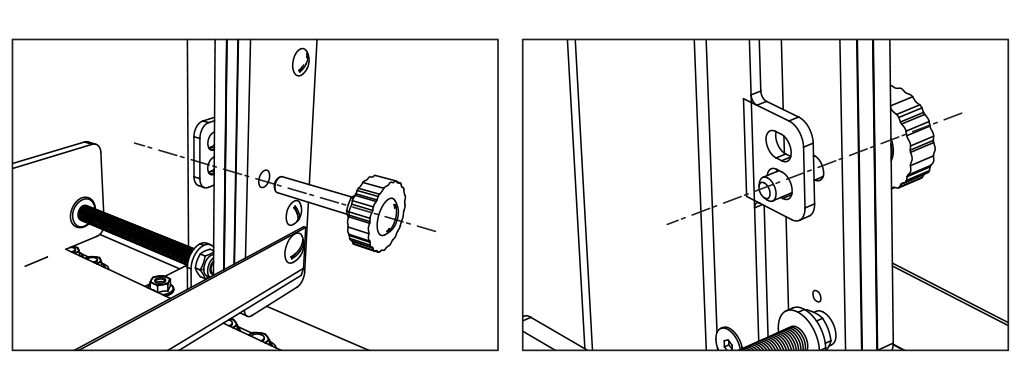
4. Blade edge balancing steps
Please watch the video for a better understanding.
Loosen the 2 screws holding the slicer blade and adjust the gap between the blade’s edge and slicing platform making sure the blade is level and evenly touches the span of the platform. Then tighten both screws.
You can adjust the gap anytime when needed.
LC ANGLE BASE INSTALLATION
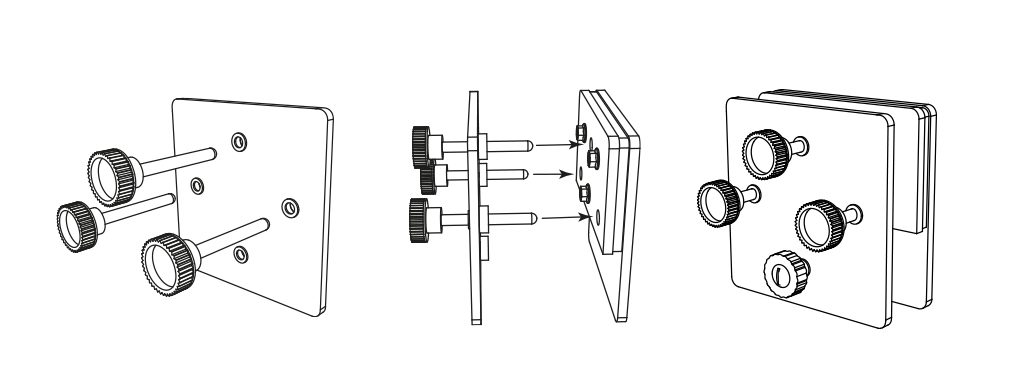
LC Angle Base (Sold separately or in a set ‘LC Slicer + LC Angle Base’) was specially developed for LC Slicer and polymer clay technique Mokume Gane and Hidden Magic.
It allows cutting at an angle and filling the gap between the backstop support and the blade to 0.
1. Screw in three bolts to the nuts. The ends of bolts must be in one line.
2. Click the second board to the end of the bolts.
3. Using the red screw, attach the LC Angle Base to the LC Ease.
Troubleshooting
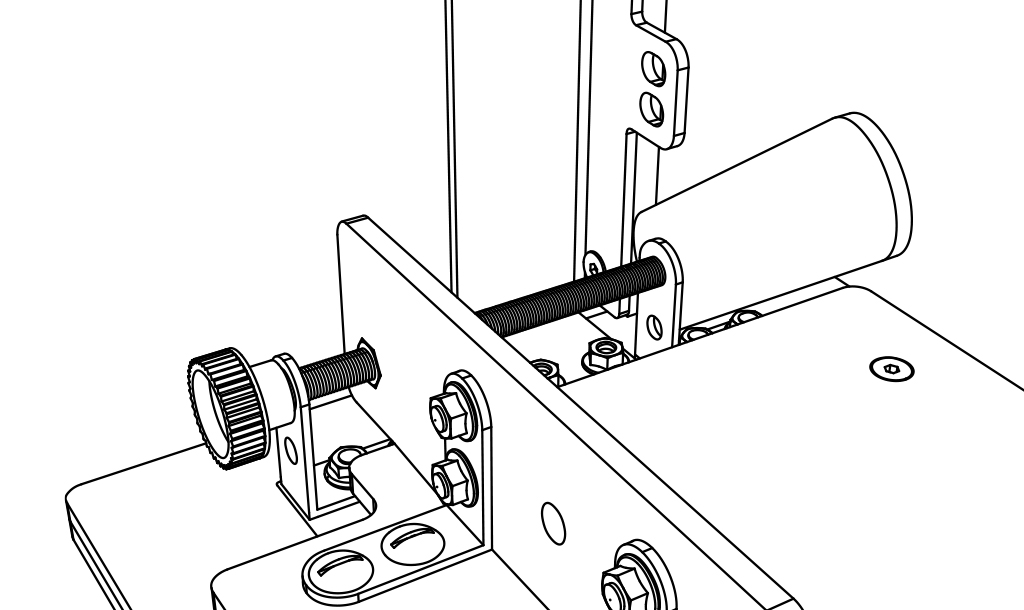
The threaded rod should be practically free of any play, but it has to spin easily. Use the supplied key.
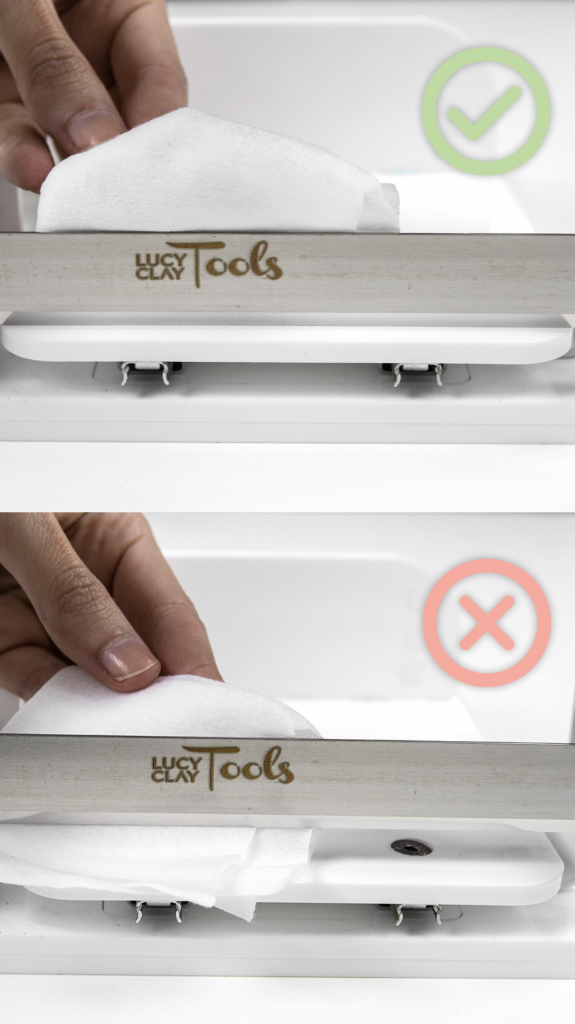
Never put your hand under the edge of the blade. Clean the blade in the lower position. Never clean the blade in any other way.
DOWNLOAD PDF :
Assembly Instructions for LC Slicer + LC Angle Base
Assembly Instructions for LC Slicer

Leave A Reply