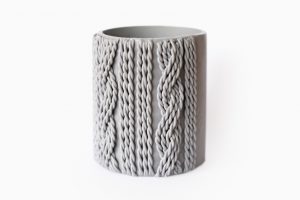
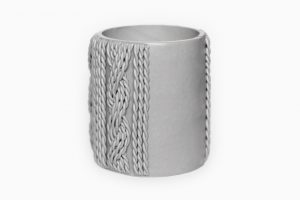
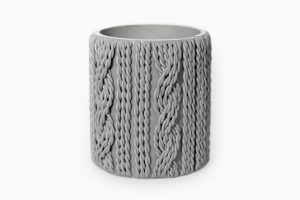
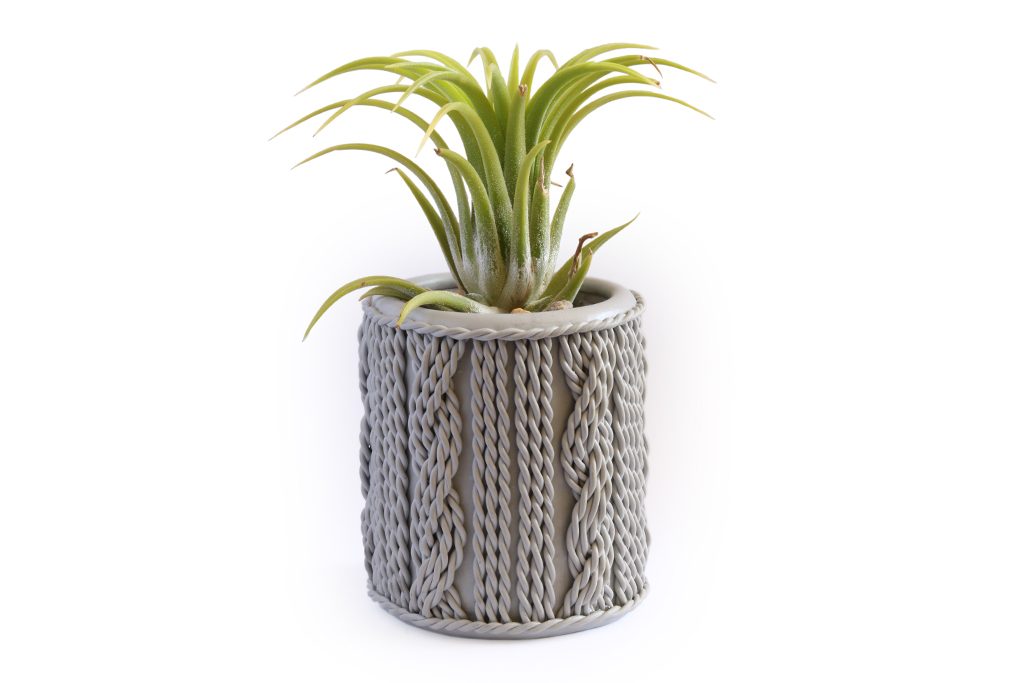
Imitate a knitted pattern to create an original pot cover for your flower. This time I got inspired by a sweater pattern.
About the author

Petra Vilímková
Petra lives near Pilsen, Czech Republic. Ever since childhood, she has loved learning new craft techniques. By age fifteen, she began studying art at various art schools in Pilsen before receiving a Bachelor of Arts degree in Industrial Design at the Ladislav Sutnar Faculty of Design and Art, University of West Bohemia. She has been working for LUCY CLAY since 2014.
Materials and tools:
- Polymer clay (gray)
- LC Machine
- Laminated working grid
- LC Glassymer Glue or liquid clay
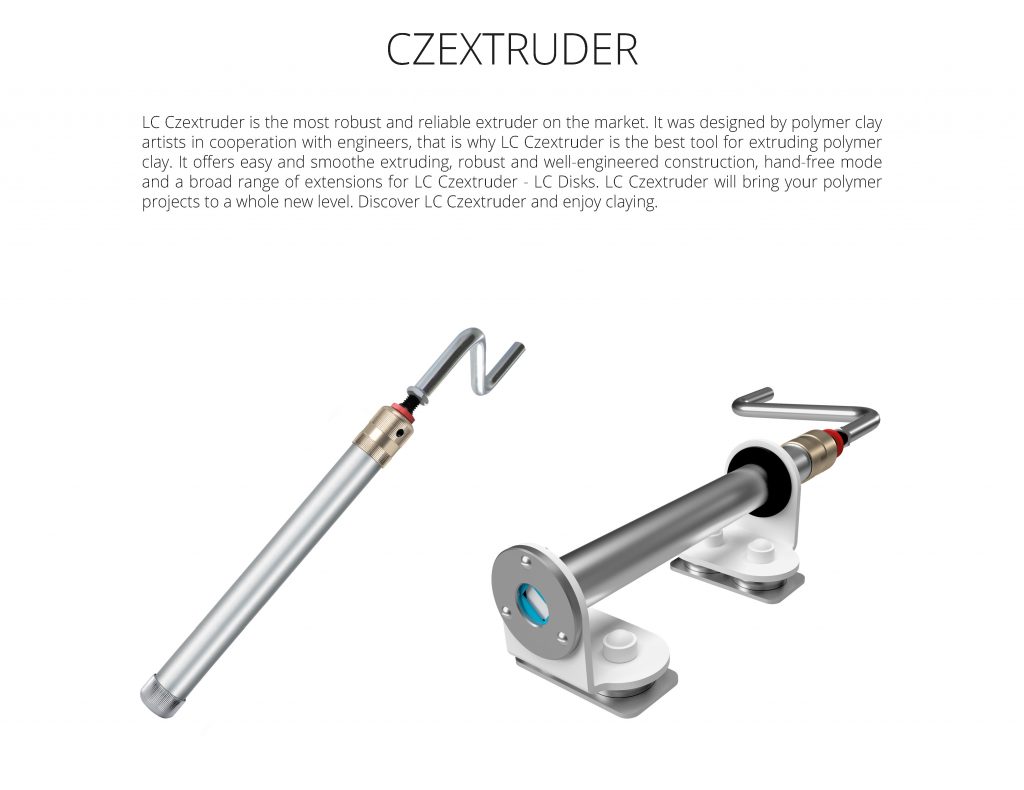
- Czextuder + LC Disk 3 (extension with small holes) + LC Disk 14 (half rice extension)
- Scalpel, blade
- Tube mold
Step 1
Condition polymer clay and make a sheet about 2 – 3 mm thick.
Step 2

Cut the clay to achieve the desired size.
Step 3

Wrap the sheet around the tube mold (edge to edge). I used a cardboard tube.
Step 4

Cut off the excess clay.
Step 5

Smooth the joint with your fingers.
Step 6
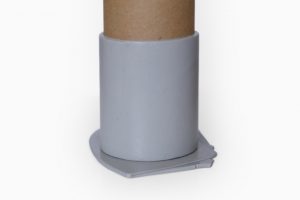
Make the bottom of the pot – place the tube on another sheet of clay.
Step 7

Cut off the excess clay. Then smooth it again and bake in the oven according to the manufacturer’s instructions.
Step 8

Meanwhile, put the clay it into the Czextruder. Use the extension with small holes from LC Disk 3 and extrude the clay.
Step 9

Separate the strands.
Step 10

Take 2 strands and twist them around each other. Continue this way with all strands. Twist all strands in the same direction.
Step 11

Apply liquid clay on the pot and place the first braid. Cut off the excess of the braid. Repeat.
Step 12
You can even make a bigger braid. Take 3 braids in one hand and 3 braids in your other hand and carefully twist them around each other.
Cover about ⅓ of the surface with the braids. Then bake according to the manufacturer’s instructions.
Step 13
Cover another ⅓ of the surface and bake again.
Step 14
Finally, cover the rest of the surface and bake.
Step 15
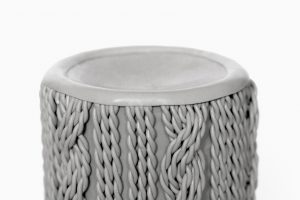
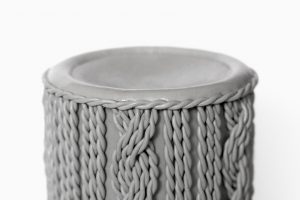
Now cover up the joints on the edges. Extrude polymer clay – use the half rice disc from LC Disk 14. Use liquid clay and wind the extruded snake around the bottom edge. Cut off the excess clay and smooth the joint.
Step 16
Then wind another braid around the joint and bake.
Step 17
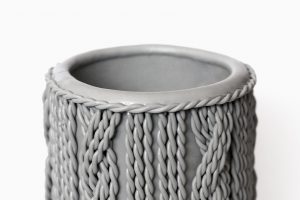
The same way cover up the joints on the top edge. Then bake again.
Step 18
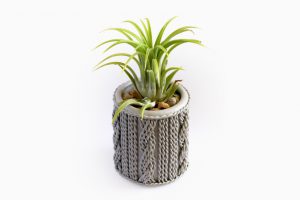
Place your flower inside. I filled the pot with small stones and placed Tillandsia inside.
Download PDF tutorial for free: knitted-flower-pot-cover-PDF-tutorial
Leave A Reply