About the author

Hana Slabá lives in South Moravia and the joy of handwork has accompanied her since her school years. She discovered polymer clay in about 2014 and working with it brings her relaxation. She would like to keep creating and exploring the possibilities and various uses of the medium with lots of support from her family. Visit her website: www.fimo-hany.webnode.cz
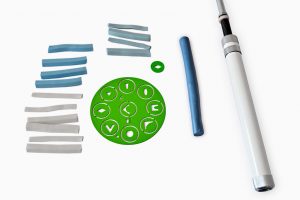
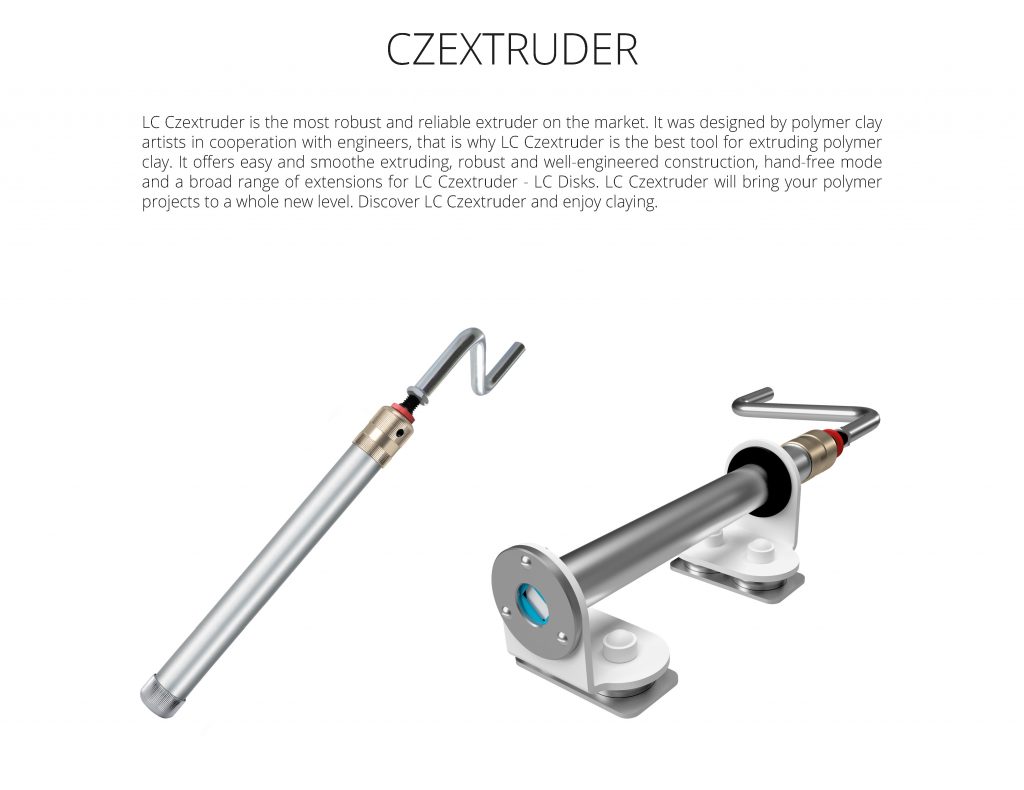
Materials and tools
• Polymer clay – blue, white
• LC Machine or any other pasta Machine
• LC Czextruder
• LC Disk 5
• LC Slicer or LC Slicer Blade
• 2 Cookie cutters
• Texturing sponge
Step 1.
Condition polymer clay, mix some blue and white to make 2 different light blue shades.
Prepare your Czextruder and disc with rhombus shape from LC Disk 5. Extrude blue, white and 2 light blue shades of clay you mixed before. Cut the extrusions in pieces approx 5 cm / 2” long.
Step 2.
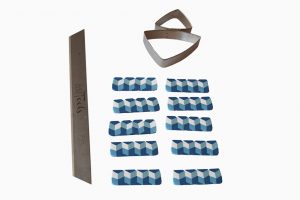 Let’s make the pattern. You will have to work with rows. The bottom row: Dark blue rhombus, light blue rhombus. The top row – light blue rhombus (different shade than in the first row), white rhombus. On the top and bottom, put the blue “cover” – dark blue rhombus. Slice using LC Slicer. Cut the excess to get rectangles.
Step 3.
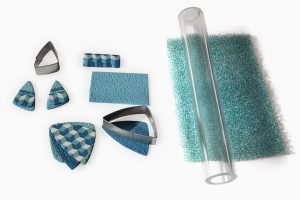
Put slices together to make a big pattern. Smooth it – gently roll over with a roller. Cut with a cookie cutter.
Run conditioned polymer clay of 2 blue shades through the machine, then put the texturing sponge on it and roll over the sponge with a roller. Using a big cutter, cut a shape from both sheets. Experiment with cutters and cut different shapes. Choose the best parts to make a pendant.
Step 4.
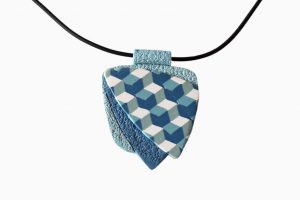
Arrange the parts as you like, bake and the jewelry is ready.
Download PDF tutorial for free: Blue-Pendant-with-3D-Effect-by-Hana-Slaba

Leave A Reply