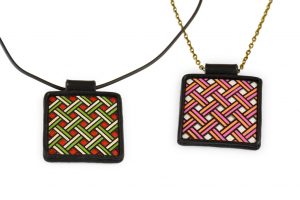
 In this step-by-step polymer clay tutorial, I created a simple geometric design, using LC Microstencils and polymer clay. It is relatively easy to create and the result looks really nice. I hope you will enjoy working with it.
About the author
Hana Slabá lives in South Moravia and the joy of handwork has accompanied her since her school years. She discovered polymer clay in about 2014 and working with it brings her relaxation. She would like to keep creating and exploring the possibilities and various uses of the medium with lots of support from her family. Visit her website: www.fimo-hany.webnode.cz
Materials and tools
- Czextruder + LC Disk 1 or 3 (disc with small holes)
- LC Microstencils set 9
- Machine, roller
- Polymer clay (white, black + 2 colors)
- Blade, scalpel
- LC Glassymer Transparent
- Texture sponge
- Chain or leather cord
- Wax polish
Step 1.

Condition white polymer clay and run it through the machine at the thicker settings. Take LC Microstencil and roll it in. Remove the Microstencil.
Step 2.
 Extrude clay in two colours using LC Czextruder and LC Disk with small holes.
Step 3.
 Take the first colour and start creating the pattern. Place the extrusion on the imprint and then cut off the excess clay.
Step 4.
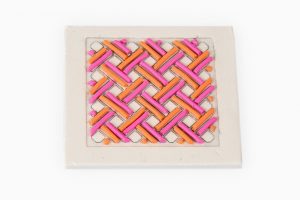
Proceed the same way with the other colour.
Step 5.
Put back the LC Microstencils and roll it in carefully.
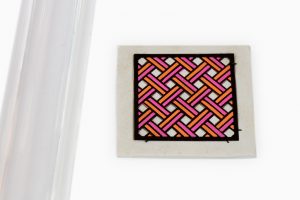
Step 6.

Cover with a small layer of LC Glassymer Transparent. Then cut off the excess clay and bake according to the manufacturer’s instructions.
Step 7.
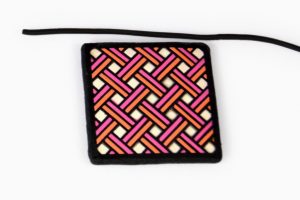 Place the pendant on the black sheet of clay cut off the excess clay, but the black sheet should slightly overlap to cover the edges. Extrude black clay using the same LC Disk and create a frame. Clean the edges. You can also texture the frame and the backside with a sponge.
Step 8.
 Make a tube for hanging and glue it using liquid. Bake according to the manufacturer’s instructions.
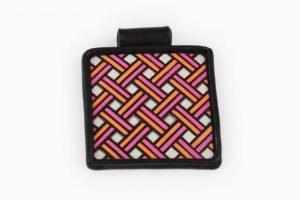
Step 9.
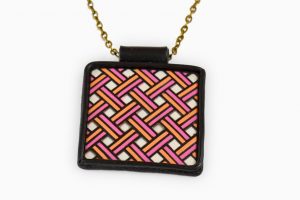 Coat the surface with wax polish and hang the pendant on the chain.
Download PDF tutorial for free: Microstencils-Pendant-by-Hana-Slaba
Leave A Reply