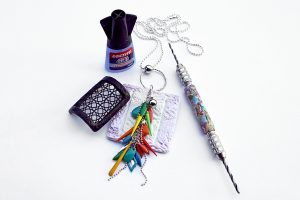
Materials and Tools
• Pasta machine/ roller
• Blades / scalpel
• Tools to smooth the clay
• Tool for making a hole (here hand chuck)
• 3 square cutters (here with rounded ends of 4,3 cm, 3,5 cm
and 7 cm)
• 1/2 pack of black clay (not too soft)
• 1/2 pack of white clay, brand of your choice
• Mica powder (here Pearlex, lavender gray color)
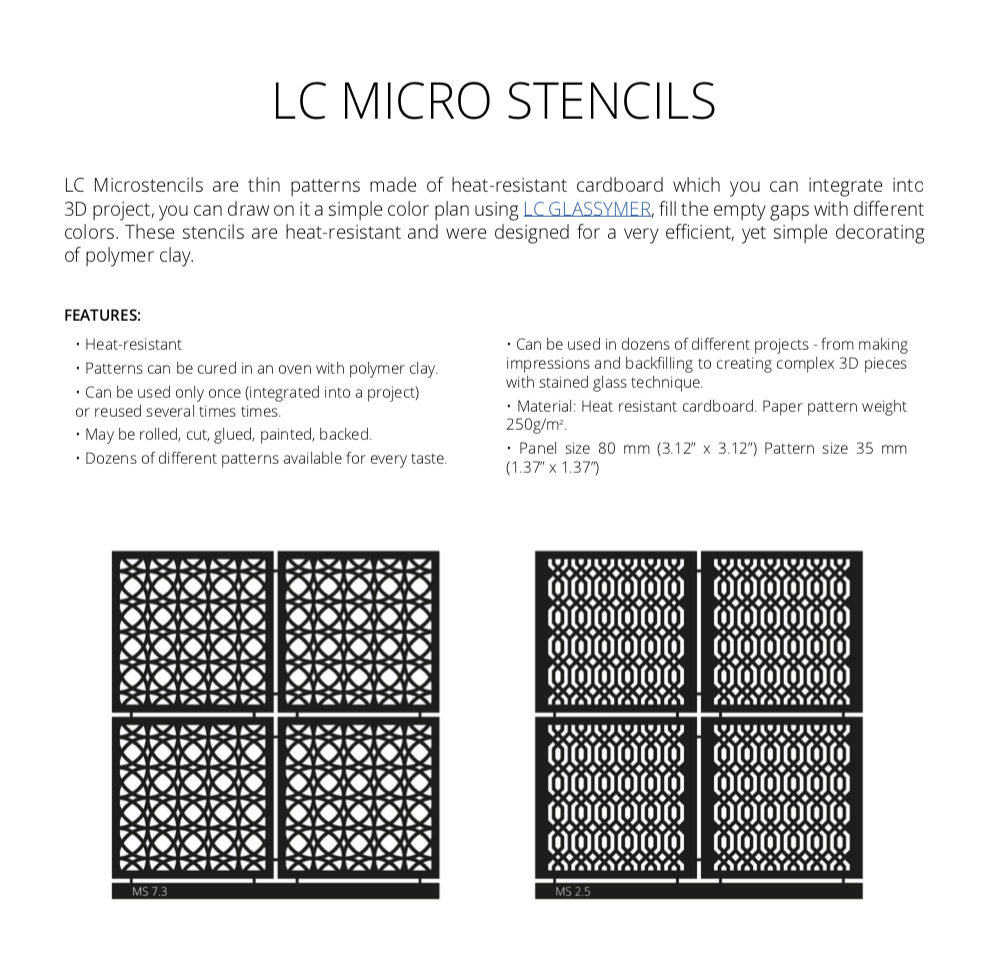
• 1 LC Microstencil of your choice
• Strong glue
• Texture (quite deep)
• A big ring (here 7 mm) and several very small to hang
the sequins
• Fine chain about 7 cm long
• Various clamps for assembly
• Choker (here chain marbles) length according to your
preference
• Sequins, balls, chain, pendants of your choice
ABOUT THE AUTHOR

Nathalie Vatinet
Handy since forever (knitting, sewing, scrapbooking, quilling …) I was fascinated by polymer
clay, discovered by chance with one of my sisters during our meetings “DIY family holidays”.
Seeing all its possibilities and unexpected results, I call it a “magic clay”!!
I have more and more fun working with it and improving my technique at workshops.
Combining clay with other media, imitating materials, creating new colors … all that fascinates
me. And I love to create unique pieces.
I get inspired by everything around me… the seasons, the wishes, the moods…
My greatest pleasure is to see that people enjoy wearing my creations… I had fun creating
them.
www.nanoufimote.e-monsite.com | www.instagram.com/nanouvat
HOW TO
Step 1
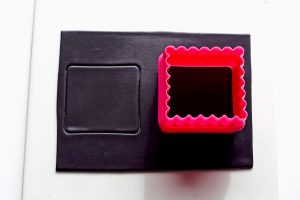 Condition the black clay, make a medium
thickness rectangle. Make 2 squares (here
4.3 cm).
Step 2
 Cut each of these 2 squares with a 3.5 cm square
cutter.
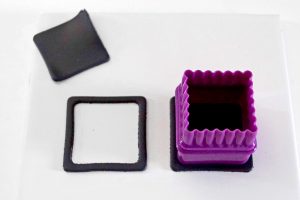
Step 3
 If necessary, smooth the inner edges of the clay
“frames”.
Step 4
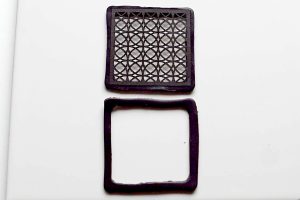 Sandwich a micro stencil between the 2 clay
“frames”.
Step 5
 Smooth the outer edges to weld the 2 “frames”.
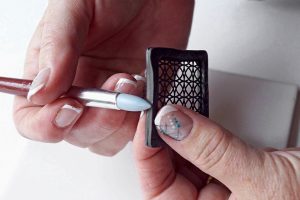
Step 6
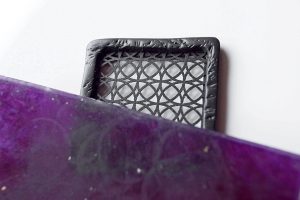 Make an imprint on the black square, press well
to “trap” the Microstencil between the 2 “frames”.
Step 7
 Place on a rounded rack and bake (see
the time and temperature recommended by
the manufacturer).
Step 8
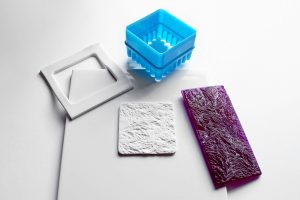 Run white clay through the pasta machine at the
widest setting, make a square (here 7 cm) and
texture it (here I took the same texture as for black
“frames”).
Step 9
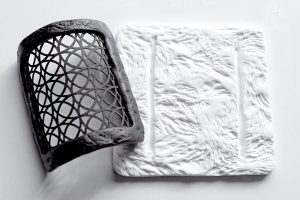 Position your “frame” on the white textured
square in the center and press hard (but gently)
to mark the print.
Step 10
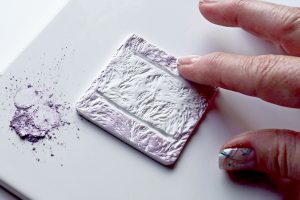 With your fingertip, apply Mica powder just by
touching the surface of the textured area around
the “frame”. Bake according to manufacturer’s
instructions. After cooking, you can sand the back
side or leave as is.
Step 11
 Hang the pendants,balls,sequins,ball chains,etc.all along the chain (here 7 cm long).
Step 12
 Make a hole in the top and center of the white square, put the big ring with the chain and the choker. Stick the “cage” on the impression with strong glue.
That’s it, your necklace is finished !!
Download the tutorial in PDF for free: Hide-and-seek-necklace

Leave A Reply