In this step-by-step tutorial, you will learn how to make a beautiful diamond pattern using LC Czextruder and LC Disk 5. The pattern can be used in many different polymer clay projects – pendant, brooch, earrings, decoration.
Materials & Tools:
- FIMO gray, green and blue
- Clay Machine
- Roller
- LC Czextruder
- LC Disk Nr. 5
- Kraft knife
For pendant:
- FIMO gloss varnish
- Brush
- Pearl Ex silver
- LC Slicer
- Pendant loop
- 1x eye screw
- Mini drill
- Wax cord
- Rhinestones and glue
ABOUT THE AUTHOR
Alena Becker

Hello, my name is Alena Becker. For the first time, I had polymer clay in my hands in 2014. But because I was studying at that time, I had to give up this hobby. Only last year I was able to return to this again. And started making tutorials for handmade jewelry and decorations from polymer clay. In the hope to inspire the people – to try something new or just to tinker nice things.
www.facebook.com/alenasclaycorner
HOW TO
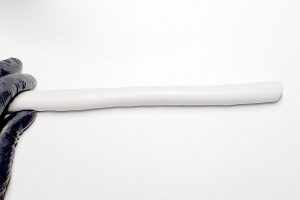
Condition gray clay and form a cane.
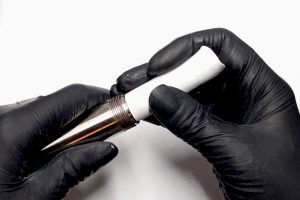
Put the cane in CZEXTRUDER.
Put the cylinder on the other side.
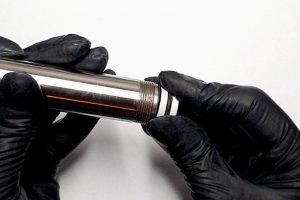
 Screw in the upper cup.
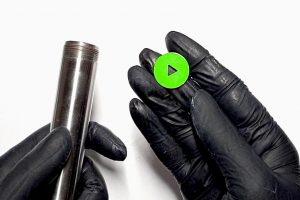
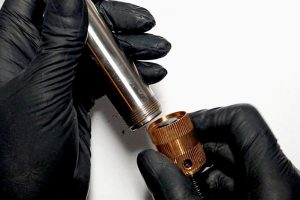
Now insert the disk.
 Screw in the bottom cup.
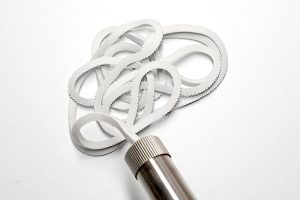
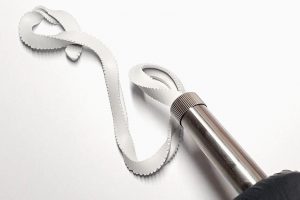
Extrude the clay.
 Now take another disc.
 And extruder gray clay one more time.
 Do the same steps with blue and green clay.
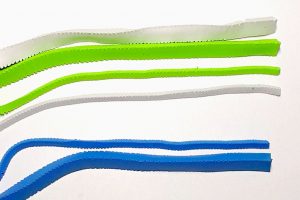
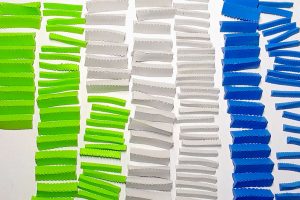 Cut all of them in equal parts.
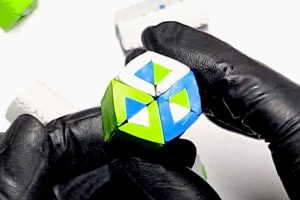
 Then we put together a rhombus, inside blue and green, gray on the sides.

Inside blue and gray, green on the sides.
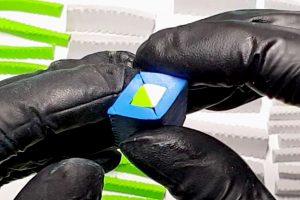 Inside green and gray, blue on the sides.
Connect the blue and gray with the sidewalls.
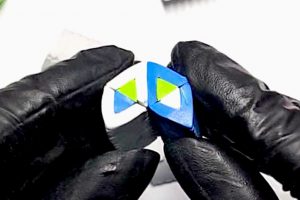
 Then lay the green one on top.
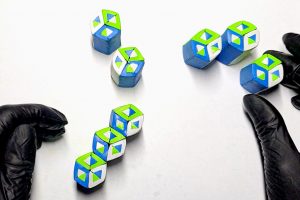 Connect all parts together.
Add the halves on the sides.
Then we begin to squeeze.
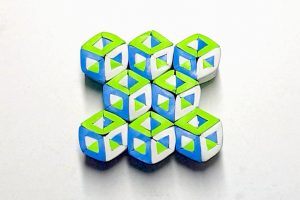
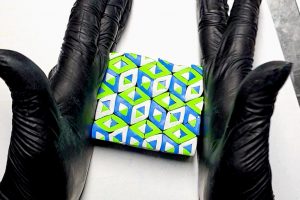
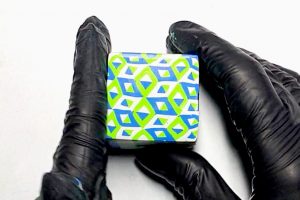 The pattern is ready. Now you can use it in your polymer clay project.
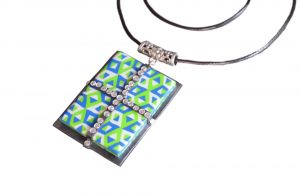 For example, make a decorated pendant.
Watch a video below to see how to make a pendant using the pattern
DOWNLOAD THE TUTORIAL IN PDF FOR FREE: alena-becker-colorful-diamond-pattern
LC DISK 5
Leave A Reply