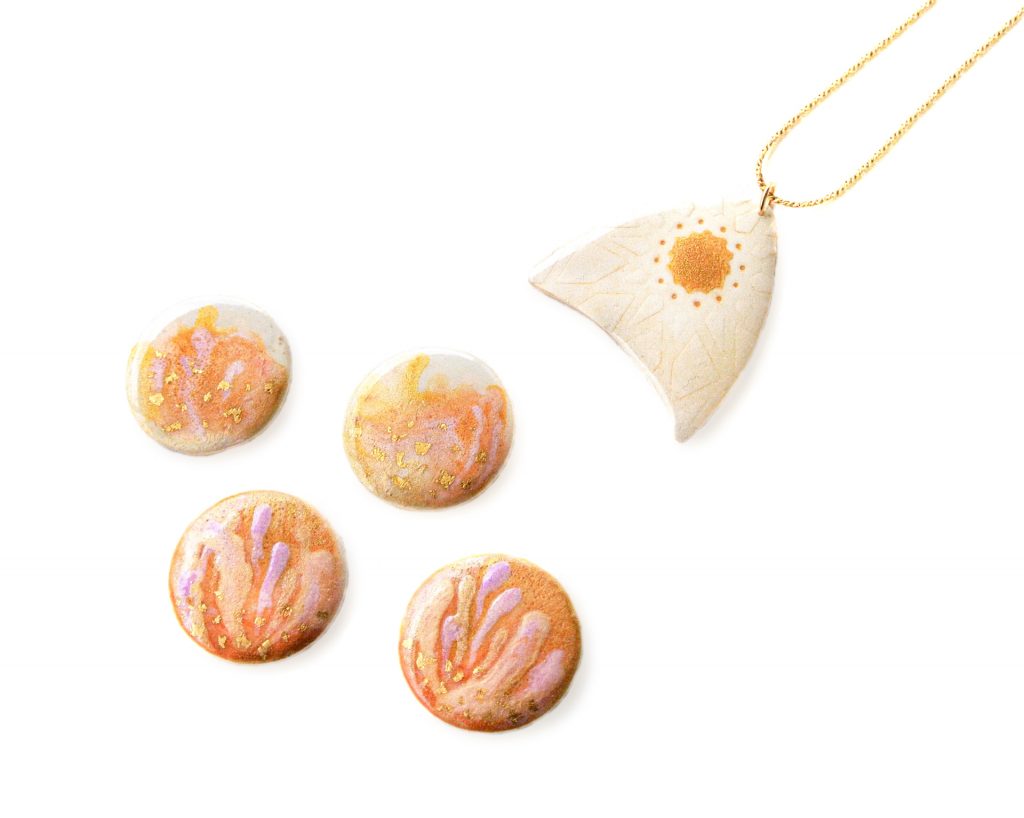
 Glassymer is an exciting new medium of polymer clay that has a wide range of uses. This tutorial explores how it can be used with mica pigments to create liquid metallic paints, which can be applied both with precision and organically, as well as to create a resin-effect domed finish to the pieces.
About the author
Marli Bean Designs

Marli Bean Designs is home to a sophisticated colour-explosion of intricately textured wearable art, by detail connoisseur Jess Dickson. Fascinated by the endless possibilities of polymer clay, Jess is constantly looking for how she can put her own spin on a technique or way of working with this beautiful medium. Every piece created is one of a kind, as to Jess this is an important part of what makes handmade pieces unique.
www.instagram.com/marlibeandesigns/
Materials and tools:
• LC Stencils Set 7 (design of your choice)
• LC Shape Plate 13 — (in 3rd largest size)
• LC Glassymer — Transparent Gel
• Circle Cutter — 13 mm and 30 mm
• Acrylic Roller
• Craft knife
• Sculpey Soufflé — Igloo
• 2 x 7 mm jumprings
• Drill (hand or rotary)
• Ball tool
• Needle tool or toothpick
• An assortment of mica powders or chalk pastels — used: Pearl Ex powdered pigments in shades Interference Violet, Aztec Gold, Solar Gold, Sparkle Gold, and Pink Gold).
• Small containers/lids or palette
TO BEGIN:
Step 1
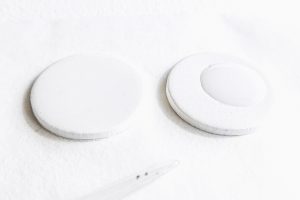
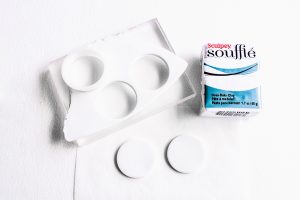 Condition Souffle Igloo polymer clay, and roll to 3 mm thickness.
Step 2
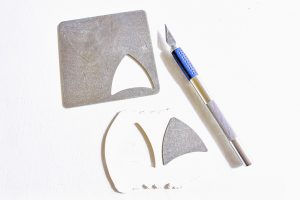 Use 3 mm circle cutter or LC shape plate and craft knife to cut out our bases.
Step 3
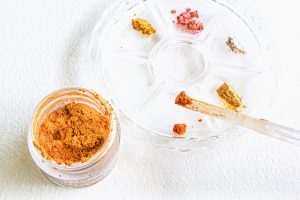 Prepare mica Glassymer colours — for each mica (or colour) you use, pour 5 drops of Glassymer into a small lid or palette.
Step 4
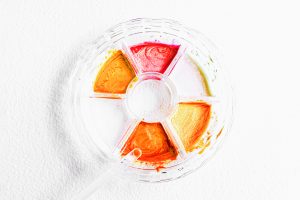 Tip or scoop a small amount of mica powder into Glassymer, and mix well until combined. Repeat with each colour.
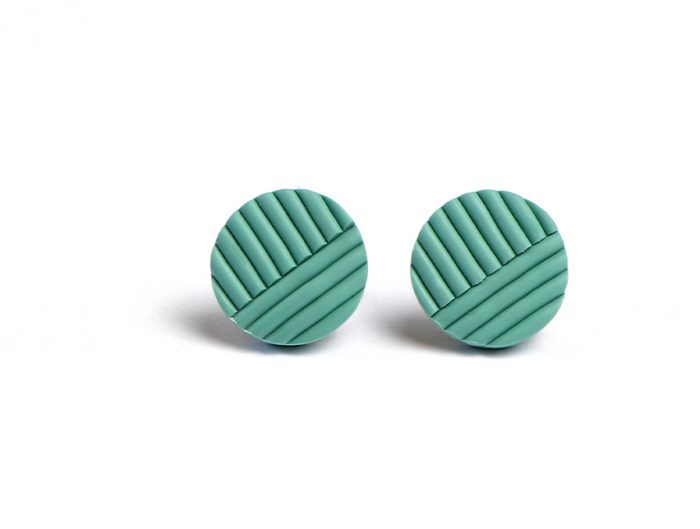
MICA GEO EARRINGS:
Step 5
 Place an LC Stencil design on top of clay bases. Gently roll over with acrylic roller in both directions, then lift it off.
Step 6
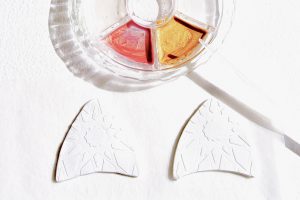 Your clay base will now have a raised design from the template.
Step 7
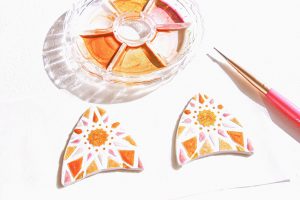 Using ball tool, needle tool (or toothpick) dip into a mica Glassymer colour and fill in the raised sections of the clay, starting from the middle and work towards the edge.
Step 8
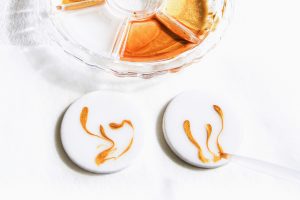
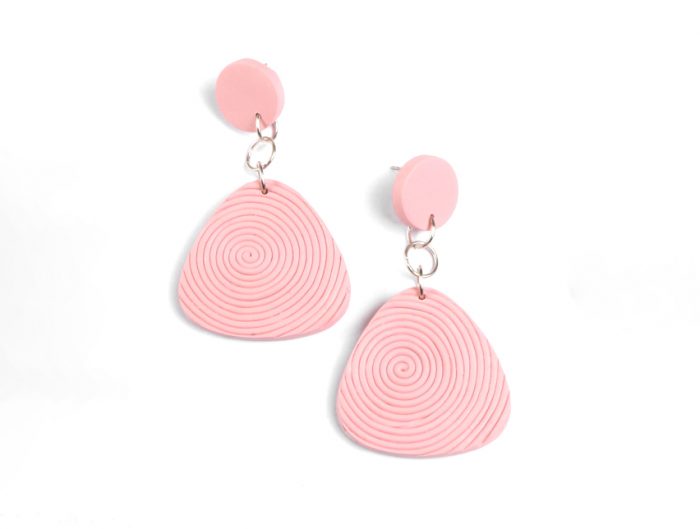
 MICA DRIP EARRINGS: Pour a small amount of Glassymer in the middle of the piece of clay. Using ball tool/toothpick, spread evenly to edges of the piece. Dip tool into a mica colour and swirl drips into the Glassymer layer on the clay pieces. Repeat with each colour until you are happy with design.
Step 9
 Optional extras: add in a sprinkle of glitter or place fragments of a metal foil on top of Glassymer for an extra dimension to the pieces.
Step 10
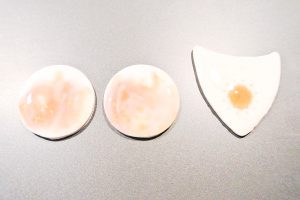
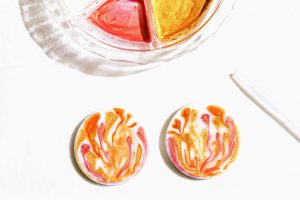 RESIN-EFFECT FINISHING STEP: Bake for 30 mins at 130°C. Take out of the oven and let cool. Pour a small amount of Glassymer in the middle of each piece. Using a ball tool/toothpick, spread Glassymer towards the edges of the piece until the whole piece is coated evenly. Place back in the oven for 40 mins at 130°C for a domed resin-effect finish.
Step 11
 TO FINISH: Adhere stud posts to backs of earring pieces to create stud earrings. For dangles & necklaces: use a hand or rotary drill to make holes in clay pieces for assembly. Put together with stud tops (for dangles) using pliers and jump rings!

Download the tutorial in PDF: mica-geo-earrings
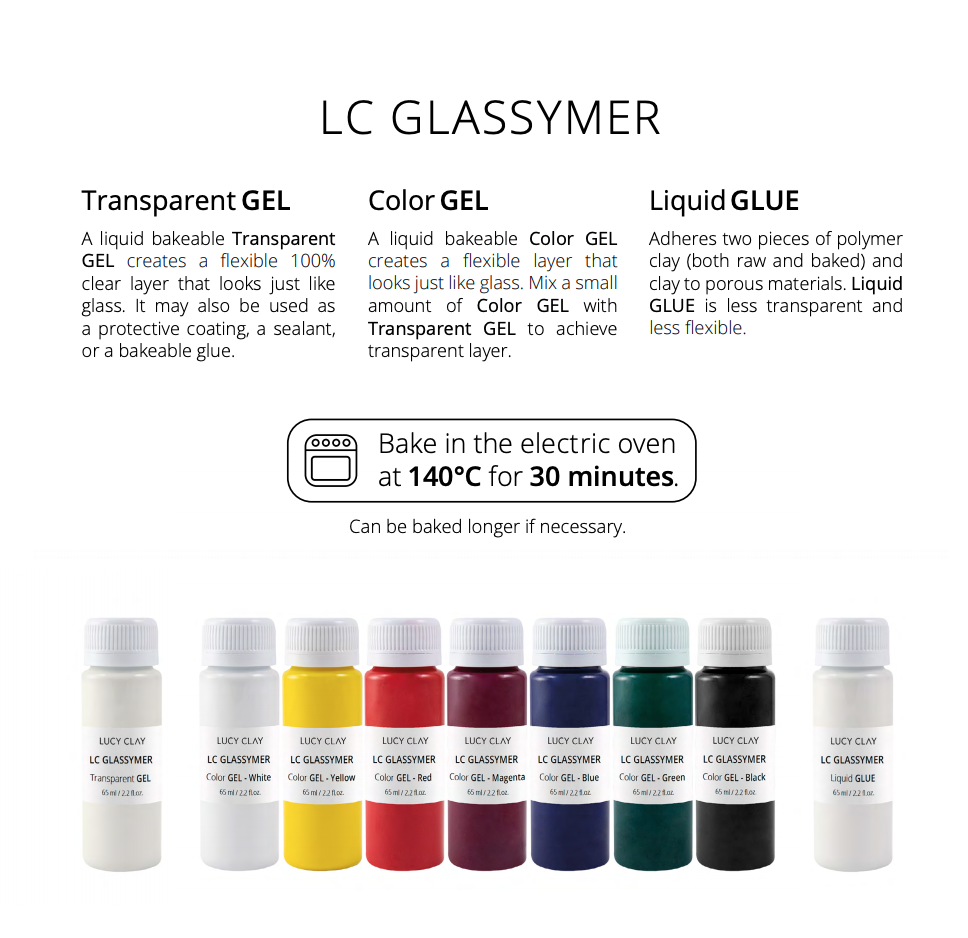
MORE ABOUT LC GLASSYMER: Liquid LC Glassymer by LUCY CLAY: instructions and guidelines
ORDER LC GALSSYMER NOW: LC STORE – AMAZON
Comment
Hi Lucy, I would like to take some time and thank you for sharing this amazing jewelry step by step tutorial. I am glad to come across this great piece of information and will definitely share this with my sister who loves to make jewelry.