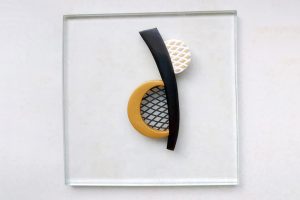
Step-by-step tutorial “In the net” necklace by Tereza Šťastná
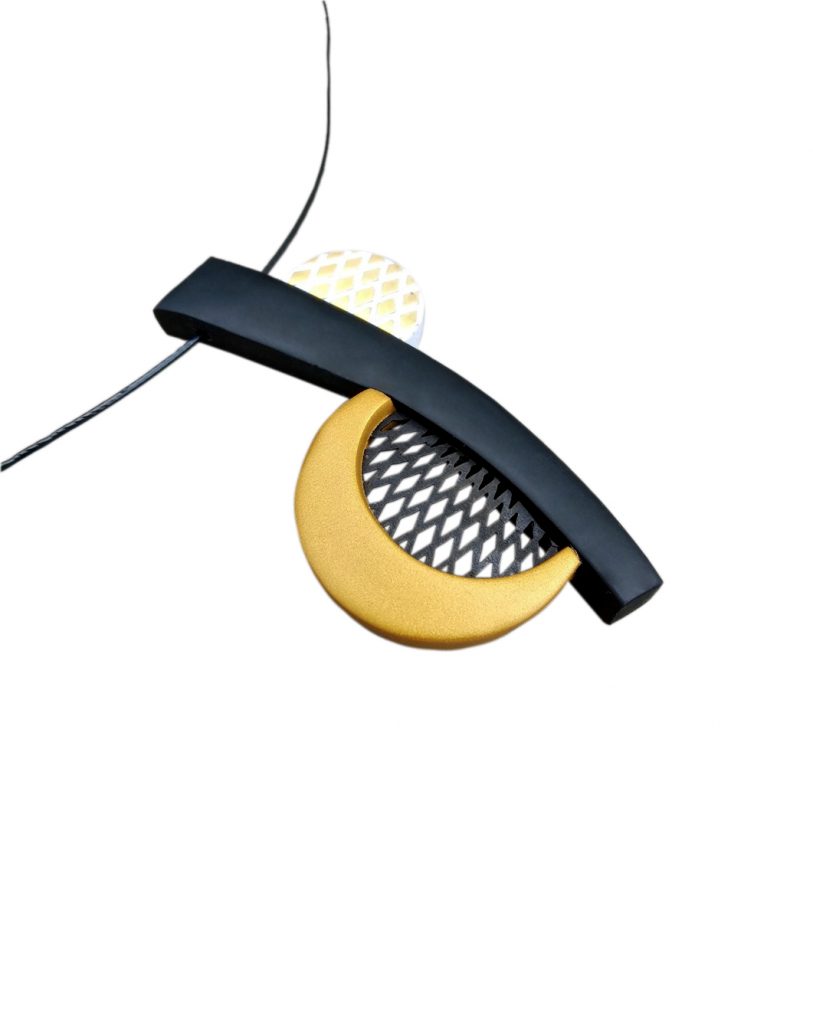 In this step-by-step tutorial, you will learn how to make a necklace using LC Microstencils. We hope you will enjoy it!
About the author
Tereza Šťastná
 I have been working since my childhood and I have tried many art and handicraft activities. In 2010 I first got to know polymer clay which fascinated me with its possibilities. I have attended several courses of Czech and foreign artists that inspire my work. Creation brings me joy and relaxation from everyday worries. I have a shop on Fler www.fler.cz/fimule.
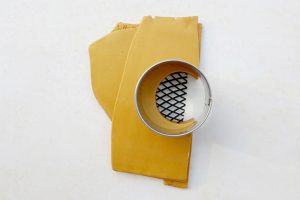
Materials and tools:
Mat
Tile
Scalpel
Roller
Baking paper
Cookie cutters – three sizes (1.8, 2.5, 3.2 cm)
Wet wipes
2 mm drill
Texture sponge
Polymer Clay – Premo Black, Gold, White
PearlEx gold powder
Poly Paste
Hoop with screw fastening
How to:
Step 1.
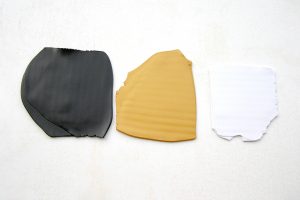 Condition all three colors of polymer clay and run through the pasta machine on the widest setting.
Step 2.
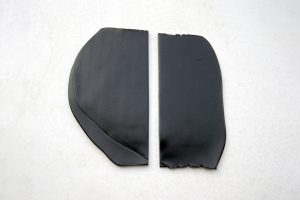 Cut the black sheet in half, stack 2 halves and put it to a small tile.
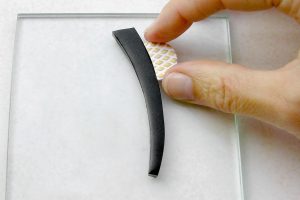
Step 3.
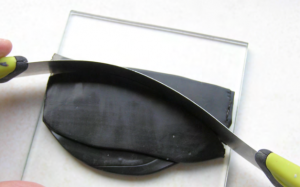 Smooth over baking paper. Use a flexible knife to cut a curved strip.
Step 4.
 Cut the white sheet in half, stack up 2 pieces and smooth over baking paper. Place a Microstencil on it a smooth with a roller. (Tip: run the Microstencil through pasta machine first with scrap clay, then with white clay. In the beginning, LC Miscrostencil has some black powder on.)
Step 5.
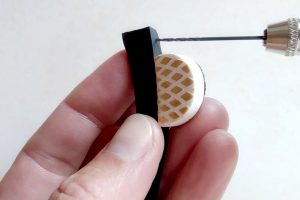
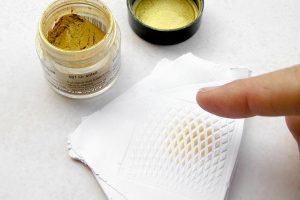 Remove the Microstensil and carefully apply PearlEx to the impression.
Step 6.
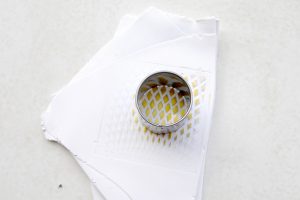 Cut a circle using the smallest cutter.
Step 7.
 Place the circle on the tile to the black strip and cut a part of the circle in the same arc with a flexible knife.
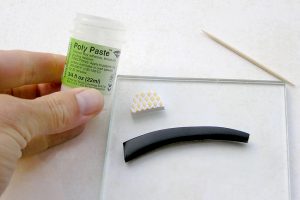
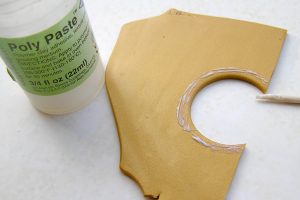
Step 8.
 Apply some Poly Paste to the edge and press against the black strip.
Step 9.
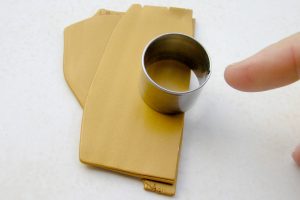 Cut the gold clay sheets in half and stack them up – without smoothing. Cut out a circle with the middle cutter.
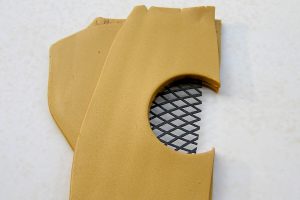
Step 10.
 Unstack sheets. Apply some Polypasta to the edges of the circle. Cut a circle out of Mirostensils, if you want, you can use a paper template.
Step 11.
 Place the Microstencil circle between the sheets of polymer clay and press them over the baking paper.
Step 12.
 Cut out a circle using the biggest cutter.
Step 13.
 Apply some Polypasta to the edges and press against the black strip. Bake for 20 mins at 130°.
Step 14.
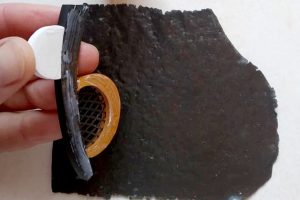 Condition the black clay and run through the second thinnest machine setting and texturize with a sponge. Apply some Polypaste on the back of the pendant, place the black sheet on it, cut out.
Step 15.
 Press with a sponge and cut the exceeds with a scalpel. Bake for 30 mins at 130°.
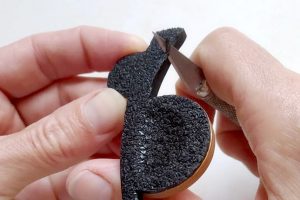
Step 16.
 Drill a hole using a hand drill and thread the piece.
Step 17.
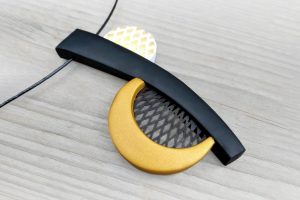 I hope you will enjoy it!
Download a step-by-step tutorial in PDF: in-the-net-tereza-stastna
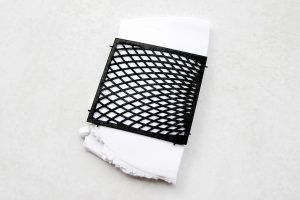
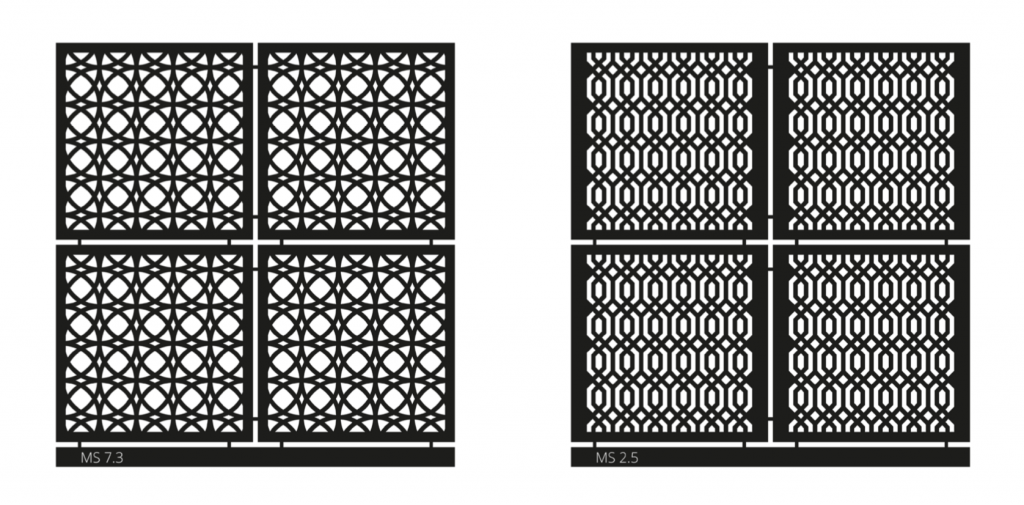
LC MICRO STENCILS
LC Microstencils are thin patterns made of heat-resistant cardboard which you can integrate into 3D project, you can draw on it a simple color plan using LC GLASSYMER, fill the empty gaps with different colors. These stencils are heat-resistant and were designed for a very efficient, yet simple decorating of polymer clay.
FEATURES:
• Heat-resistant
• Patterns can be cured in an oven with polymer clay.
• Can be used only once (integrated into a project) or reused several times times.
• May be rolled, cut, glued, painted, backed.
• Dozens of different patterns available for every taste.
• Can be used in dozens of different projects – from making impressions and backfilling to creating complex 3D pieces with stained glass technique.
Leave A Reply