Liquid polymer clay tutorial by Pavla Čepelíková “Glassymer Leaves”
About the author.

Pavla Cepelikova is a talented artist from the Czech Republic. If you do not understand any step, do not hesitate to contact Pavla via email: pavla.cepelikova@seznam.cz.
You can also get some inspiration from her Flickr pages, Instagram or Facebook.
Materials and tools
- Lucy Clay Glassymer (Transparent GEL and Color GEL)
- Leaves of real plants (best one is Viburnum species – they have nice veins and little bit hairy)
- Scissors
- Aluminium foil
- Paintbrush
- Diary, or any surface you want to decorate
- White acrylic paint (if necessary)
- Polymer clay (suitable is any brand which is cured below 140C)
How to:
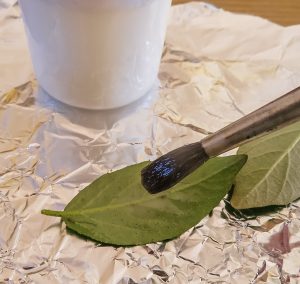
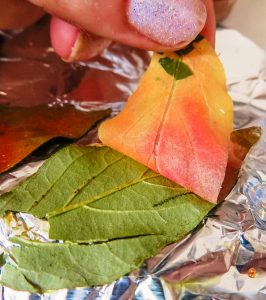
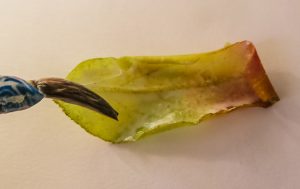
Apply transparent Glassymer by paintbrush on the back part of your leaf.
In case of “viburnum” species it is the hairy side. Those plants are available in parks and they have (some) leaves whole year time.
Important: Not each leaf is suitable, try first what works well for you! 
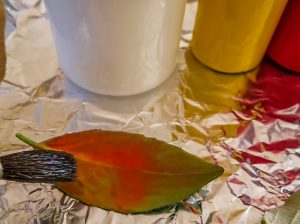
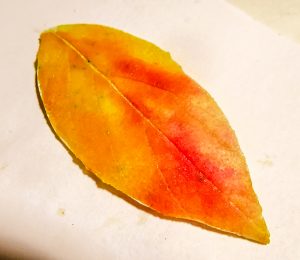
I was very surprised, just one layer of Glassymer is enough! When covered by transparent one. Dip gently your paintbrush into the colors you like and apply as well. If you like glitters, go ahead!
Bake (140 C/30 min)
Use the aluminium foil! Glassymer flows down (depending on the type of leaf more or less) and it is easy to remove your leaves from the aluminium foil. Easier than from the tile.
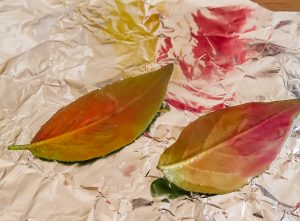
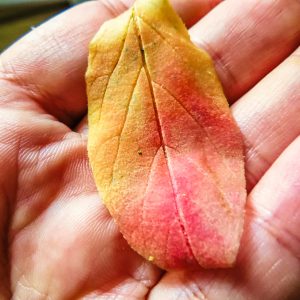
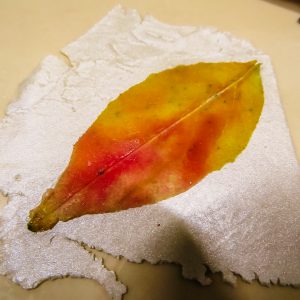
All those imperfections cut out by scissors after baking 😊
Leaves go flat and dry (fragile) in the oven. This is the reason why is so easy to separate leaf from the Glassymer. DO IT ONLY THEY ARE COOLED DOWN! Never when hot!
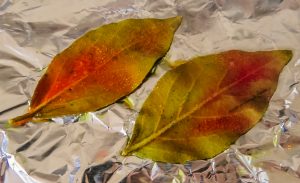
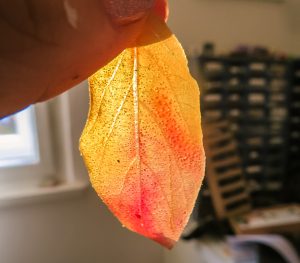
Leaves are paper thin, very flexible and transparent like real leaves!
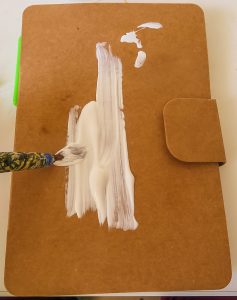
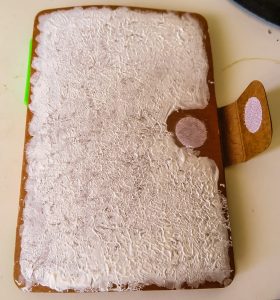
Because they are baked already it is easier to apply them on any surface you like.I tried it on the diary I had at home.
The diary had a brown color, and it is not the best background for transparent leaves, I used the white acrylic paint first. White background makes them bright.
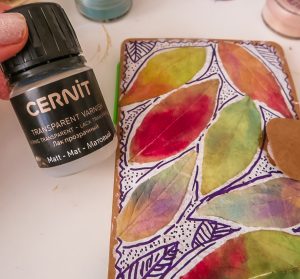
Use glue for decoupage (in case of material like paper, wood, or glass) or any glue which is transparent.
Glue leaf on selected surface. You can play with markers or pastels to fill gaps between leaves.
If you like, use mat finish varnish. I did it, but I realized without varnish it was better. (Leaves look like a leather now)

In case you want use your leaves for jewelery, you need white (or pearl white clay) as a background. (Premo, Fimo, Cernit are suitable) colored clay are going to change your leaf color due to transparency.
Use liquid any brand you have to connect baked Glassymer leaf with the clay.
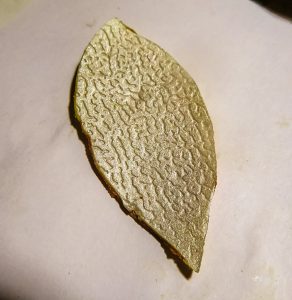
Cut it around and bake. I used texture for the backing. Now you can drill it, use jump ring and make earrings or necklace for simple example.
Download tutorial in PDF: Glassymer leaves pdf
Leave A Reply